
Before and After: A “Sad and Dirty” Laundry Room Becomes Cheery and Functional
If you want to sell your home down the line, you’ll want to think about how you’re upping the utility and timelessness of your space for future homeowners when tackling renovations or projects. And if you plan to stay in your house for many years, you’ll still want to think about the longevity of any changes you make, especially if they’re investments like plumbing, appliances, flooring, windows, and doors.
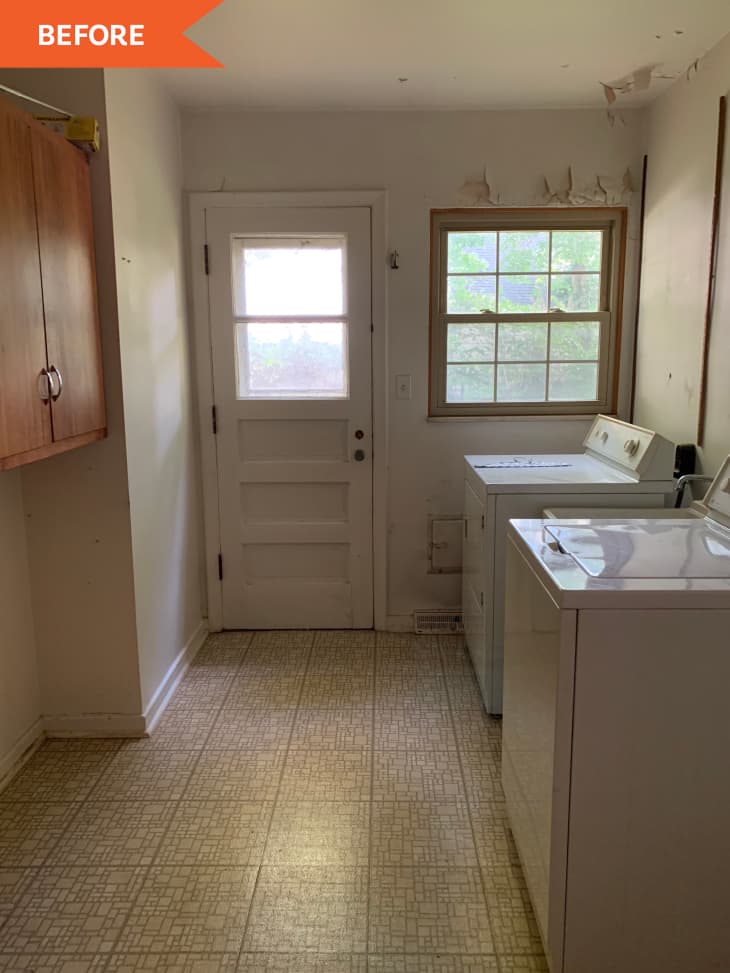
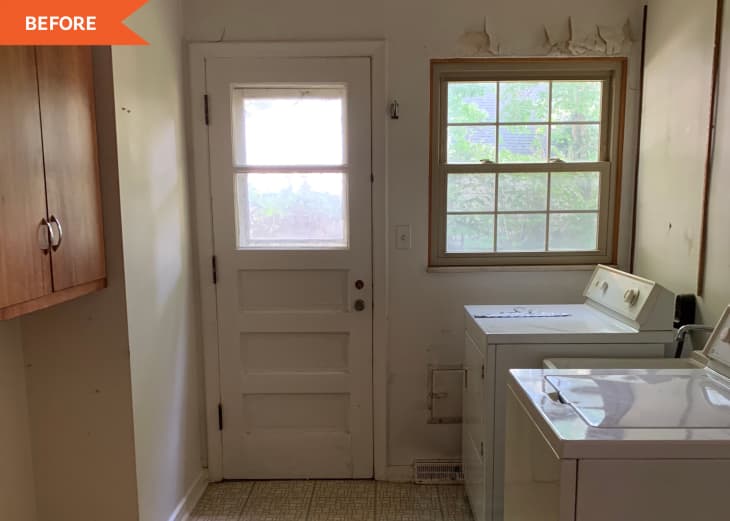
When she was redoing this 1951 bathroom with chipping paint, tar from smoking inside, yellowed walls, yellowed vinyl flooring, and a door — the only door to outside — that didn’t work, house flipper Lindsey Mahoney (@buildingbluebird) was thinking about one question: How can I make this better for someone who lives here?
“The laundry room was a sad and dirty mess,” Lindsey says of the before. “This room did not function how a modern family would use it today, and it was completely uninspiring.”
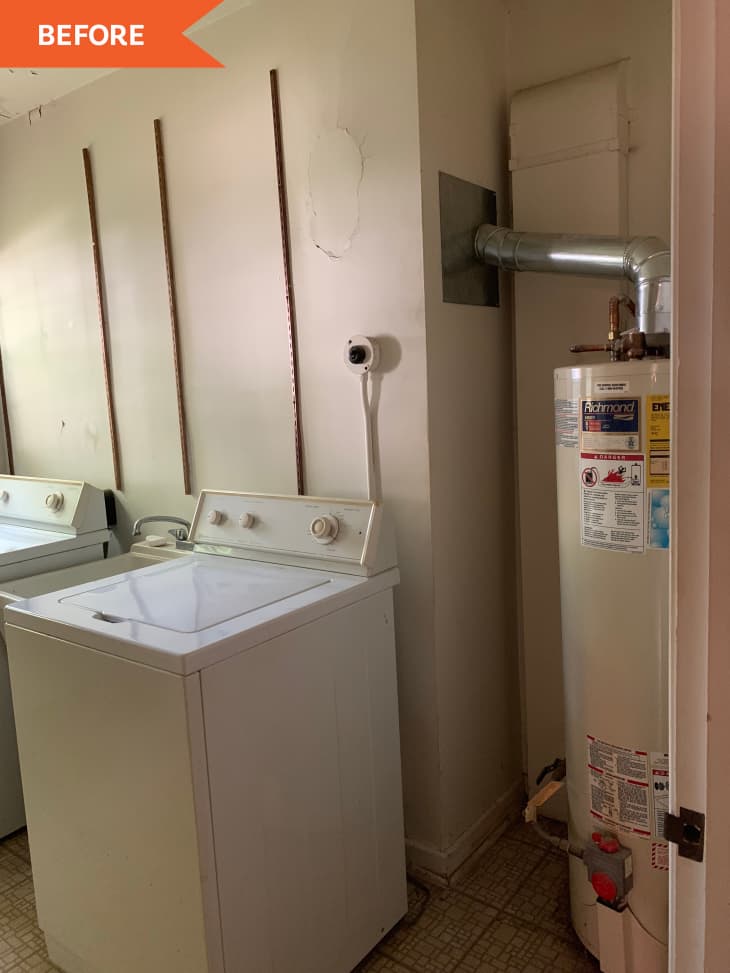
Although the laundry room did have a utility sink (located between the washer and dryer) going for it, it didn’t have much storage, and the hot water tank was exposed — not to mention all of the aforementioned ugly things about it. Lindsey’s $3,000 redo made the space way more functional — and more stylish, too! It was a mix of DIY and professional work.
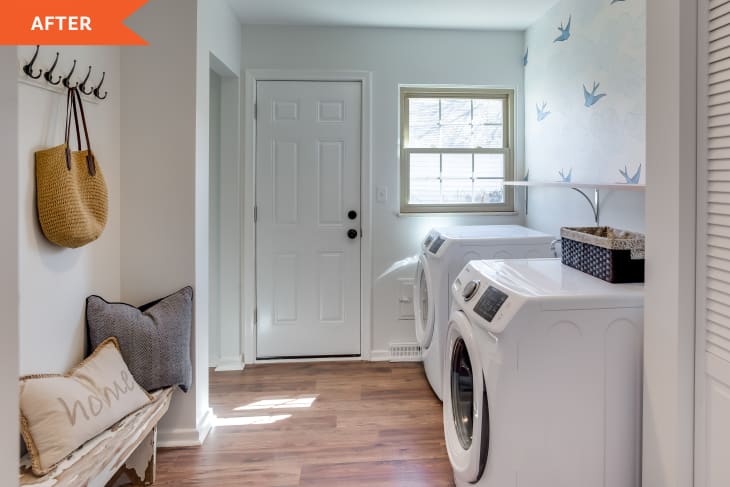
Because Lindsey was working on the dining room next to the laundry room at the same time, she eliminated a closet in the dining space to make room for one (next to the door to the outside) in the laundry room; it has a hanging rod and space to store clothes baskets. “I opted to keep the closet open because a door would block access to the exterior door,” Lindsey writes on her blog.
She also had professionals build a closet around the water tank. “Following safe building codes, we installed breathable bifold doors for ventilation,” she explains on her blog, adding that the closet around the tank gives the room a much more “finished” look.
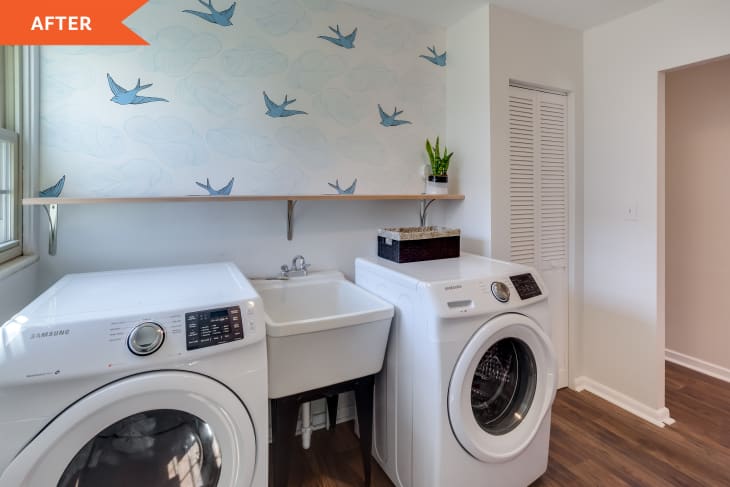
After demoing the old linoleum floors herself with a heat gun and scraper, Lindsey hired pros to install LVP floors on the entire first floor of the house, and during this step of the project, she scraped and painted the base of the utility sink black.
She hung a whimsical wallpaper (Hygge & West’s “Daydream”), which she says is the perfect “element of surprise,” and added a shelf with brackets over the washer and dryer for easy detergent access (and because she didn’t want any bulky cabinets to block light from the window.)
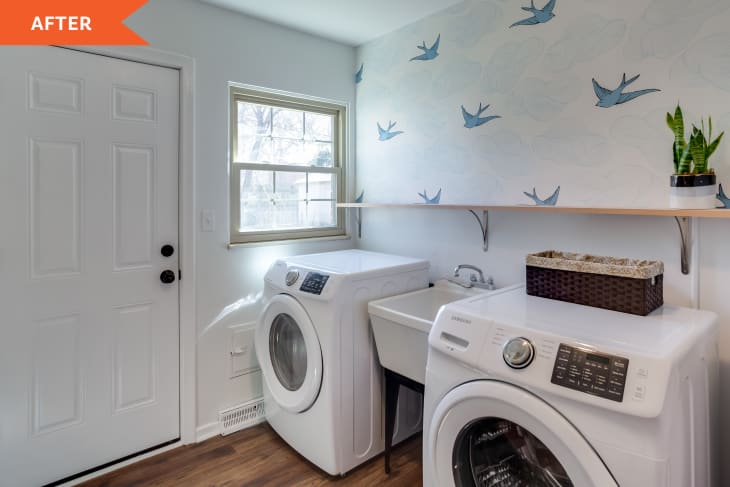
And speaking of windows, because Lindsey was losing one by replacing the old, non-opening door, she painted the room a crisp white (Benjamin Moore’s Decorator’s White) to maintain light and airiness.
Lastly, Lindsey created a drop station in the corner of the room with a bench and hooks. “If I had the budget, I would have created a custom built-in unit, but the hooks and bench work just as well.”
Her advice? “Think outside of the box to achieve your goals, and tackle the projects that will give you the most bang for your buck,” she says.
Lindsay’s favorite part of the redo is the seating and storage area, and she’s proud of the room’s refreshed feel overall. “I love how bright and airy this new laundry room feels,” she says.
Inspired? Submit your own project here.