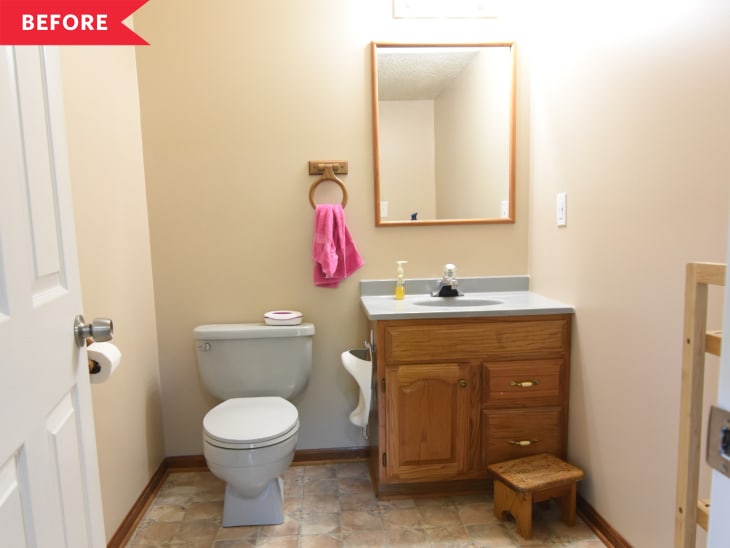
Before and After: A Hodgepodge Builder-Grade Bath Gets a Big Style Boost for Just $200

For many people in 2020, long-backburnered projects took on a new urgency as they found themselves spending more time at home more and using their spaces in different ways. For Melissa and Wyatt Shipman (Loving Here), that project was the half-bathroom in their basement. It was a relic of the early 1990s when their home was built, and it looked it: dingy tan vinyl floors, an oak vanity, poor lighting, and a dusty blue (yes, blue) toilet and sink. “We’ve DIYed most of the rest of our house over the last nine years of living here but I was basically ignoring this room because we never really used it and I didn’t want to spend the money to upgrade a space that felt impossible,” Melissa says. “What were we going to do with a blue toilet?!”
But once Wyatt started working from home and using that basement as his office, it started to get a lot more use — even more so now both of the couple’s young children were home all day, too. What once was a space they could close the door and forget about became a higher priority DIY.
That said, they didn’t want to spend a lot, so Melissa and Wyatt gave themselves a $200 budget to make the bathroom look cleaner and more modern.
Melissa and Wyatt started by removing the old popcorn ceiling, which instantly made the bathroom look 30 years younger. Then, they painted over the old yellowy tan paint with a crisp white leftover from other projects, which makes the bathroom look brighter and cleaner.
Melissa and Wyatt didn’t have the money in their $200 budget to replace the floors — but they could afford to cover them with stick-on tile. Melissa picked a graphic hex tile pattern in gray, white, and black. “I felt ‘safer’ going bold since it was affordable, stick on tile instead of a permanent tile investment,” Melissa says. “Installing the flooring was a bit of a challenge, but only took us a few hours since it was a small room.”
The old oak vanity stayed, too, but sanding down some of the decorative edges gave it a more modern look; painting it black, also with leftover paint, helps tie it in with the flooring.
“I was planning to just paint the vanity as-is, even with the dated shape of the doors, but when Wyatt suggested sanding down the edge, I immediately realized this was a way to make a huge difference,” Melissa says. “I think a lot of people who paint dated cabinets have the tools to do this and maybe haven’t ever considered how easy it is to change the edge profile on solid oak cabinets, so I’d encourage people to try it. It made a huge difference!”
With the sleek new black vanity beneath it and a new black faucet, the existing countertop looks totally different (ditto the matching toilet).
Finishing touches: a new mirror, more contemporary lighting, and DIY art in frames the couple already owned. With the smart reuse and clever hacks, they were able to pretty much stick to their budget, coming in at just $203.76.
“I love how bright it is with the new lighting, white walls, and scraped the popcorn ceiling, and I really enjoy the bold floors,” Melissa says. “I honestly just wish we had done it sooner—why did we wait so long?!”
Inspired? Submit your own project here.
