
Before & After: A Beautiful Solution for One Big Blank Wall
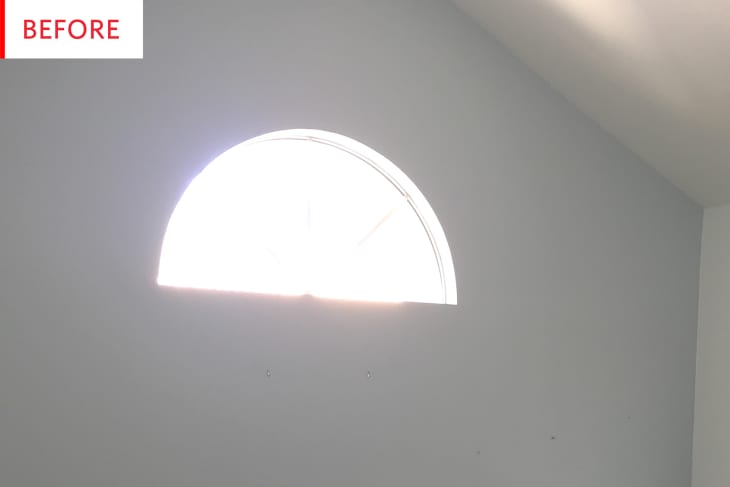
What’s this, a blank wall? What could possibly be done with it—a coat of paint? Some sassy wallpaper? A coat of paint with a sassy wallpaper border? Be prepared for something so much more dramatic and intriguing than all that…
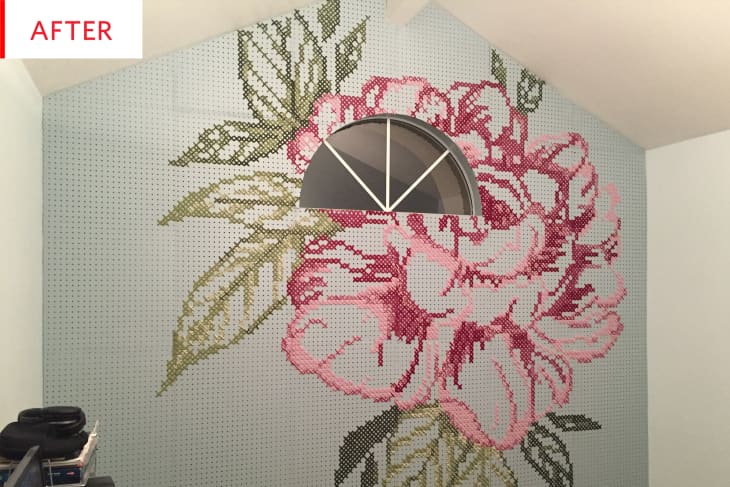
Even though the title of this submitted project was “Pegboard Cross Stitch Mural,” I still wasn’t prepared for this. It’s incredible, it’s dramatic — yet perfectly scaled, and totally unexpected.
Here’s how reader Heide described the origins of this project:
I have a spare room that I use as an office/TV room. It has a large 11ft x 12ft wall that was blank for a long time. In looking for cross stitch designs for another project, I discovered some large scale cross stitch that people were doing on pegboard. I decided to scale it up and fill the whole wall. This is the main piece that inspired the wall.
The results are completely amazing, but it made sense to do a project this unconventional and bold in a less-used room before trying it in, say, the living room. Since this first attempt went so well, I hope Heide does another one soon.
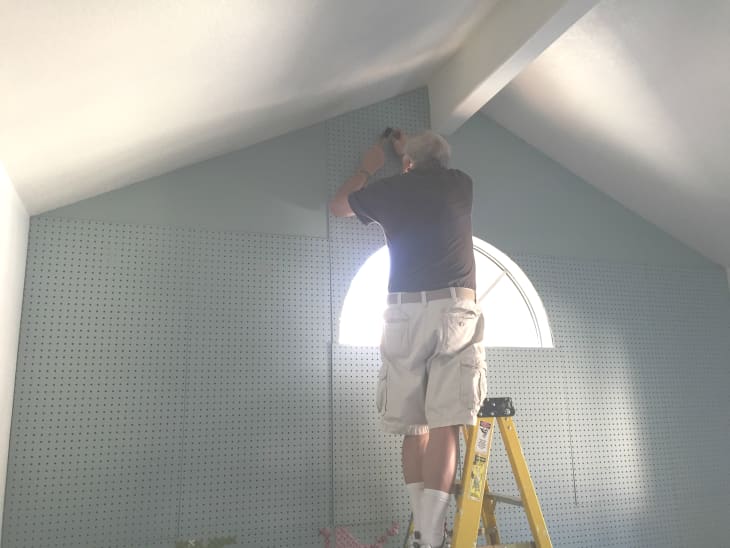
Here’s Heide’s dad working on the measuring and cutting. Let’s break this project down by days and dollars:
It only took about 10 days to complete. It took a day to paint the panels, a day to cut the panels. I was able to stitch one or two panels a day in the evenings. The install took two full days. It cost approximately $230: $150 for the panels and hardware, $50 for the yarn, $30 paint. My dad helped with measuring and cutting the panels. Other than that I did it all on my own.
As for what I would do differently, I would get help with the installation. That proved to be the hardest part. I did it all on my own, which I didn’t need to do. An extra set of hands would have A) made it go much faster and B) would have helped me get the panels a little more square. I ended up putting putty between some of the seams because they didn’t quite line up once they were on the wall… that could have been avoided.
I can’t believe Heide installed this alone. And while $250 is not pocket change, it’s very affordable for such a major piece—and the panels are reusable if a new cross-stitch design was ever desired. That paint color would look good with almost anything, and only new yarn would have to be purchased.

Overall, Heide was (rightly) satisfied with the mural:
I wanted to make a big statement on that wall — something that would reflect who I am and delight me . . . Next time, I might take a bigger risk with the image — choose something funkier/edgier. Since this was in a room that may eventually be converted into a guest room, I stayed with a more neutral/classic subject. I love that it makes a big statement. It really brightens up the room.
That “next time” seems to indicate that another major cross-stitch mural is indeed a possibility, and I sincerely hope Heide sends us the photos. Something funkier/edgier sounds even more incredible.
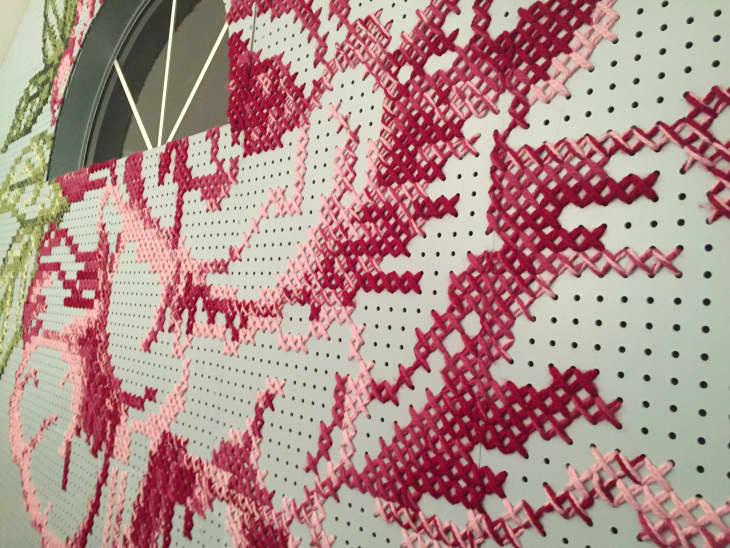
If you’re interested in your very own wall peony, this is the free DMC pattern that Heide used to create this one. Definitely let us know if you make one!
Thanks, Heide!