
Before and After: This DIY Fireplace Update Features a $2 Gallery Wall Hack Worth Copying
Some home makeovers are giant undertakings that can take thousands of dollars to fund and months to finish. But other redos can effect a big change with just a few simple swaps. This fireplace redo is one of those.
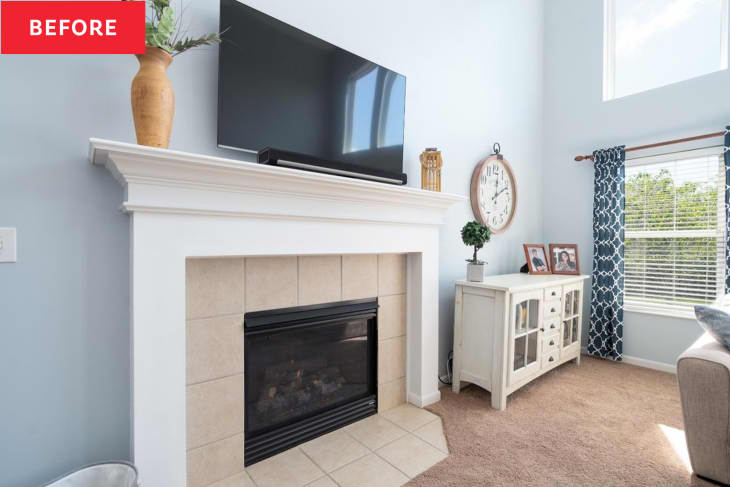
When Wendy Robbins’s (My French Twist) son and daughter-in-law moved into a new house, they were fortunate to have a blank canvas in their living room — complete with soaring ceilings and a fireplace. But this adventure-loving couple felt underwhelmed by its traditional aesthetic.

“This living space definitely needed a more youthful vibe,” explains Wendy. “The baby blue walls and standard beige ceramic tile did not accent the fireplace well or do justice to the room’s height.” Thankfully, Wendy’s daughter-in-law knew exactly how to better reflect their personal style without racking up major renovation costs, and Robbins was ready to jump in and help.
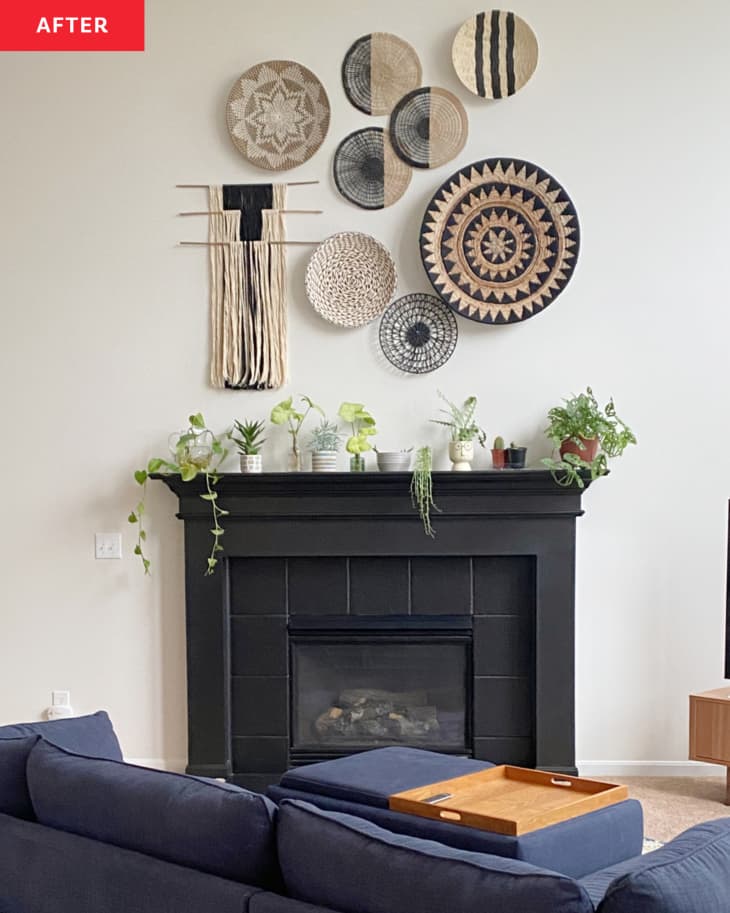
“Our solution required more boldness than skill,” Wendy says of the project. It started with paint: Once they painted the walls a neutral white — much more luxe-looking than the old baby blue — they turned their attention to the fireplace.
Wendy and her daughter-in-law decided on a dramatic solid black shade to unite the tile surround and the wood mantel. “This was an economic solution for covering the bland ceramic tile, and it was a much easier task than we expected,” says Wendy. Choosing a single shade for the whole fireplace makes it look bigger and more modern.
With the foundation in place, Wendy wanted to call attention to the room’s high ceilings with some statement decor. They decided to give the room a boho look with a vignette of black-and-white baskets over the mantel. A large one from World Market is the centerpiece, while other smaller baskets from the craft store helped fill in the space around it.
To get the arrangement just right, the trio planned it out on the floor before nailing anything to the wall. It took a few rounds — they tried out some different ideas, saw what worked, tweaked what didn’t, and tried again. Wendy’s design was guided by the triangle principle, a classic art lesson to remember during any design project. “Keep in mind when arranging items to create a triangle,” she advises. “Designate three main points, then work around them.”
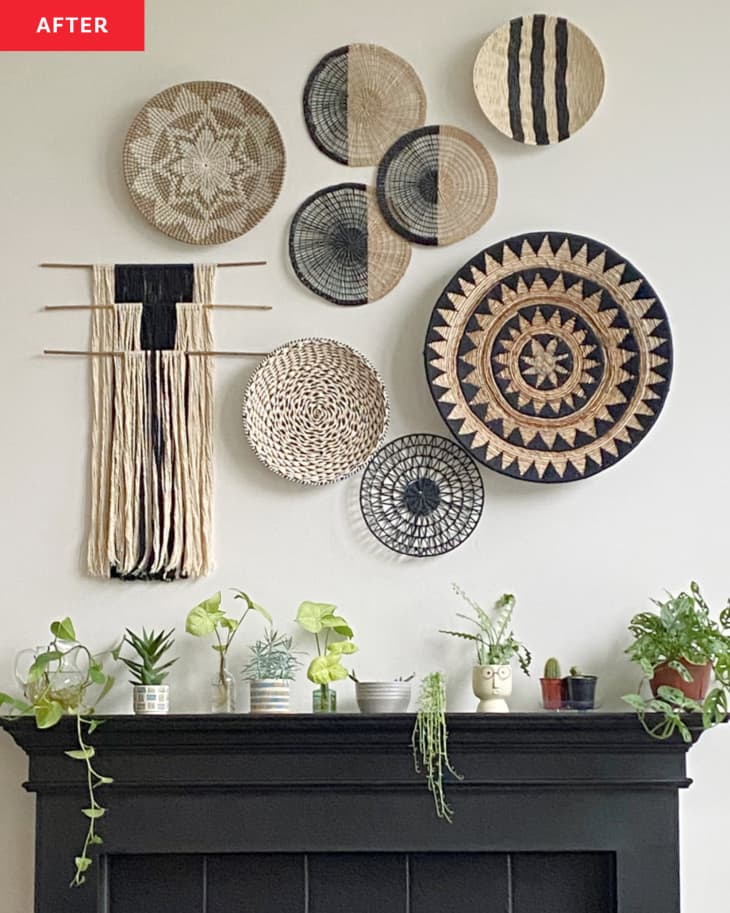
As the trio arranged the baskets, they found that they needed a few more to make it feel complete. Unfortunately, they’d already maxed out their budget, so they found a quick and creative fix. Instead of adding more baskets, they purchased $2 straw placemats that they painted with black spray paint (they taped half the placemats off to get the cool graphic treatment). The resulting DIY blended in perfectly with the baskets, as did a small macrame wall hanging they also crafted.
The final result is both calming and bold, and Wendy’s son and daughter-in-law are delighted with the affordable update. “It feels trendy and youthful,” Wendy says. “Yet when paired with an array of plants along the mantel, the mood feels restful and calm. It’s a nice place to plop on the couch and relax with your best friends.”
Inspired? Submit your own project here.