
DIY Home Decor: How to Make a Leather Valet Tray

When Paul’s not busy restoring vintage items, he’s down in his basement workshop crafting leather goods for his etsy shop. Most projects are made to fill orders but, every once in awhile, he makes personal projects as well, including this super simple valet. Here’s how to do it yourself:
Skill Level: Easy
Time Required: 1 hour
Project Cost: $20-50 (depending on size and tools used)
When choosing your piece of leather, pick something thick and firm enough to hold its shape. Paul used 4 ounce vegetable tanned leather for this project. You can either dye vegetable tanned leather, buy it pre-finished, or opt to use a different kind of leather that is the color and texture you are looking for.
What You Need
Materials
- Leather scrap
- Copper rivets
- Copper burrs
Tools
- Ruler
- Marking tool (pen, awl, or embosser)
- Ball peen hammer and/or rivet setter
- Knife
- Hole punch (optional)
Instructions
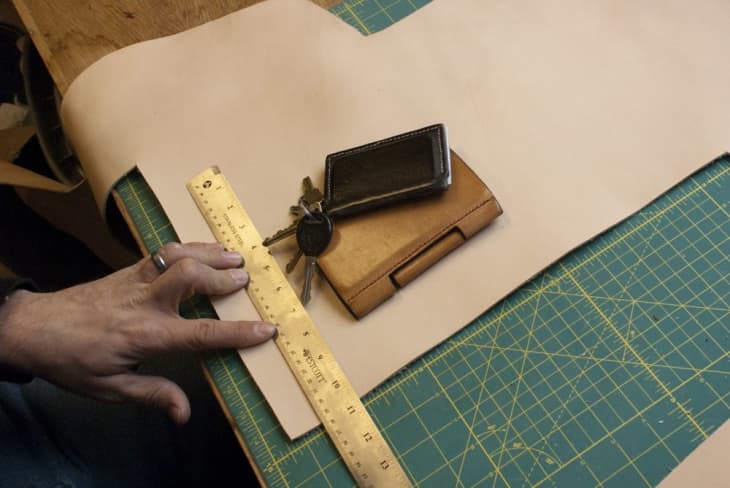
1. First decide how big you want to valet to be. In this case, Paul took several items he planned to store in the tray, laid them out and measured their footprint, then added an inch in every direction to accommodate the sides.
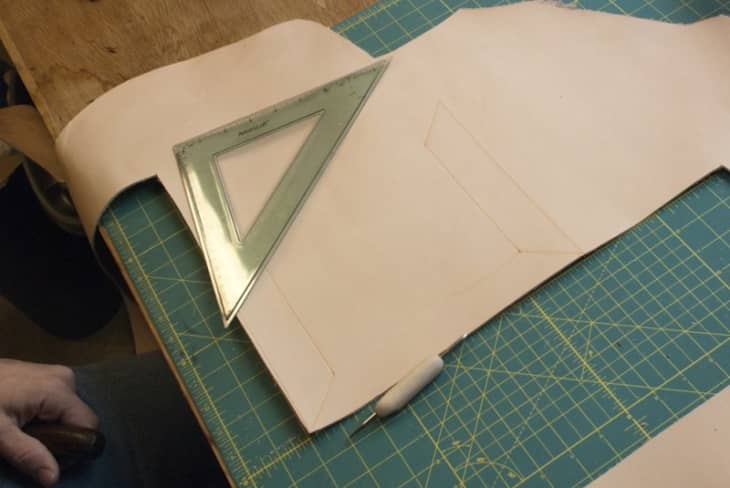
2. Once you know your size, it’s time to draw onto the leather. Mark both the outside shape of the valet, as well as the lines where you’ll eventually fold the leather up to make the sides.
Tip: Although you can use a pen for this step, Paul prefers to use a metal point (like the one on the photo) that leaves an indent that is easy to follow, without having to worry about ink bleeding or smearing elsewhere on the leather.
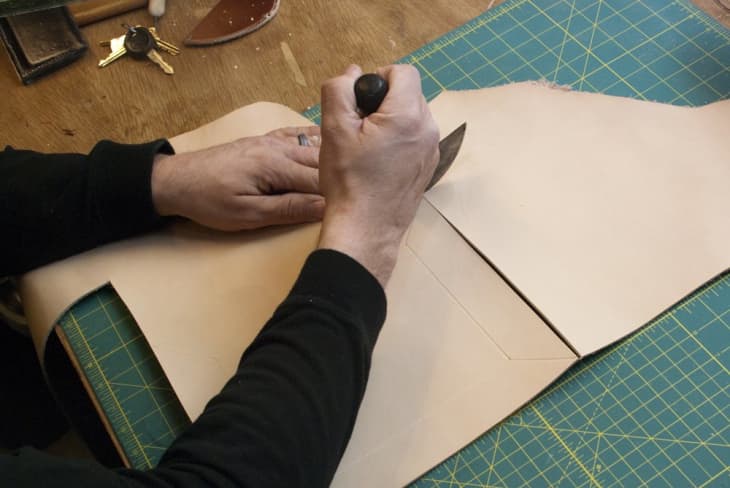
3. Next, cut out the leather. There are specialty knives (like a head knife or wood carvers knife), but a simple X-Acto knife with a new blade will do the trick.
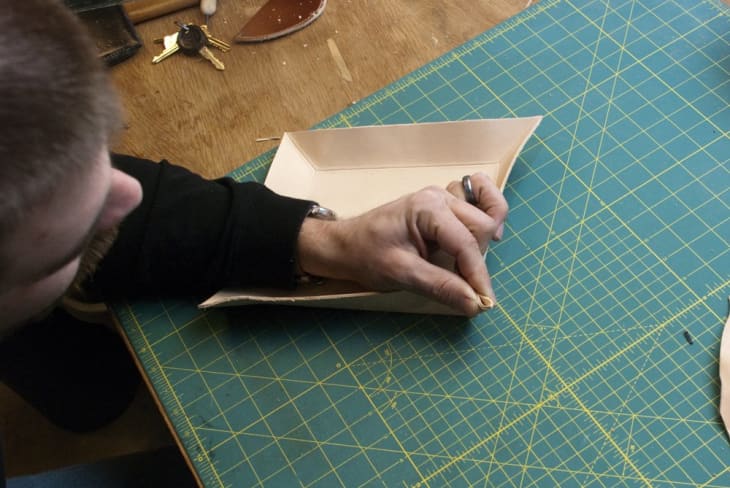
4. Next, fold the leather on the embossed the line. This is to encourage the leather to hold the desired shape when the corners are pinched together.
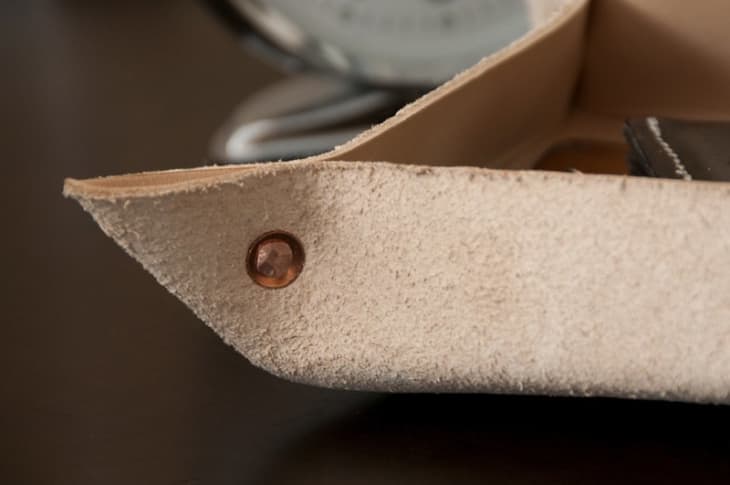
5. After pinching each of the four corners together, secure them in place. Here, Paul uses rivets, which might seem difficult, but are really quite simple. You can buy copper rivets individually at your local hardware store (just don’t forget the little copper washers that go with them).
Tip: If you don’t like rivets you can sew them together with a needle and thread instead, or with a tool like the Speedy Stitcher.
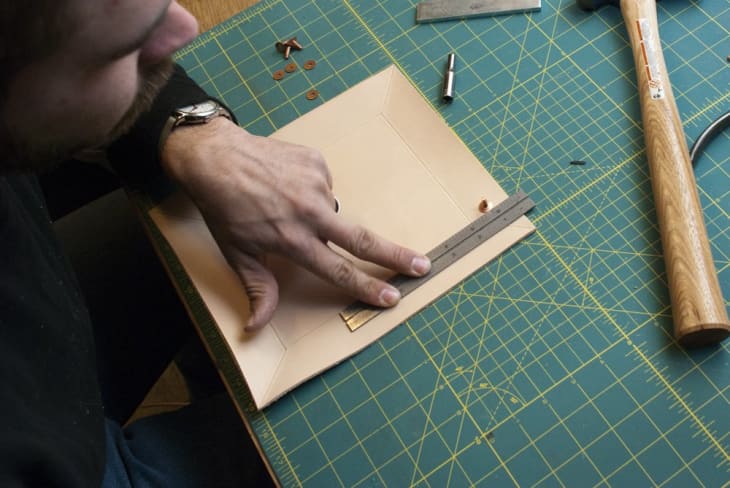
Figure out where to place the rivets. Just remember, the rivets will actually pinch and hold the leather together about an 1/8 inch beyond the edge of the rivet head. If you’ve never worked with rivets before, buy a few extra and practice on a scrap piece of leather before you do this step.
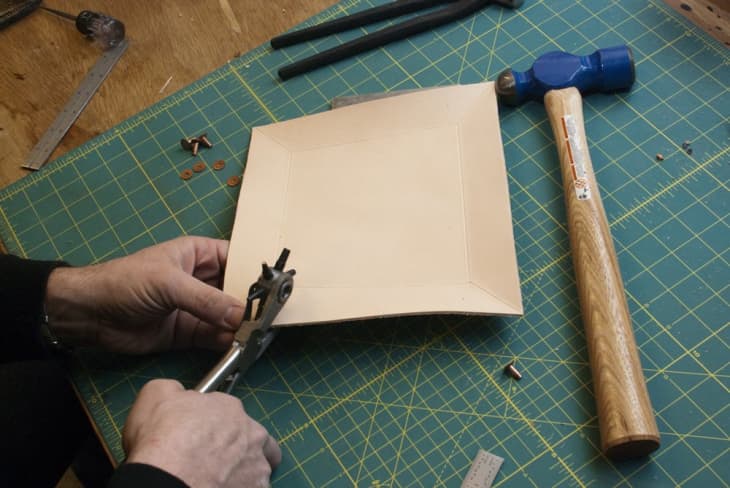
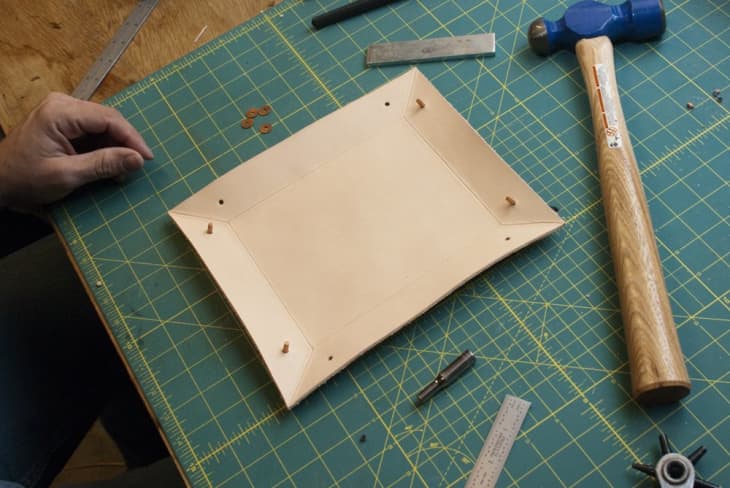
7. Now insert the rivets in their holes and smash them down tight.
Add your keys and wallet, and you’re done!
Have a really great DIY project or tutorial that you want to share with others? Let us know! We love checking out what you’re making these days, and learning from our readers. When you’re ready, click here to submit your project and photos.