
7 Ways to Hack Your Way to a Kick-Ass DIY Kitchen Island
I’m in the planning stages of a kitchen renovation and the first thing I knew I wanted to add was a kitchen island. There is almost no counter space in the kitchen, but tons of room in the middle, so I thought “Easy, we’ll just run to the store, build some cabinets, add a countertop, done.” If anyone else has looked into this, you’re probably laughing at me now, because here’s what I didn’t know: Any “permanent” island, by code, requires outlets. Which means ripping up the floor to run electrical to it. So I scratched the original plan, refocused, and now I’m on track to hack a pre-built option to meet our needs.

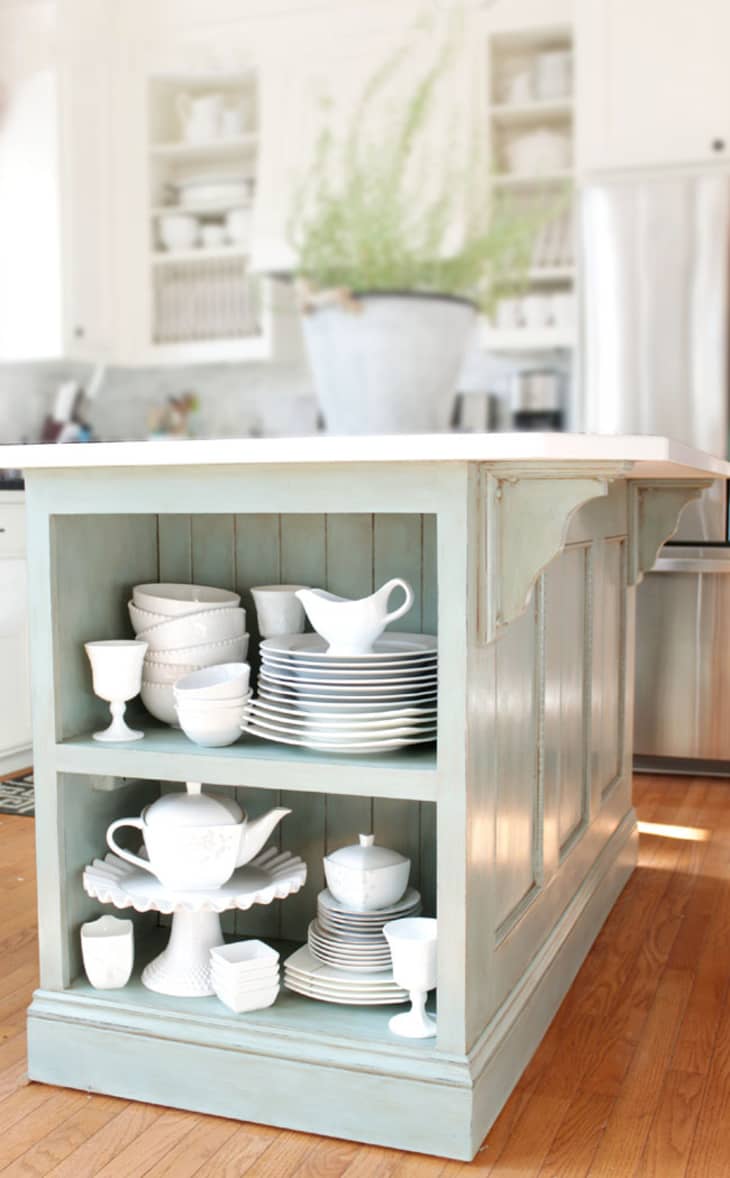
Painting your island a bold hue is a great way to introduce color in an all-white kitchen. Go check out Cami’s before and after to see how much life a bit of paint brings to her home. In addition to paint, Cami kicked up the style with chunky corbels and towel rack.
There aren’t many pre-built island options long and skinny enough to fill out a galley kitchen, so Victoria decided to upcycle a vintage table. It already fit the space perfectly, it just needed a matching quartz countertop to complete the transformation. (P.S. If anyone is worried about the height difference between the table and the countertops, I am actually using a dining table as an island stand-in right now and haven’t had any issues using it for prep work.)
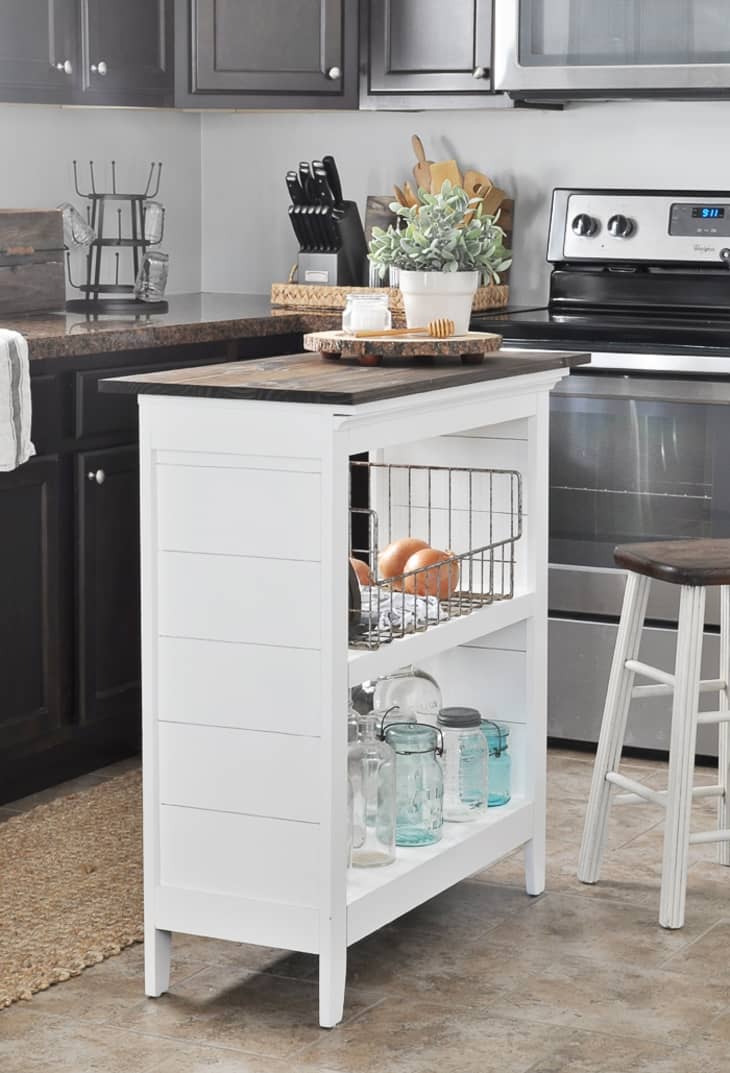
Speaking of upcycling, didn’t Ashley do an amazing job transforming this bookshelf? She removed the back, added faux shiplap, and added a wood countertop for an amazing small-space solution.
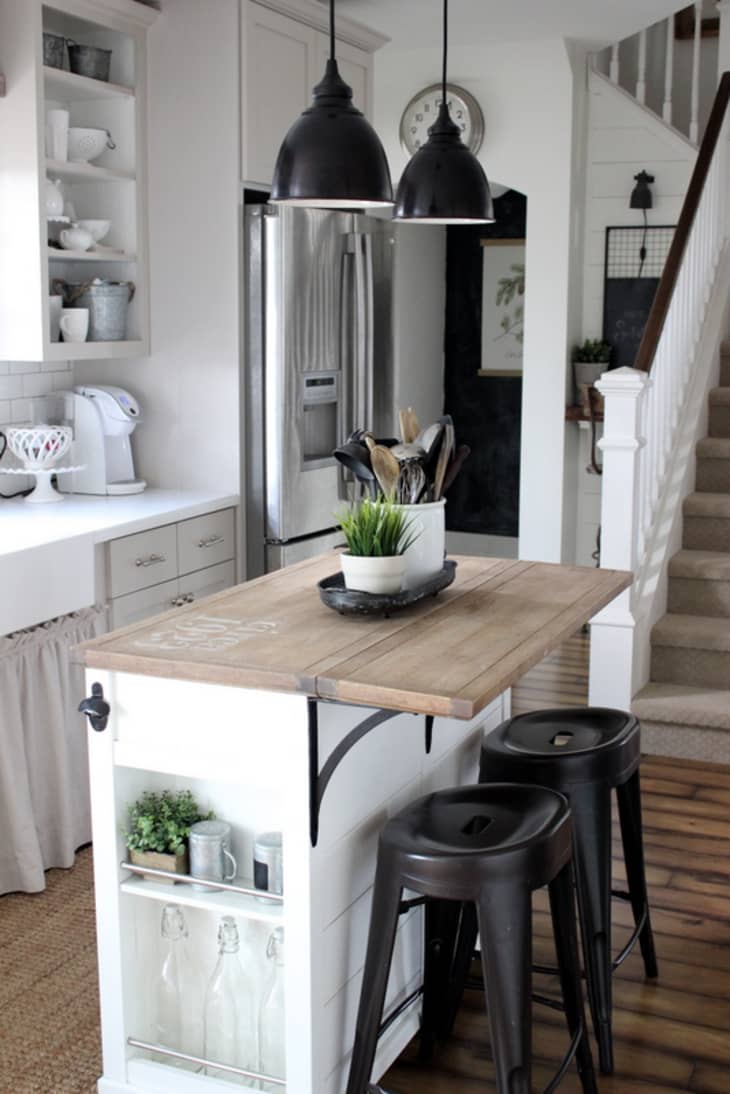
Or, instead of hacking a bookshelf, build one in. Cristina cased out an endcap bookshelf for her island to house a microwave, then found it was the perfect spot for open storage. She made the new addition seamless by extending the baseboard and giving the whole island a new coat of paint.
Pre-built islands can look flat in your otherwise styled home. Allie’s basic, pre-built option makeover is a testament to how a few, easy swaps can make a piece feel custom. She added beautiful new hardware, re-stained for the countertop, and replaced the cheap casters with bun feet for a significantly more substantial feel.
Kim and Scott of Yellow Brick Home struggled to find an island that allowed unrestricted access to the surrounding cabinets and had storage and seating. That’s a lot to ask of a pre-built option. So instead of searching, they added matching brass casters, pulls, and a butcher block countertop to a dresser.
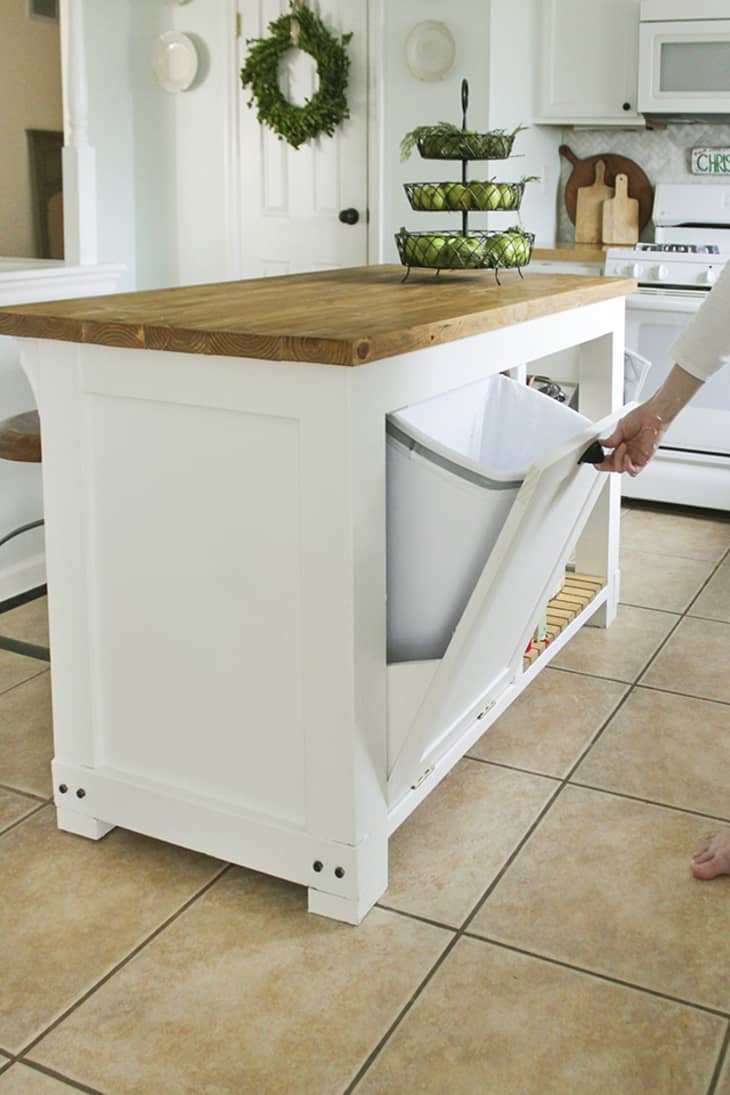
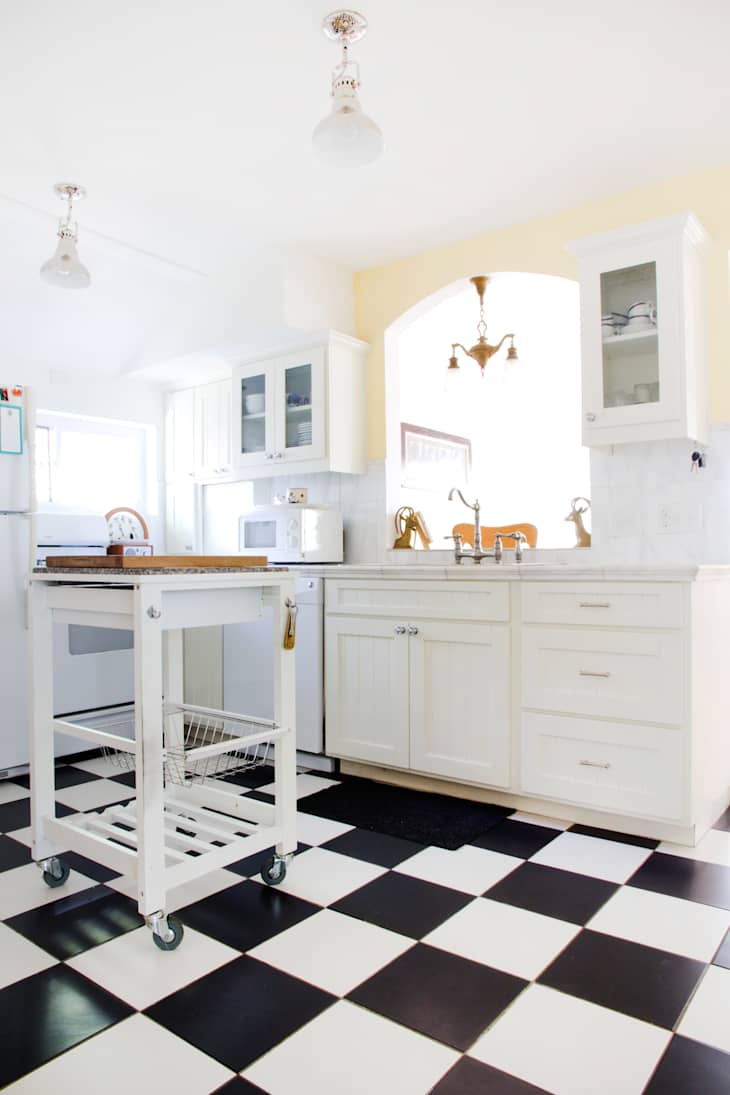
Rachel is my new DIY hero. When she couldn’t find a pre-built option that allowed for hidden trash storage, she built her island from scratch. Besides the ingenious trash cabinet, she added open, slat shelving for baking supplies and an IKEA FINTORP rail with hooks for kitchen towels. Her plans are clear enough to hack one of your island’s doors to achieve the same effect.