
How to Turn Basically Anything into a One-of-a-Kind Table Lamp

Want more DIY tips, tricks, and inspiration? Check out more stories featuring the 2023 Apartment Therapy DIY Collective. This content is presented in partnership with The Home Depot; it was created independently by our editorial team.
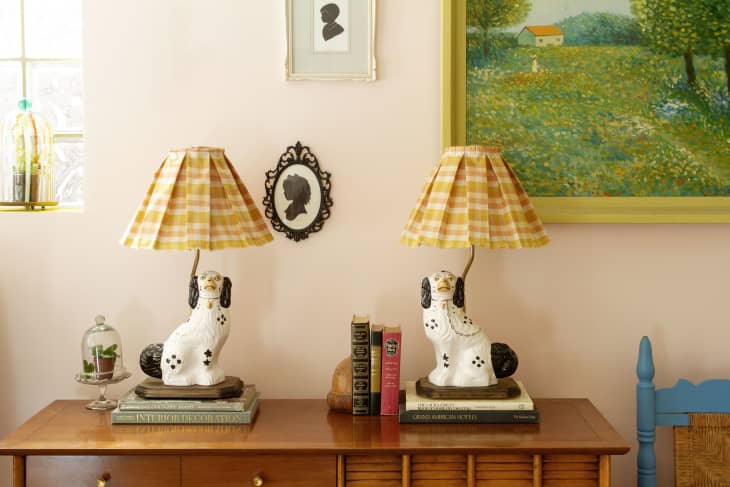
When you live in a small space like I do, it’s tough to fit in any items that don’t feel totally necessary. That’s why I try to make sure everything in my home has a purpose. But I also really love fun and whimsical decor, so that’s why I couldn’t pass up these porcelain Staffordshire dog figurines when I found them at the thrift store. I loved the pair of dogs as-is, but I wanted to elevate them into something more than just shelf decor. Turning them into lamps seemed like the perfect solution — they’d be functional and practical, but also really fun statement pieces.

You may not have a pair of dog figurines just lying around your house like I did (though I definitely recommend it if not), but you can still follow my steps to turn basically anything into a personality-packed statement lamp. This is a project for everyone — especially people who see something fun they love but then think, “I don’t actually need this! I would never use this! This doesn’t have a use!” I am happy to be the little enabling devil on your shoulder to justify filling your home with things that speak to your personality!
Here’s what you’ll need to pull off this DIY:
Supplies:
- Porcelain figurine of your choice
- Wood base
- Figurine arm
- Lamp kit
- Additional fixture pieces: washers, necks, nipple extensions
- Lampshade
- E6000 craft adhesive
Tools:
- Needle nose pliers
- Drill and drill bits
- Phillips screwdriver
- Rag for stain
To customize your own lampshade you’ll need:
- Fabric of your choice
- Hammer
- Scissors
- Hot glue gun
- Sewing machine
Before you head out to pick up your supplies, make sure to note the measurements of your figurine (height, depth, width). The height will determine the length of the figurine arm you need, and the width and length will determine the size of the wood base you’ll need. Craft stores will have a good selection of bases for you to choose from in the craft wood section, but you might have a tougher time with the figurine arm. This website has everything you’ll need for lamp making including any extra parts (rings, necks, and more).

1. Drill a hole in your wood base.
Once you’ve got your wood base, use a 3/8-inch bit to drill a hole. You can put the hole for the figurine arm wherever it most makes sense for your piece, but try not to put it too close to the back edge of your base (otherwise, it won’t be secure). I chose to center my arm along the backside of the base, and kept it about an inch from the edge. Before drilling the hole, be sure to double check the thread on the figurine arm. Most commonly, the diameter for table lamps will be 3/8”.

2. Elevate and stain your wood base.
This next step won’t make a whole lot of sense until you start doing the actual electrical work, so bear with me! You need to elevate your wood base to allow room for the cord to freely move out and under it. You can do this a few different ways, but I picked the easiest: nail on furniture guides. Nail one glide in each corner to give the wood base a boost. After the glides are in place, paint or stain your wood base. I chose a dark walnut stain, but you can really go wild with this step — do whatever color you like, and finish it with a protective wax or clear coat.

3. Attach the lamp neck.
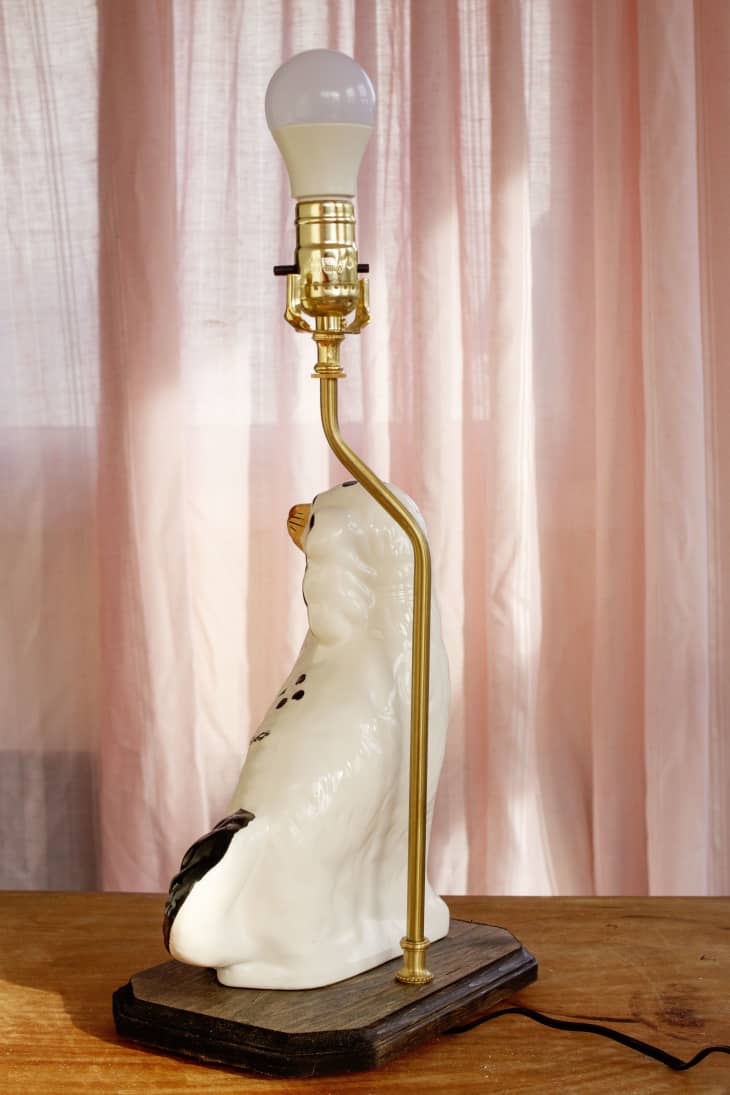
One of the extra bits and bobs you can purchase is a neck. This screws on to the end of the figurine arm, and helps secure it to the base. It also acts as a really nice transition piece, making your lamp look like it was created by a pro! Attach the neck to the figurine arm (as shown in the photo) and screw the arm into the wood base. You’ll also want to attach a lock washer and another neck near the top of the figurine arm. Be sure to leave a bit of space to screw on the harp base and socket cap; if there isn’t enough space naturally, you can always screw a short nipple into the top of the neck to allow for more.
4. Assemble the lamp parts.
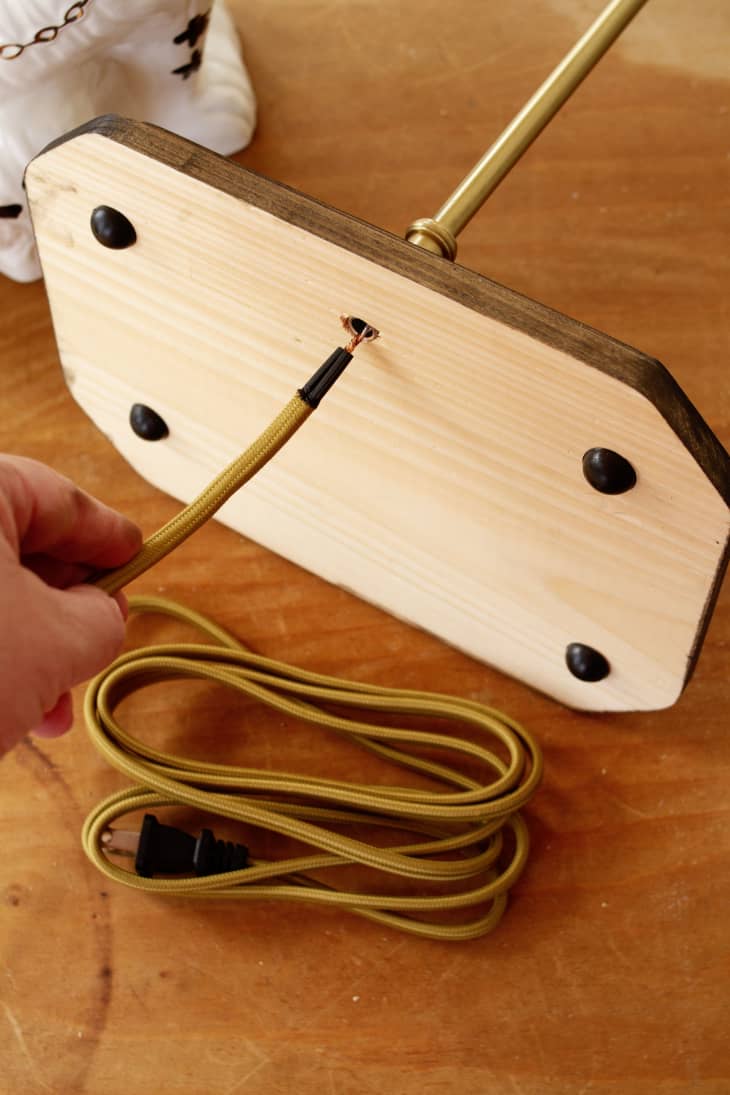
Pop open the lamp kit and remove the harp base and the socket. Place the harp base on the nipple, then set the socket cap in place and tighten the screw until the cap is secure. Feed the electrical cord up through the bottom of the wood base, all the way out the top of the socket cap. You may need to twist the wires together first, so that the cord can be easily fed through the arm.
Pull the two wires apart just a bit, and tie a lamp cord knot (also known as an underwriter’s knot). This knot is really easy to tie and necessary to keep the cord in the socket, in case it’s accidentally yanked or pulled. There should be an easy to follow diagram in your lamp kit; otherwise this is a great tutorial.

5. Secure the wires.
Next, you’re going to connect the exposed parts of each wire to the two screws on the socket interior. You’ll notice one wire casing is ribbed, and the other casing is smooth; the smooth wire casing connects to the brass screw, and the ribbed wire casing connects to the nickel screw. A pair of needle nose pliers will help you bend the exposed bit of wires into a “C” shape, which will fit perfectly around the screw. Once the wire is behind the screw, tighten the screw in place.

Push the socket interior down, and cover the entire thing with the socket shell. And that’s it! You’ve wired your lamp for electricity! At this stage I like to insert a light bulb and check to make sure everything is working as it should.
7. Finish the assembly.
At this point you can continue to assemble the harp unless you’re using an uno fitting like I had on my lamp shades (these rest directly on the lamp base and don’t need a harp). Then, use your adhesive to glue the figurine to the wood base.
I repeated these steps one more time and just like that, I had two perfectly symmetrical figurine lamps!

You can stop here and use an off-the-shelf shade, but I thought my unique lamp deserved an equally unique topper. Here’s how I made my custom lampshades.

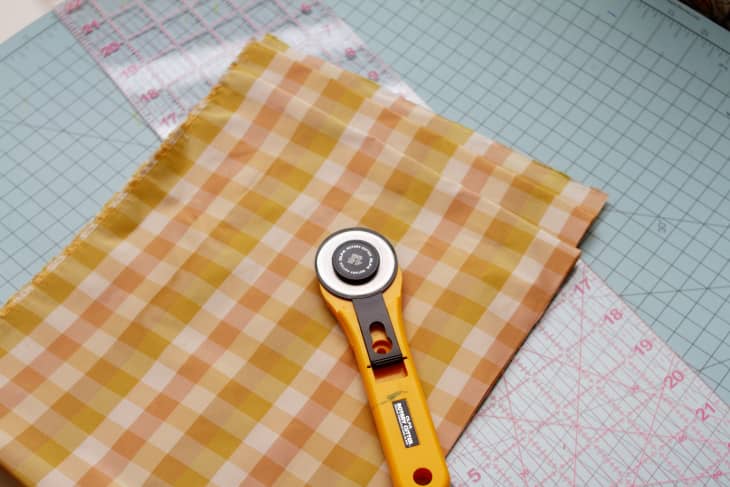
8. Measure your shade frame and choose your fabric.
For the shades I decided to really play into the whole “grandmillenial” theme and went with a beautiful checkered soft pink and yellow silk fabric. I created my take on a box pleat lampshade by making a sort of skirt that I then laid over the cloth shades. I say it was “my take” because I really just eyeballed the measurements once I figured out the method to create the pleats — otherwise it would have taken me hours had I followed precise instructions, measuring as I went. Instead, I had two shades that were ready to be pressed flat in under 20 minutes. Pressing your pleats is very important. Press them, then press them again to be sure you have a perfect crease.
Here are my tips for creating the best box pleats:
- Start by measuring the circumference of the opening of your lampshade, then multiply that by 4 to figure out how much fabric you need to use. Typically, you multiply by 3 for box pleats, but depending on the angle of your lampshade I think it’s best to end up with more than you need so you can adjust accordingly depending on the angle of your lampshade.
- If your fabric allows, spray with starch to get really well defined pleats.
- Using a striped or checked pattern allows for quick work and straight lines — I highly recommend it!

Once I finished the “skirt” I stitched it together at the top with a sewing machine, then used hot glue to attach it to the lampshades. The soft yellows and pinks create the prettiest warm light in the evenings. I love how it turned out!

Ready to make your own custom lamp? Tag @apartmenttherapy on Instagram or TikTok to show us how it went!