
I Transformed My “Landlord’s Special” Radiators Into a Gorgeous Feature (See How)
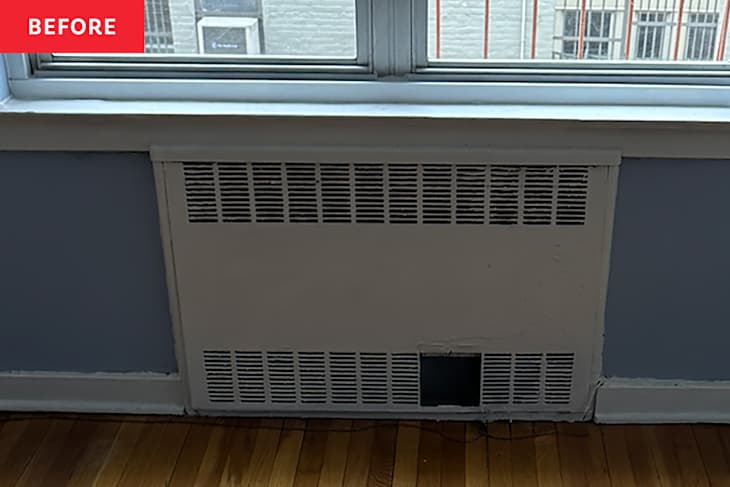
For better or for worse, I believe I can do just about anything I set my mind to — as long as my power drill is fully charged. Two years ago, with almost no experience, I actually built and installed my own custom, removable radiator covers that not only look gorgeous but also make accessing the units way easier. I tackled the project entirely on my own. And in the end, I only spent about $100 on each radiator.
Whenever I have guests or neighbors stop by, they always ask how I disguised my radiators so well. (And I’ll never get tired of saying “thanks, I made that!”) Although it might seem daunting, with a can-do attitude and a few key supplies, a project like this is more DIY-friendly than you might think. Here, I’m sharing some of the materials I used and the mistakes I made along the way, so that you can take this on without any issues.


Perforated Aluminum Sheets Improved the Look and Airflow of My Radiators
My radiators had two main issues. First, they were hideous. Second, they also weren’t very functional. They’d been given the “landlord special” so many times that it was impossible to open them now, and what vents did remain were tiny. I knew I’d have to use a crowbar to get the old covers off, damaging them irreparably. So failure really wasn’t an option. I needed something to improve the airflow, not just make the radiator look better. So I was thrilled when, on a trip to The Home Depot, I spotted these gorgeous pre-cut aluminum sheets.
I picked up two of the aluminum sheets along with a set of tin snips (which proved to be very helpful and made cutting the metal a breeze.) I built the cover frames out of wood and followed the blueprint of a giant picture frame. The tricky part here was the measurements, of course; always be careful to measure twice and cut once. Once the frames were done, I simply cut the sheet metal to size with the shears and attached it to the back using a staple gun. This was by far the easiest and most fun part of the process.


Adding Magnets Made the Covers Removable for Easy Cleaning
Perhaps the best part of the project, though, is the fact that the covers are magnetic. Once I pried the old covers off, I realized the radiators had quite possibly never been cleaned. Behind the covers, the radiator bodies were full to the brim with fur, thread, lint — I shudder to think of it even now. I cleaned it all up, and then I set about prepping the frames.
I added two pieces of 2-inch square dowel on either side, to give the new cover something to attach to. (These radiators are wall-mounted, meaning they’re recessed, but not completely flush to the wall.) Then, I simply attached these cabinet magnets on either side of the frame, and voila! It’s a small but impactful upgrade well-worth the blood, sweat, and tears.
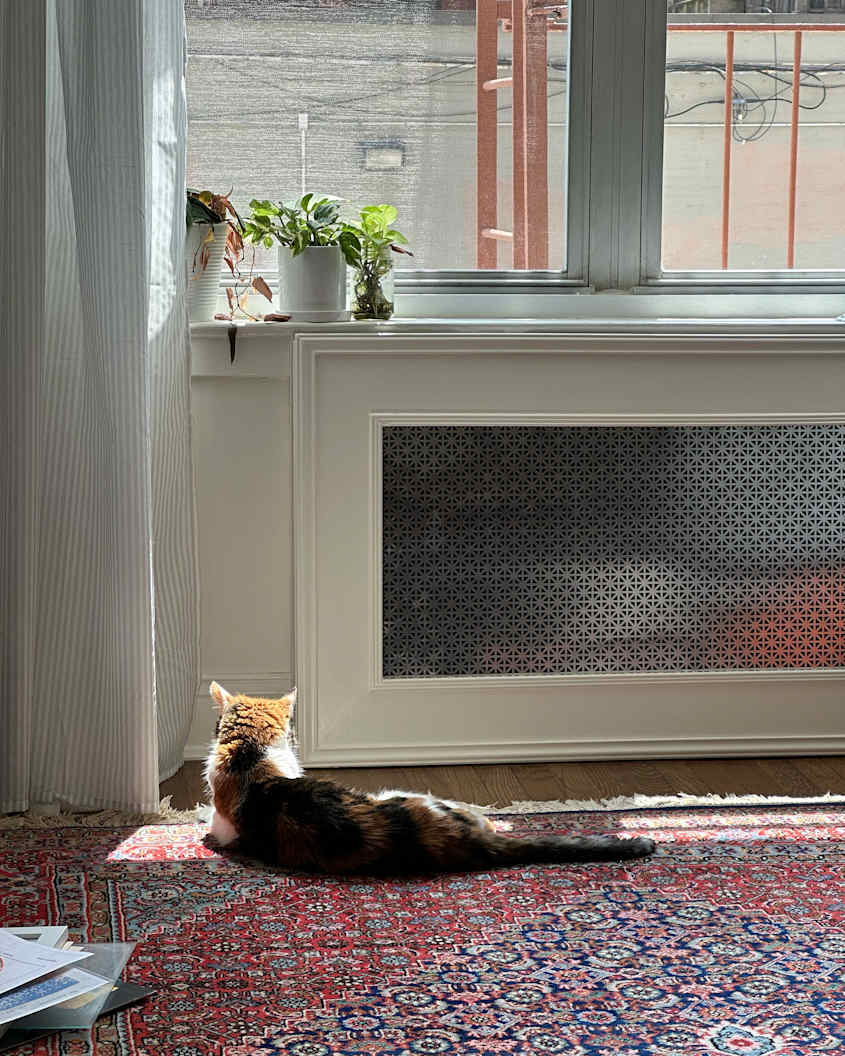

My DIY Radiator Covers Transformed an Eyesore into a Conversation Starter
I started this project with nothing but a table saw and a vision, but despite all odds, my DIY radiator covers actually turned out gorgeous. To this day, my neighbors all comment on them; some have even begged me to do the same for theirs. Not only do the radiators look so much better, but they’re also so much easier to keep clean and to adjust now, too.
The moral of the story? Sometimes, you just have to start the project to learn the skills. As long as you’re safe, you might just turn your apartment’s ugliest feature into one of its best.