
Instead of Tossing Her Existing Bed Frame, She Placed a $40 Upcycled Headboard in Front of It
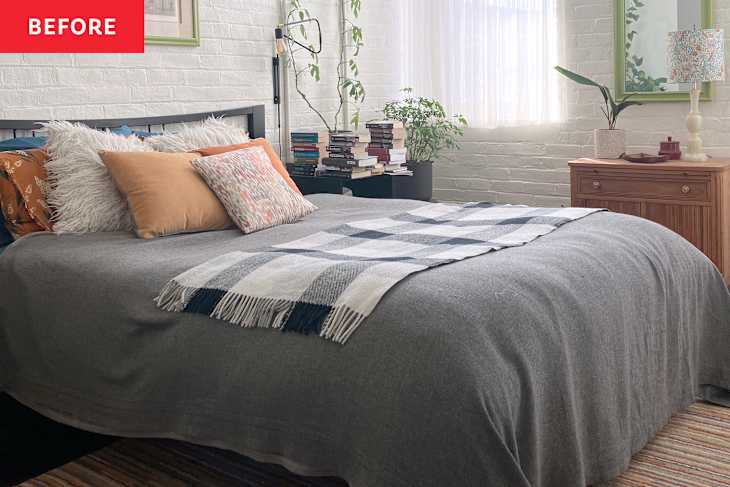
“I have a really high-quality bed with a vaguely modern aesthetic that no longer suits me,” Maya Drozdz says. She bought the bed frame years ago, but her current style shifted towards an eclectic, vintage look. Maya had originally wanted to replace just the headboard, as that was really the only noticeable part.
But because it couldn’t be detached from the frame, Maya had to come up with another solution instead of replacing it. She realized a king-size headboard fit in front of the queen-size one without any issues — meaning she could keep the original bed frame and still have the style she wanted.
She Decided to DIY Her Dream Headboard
Maya wanted an oversized, upholstered headboard without purchasing a whole new bed. “Buying something like that gets really expensive, so I decided on a DIY approach,” she shares.


A DIY Pivot Led to Her Painting the Original Fabric
Maya wasn’t new to DIY projects, so when she won a $40 headboard at a local auction, she was excited to reupholster it for the look she wanted. However, her stapler didn’t work for the reupholstery job because of the thick fabric it came with — so she had to change her DIY plans.
After researching how to paint the original stained fabric, Maya discovered chalk paint and chose a dark gray-teal color. “Fabric paint isn’t opaque, and I didn’t want to go darker, but chalk paint, combined with water, can be used,” she explains.
For Maya, it was a nerve-wracking experience because “it was difficult to imagine a positive outcome” when the first couple of layers were watery and “looked horrible.” But “after four light layers, the fabric was covered but not crunchy, and I sealed it with furniture wax,” Maya says.


She Elevated the Upcycle by Using Designer Fabric
For the headboard’s upper border, Maya added Morris & Co.’s Golden Lily fabric in the “Sunshine” colorway with fabric glue. “Upholstering the border was slightly easier than expected, as I’d chosen a lightweight fabric in a forgiving pattern,” she explains.
Maya also added a thick rope cord to the inside seam to hide where the new fabric met the painted original and to hide “any imperfections.” To attach the new headboard to Maya’s existing frame, metal adapter brackets finished the DIY project.

It Looks Like a “Custom Headboard I Didn’t Think I Could Afford”
Now, Maya’s bedroom reflects her “evolved aesthetic” with the new headboard featuring a vintage pattern and soft colors — just like she envisioned. She’s also proud she reused her bedframe and didn’t need to replace a perfectly functional bed to get the look she wanted.
Plus, Maya’s “unaffordable vision” was done on a tight budget without compromising style or uniqueness. “The end product looks like one of those custom headboards I didn’t think I could afford,” she says.
Inspired? Submit your own project here.
Shop This Before & After
