
Kitchen Renovation FAQ: 50+ Questions to Ask Before You Embark on a Kitchen Remodel
Taking on a renovation in a kitchen can be downright daunting. It’s one of the most-used rooms in your home and needs to be equal parts functional and beautiful. But with all the different moving parts—appliances, sinks, lighting, cabinets, and more—it’s tough to know where to begin. Plus, there’s the issue of cost and time. It’s a lot! Thankfully, Apartment Therapy (and some helpful experts) did the heavy lifting for you. Here, pros weigh in on every step of the process, from planning all the way to the finish line, so you can feel empowered to create the kitchen of your dreams. Click on each question to find out the answer to anything you may be wondering about.
Planning It Out
1How much will my kitchen remodel cost?

Your remodel costs depend upon three things: the size and scope of the project, the level of finishes, and your geographic location, which dictates labor costs. A 2019 study by the National Association of Realtors (NAR), with input from the National Association of the Remodeling Industry (NARI), pegged the average cost of a kitchen upgrade across the country at $38,000, while the cost of a complete kitchen renovation came in at $68,000. Both include labor and materials, though an upgrade usually assumes that you’re retaining some existing surfaces or fixtures. HomeAdvisor estimates the cost to be far lower on the low end, on average—from $15,000 to $60,000. When it comes to budgeting, HomeAdvisor recommends homeowners use what it calls the “5 to 15 percent rule,” which suggests the renovation should cost somewhere between 5 percent and 15 percent of your home’s current market value. The idea here is that if you don’t spend enough, the quality of the remodel won’t match your area—or even the rest of your house. At the same time, spending too much can mean you’re over-renovating for your area, and you won’t recoup those costs when you eventually sell. For a more precise answer on your remodel costs, get detailed bids from multiple contractors in your area, and weigh that against what you can afford. A line-item bid will include specific costs for various elements, making it easier to see how much each individual splurge—like heated floors or marble countertops—will set you back.
2How do I finance my kitchen remodel?
If you can’t squirrel away the cash you need for your remodel, your best bet is usually to borrow against the equity you already have in your home. That’s because borrowing against equity usually ensures you’ll pay a lower interest rate than you would with a credit card or personal loan. Home equity loans and home equity lines of credit are two options. Both measure the current value of your home against the amount you owe on your mortgage. With either, the amount on your current mortgage, combined with the amount you’d like to borrow for your project, typically can’t exceed 80 percent of your home’s current market value. Of course, all of this is conditional upon your current income and credit—usually, a minimum FICO score of 680 is required, and banks won’t lend more than they think you can pay back. A home equity loan provides a fixed sum of money that you request up front, and you pay it back in structured payments over five to 30 years. The interest rate is fixed, meaning it can’t change, but these loans usually come with closing costs. “A good rule of thumb is to assume that closing costs will add about 8 percent to the amount you’re borrowing,” says Angela Demaris, senior loan originator at Prime Lending. “They vary by lender and state, but they can add a significant expense.” A home equity line of credit usually has a variable rate and more flexible terms for repayment, not unlike a credit card. But the fees can be lower up front. If mortgage rates have dropped since you purchased (or last refinanced) your home, your best bet may be what’s called a cash-out refinance loan. This allows you to simultaneously refinance your primary mortgage to a lower interest rate while also borrowing an additional sum to pay for your project, provided you have enough equity. You’ll only pay a single set of closing costs, and you usually lower the monthly payment for your primary mortgage as well.
3Can I do a budget kitchen renovation?

Absolutely—just consider the reasons you’re renovating. If you’re simply tired of your existing finishes, things like painting your cabinets or replacing a faucet can make a world of difference. But if you’ve got broken appliances, or a layout that makes it downright tedious to cook, you might be better off saving up toward your dream remodel. “I try to gauge my clients’ budgets against their needs and guide them accordingly,” says Elle H-Millard, CKD, a certified kitchen designer in Carmel, Indiana. “If they can scrap away enough money for their dream kitchen in the near future, I usually tell them to hold off on the remodel until they can do it right. But if it’s clear it might take them 10 years to save enough, I usually try to scale back plans and work within their budget to deliver something they can start enjoying immediately.”
4How long will my kitchen remodel take?
As with cost, the timing will depend on the scope of your project. “The timing really falls on many schedules, including the contractor’s,” says H-Millard. An ambitious project that calls for moving or removing walls—or for changes to plumbing, electrical, or HVAC systems—is more complex. But even things like custom cabinets and countertops often require lead times to fabricate. Gilday Renovations, a contracting firm in Washington, D.C., says a total of about 10 to 12 weeks from start to finish is a good rough estimate for project length. But you’ll get the best sense for your own timeline once you’ve received line-item bids from contractors that specify exact material choices.
5Is there any one project I can do that will have a big impact on my kitchen?
Partner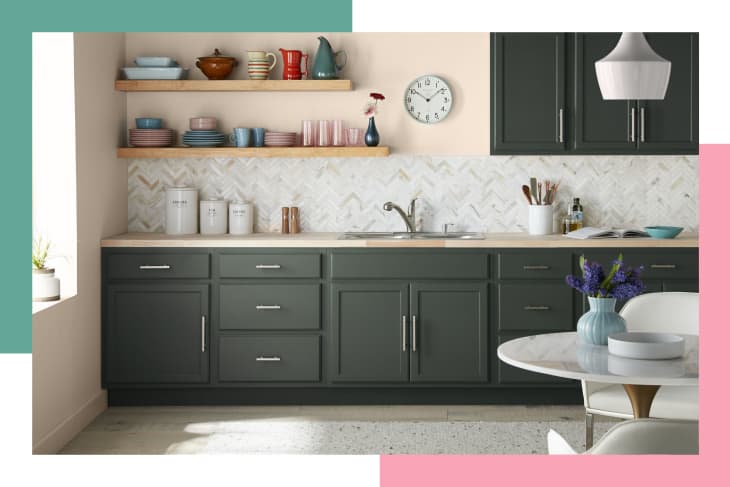
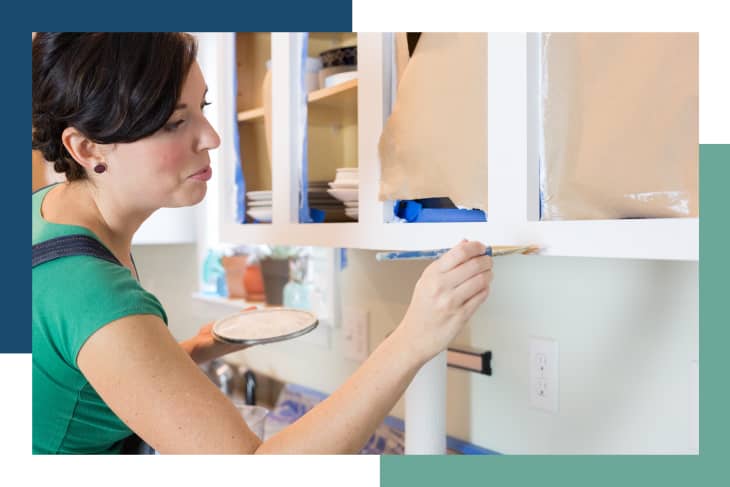
Yes, there certainly is! Changing the color of your kitchen or refreshing it with a new coat is a relatively easy project that will give it a whole new life. We get into it in great detail below—see questions 17 (for cabinets), 36 (for backsplashes), and 41 (for walls)—but if there’s one thing you need to know about how to do it, it’s that what type of primer and paint you use makes a big difference in the kitchen. Read what a professional builder has to say about priming and painting this high-traffic, high-humidity, high-heat room.
6Should I do a DIY kitchen renovation or hire someone?
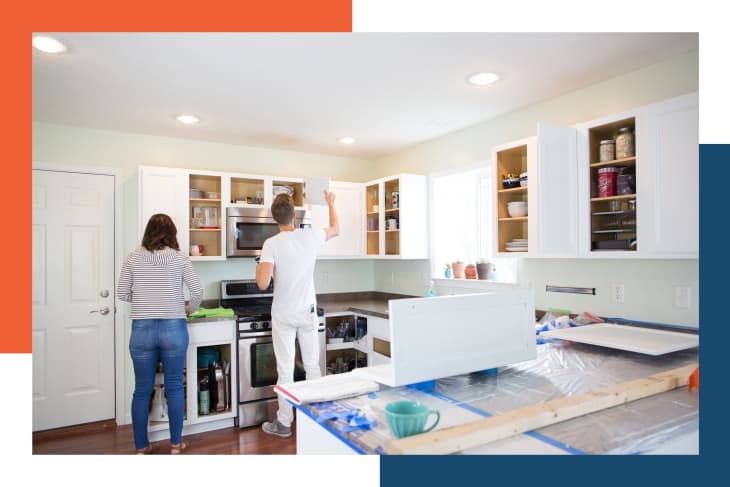
You’re the only one who can answer that question, but keep three things in mind: your DIY experience, your patience, and how big of a project you’re looking to take on. Full kitchen renovations often mean you’ll be dealing with most, if not all, of your home’s systems—including plumbing, electrical wiring, heating, ventilation, and air conditioning, not to mention appliances, flooring, cabinets, and countertops. “I find that a lot of my jobs actually come from people’s failed DIY attempts,” says H-Millard. “When people ask me up front for my advice, I usually say to try tackling a bedroom or living spaces first, because you’ll have a much higher rate of success.”
If you won’t be swayed and want to tackle some (or all) of the job yourself, start by calling your local building department or code enforcement department and asking which projects require permits, and which homeowners are allowed to do themselves. If your town allows it, and you feel up to the task, give it a try. “An E-designer can be a great option for those serious DIY types who have the tool skills, but maybe not the specific design knowledge,” says H-Millard. “The designer can work remotely to give you a really strong layout, and you can try to execute their plan on your own.”
7What kinds of pros are needed for each part of the project?
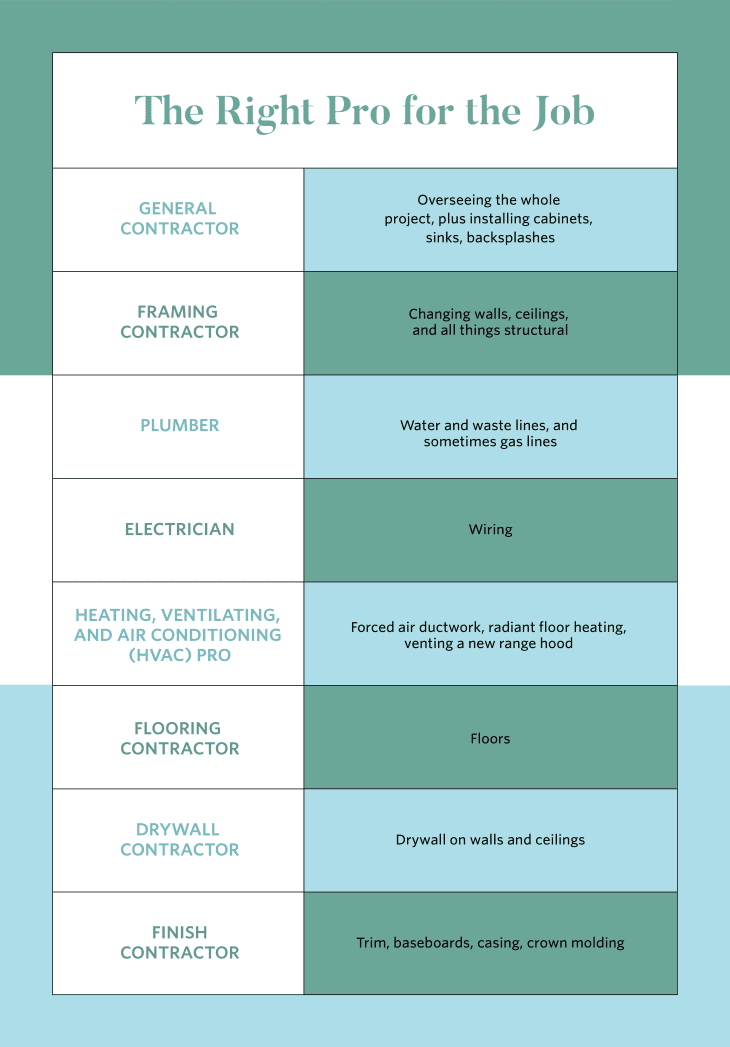
A general contractor is the easiest route to your remodel, because it’s the only kind of contractor who acts as an expert in all fields, or at least, knows which sub-contractors to hire for specific elements. If you’re hiring a mix of pros rather than relegating the task to a single contractor—a process often called acting as your own general contractor—get ready to be wowed by the number of sub-specialists in this field. A framing contractor deals with changes to walls, ceilings, and all things structural, and provides the framework for other pros to install windows and skylights. Electricians deal with wiring, and plumbers with water and waste lines. Some plumbers also deal with gas lines. Heating, ventilation, and air conditioning (HVAC) contractors deal with things like forced air ductwork, radiant heating in a floor, or venting a new range hood. Flooring contractors tackle floors, and drywall contractors deal with ceilings and walls, once all the unseen mechanical work is complete. Finish carpenters install trim, baseboards, casing, and crown moldings. Painters… well, you can guess. Often, a general contractor, or even a skilled handy-person, can tackle installing cabinets, backsplashes, or sinks, though a plumber sometimes makes the actual final plumbing connections. As daunting as it can be to find each of those pros, managing their timing and making sure they communicate is even harder. One missed instruction on your end can mean that a floor gets installed before radiant heating has gone in, or a tile backsplash is set before you’ve wired for outlets behind your counters. It’s important to consider all of this when deciding whether to act as your own general contractor.
8How do I find reputable pros?
Online referral services like Thumbtack, Angie’s List, and HomeAdvisor are all great places to start. Generally, these services perform background checks and allow user reviews, and some even double-check licensing and insurance of the registered pros. Read the fine print to find out how thorough each service is, and what, if any, recourse is offered for problems that arise. Referrals from friends and family are also a great starting point, but make sure to check in with services like the Better Business Bureau to look for consumer complaints or past litigation. If you work with a designer or architect, they’ll often have pros they recommend, but make sure to do your own digging, too. In addition to looking for infractions, ask any pro for several references. When you contact them, ask not just the obvious—like whether the pro actually finished the job—but also inquire about how close the pro came to their initial estimates for time and expense, whether the work has held up well, how involved the owner or boss was with the day-to-day work, and whether there were any issues with the crew or subcontractors, since those are the people who will actually be spending the most time in your home.
9In what order should I renovate my kitchen?
If you plan on using a designer, they can help dictate the order of events. “Every expert in this industry says to start with their field, but a good designer can actually save you money before you even pick a contractor,” says Jennifer Bertrand, an accredited kitchen and bath designer who has hosted design shows on both HGTV and Lifetime. “We do our homework, we know the questions to ask, and we can get you a detailed bid that’ll avoid surprises and help you know where to put your money.” If you choose a general contractor, they’ll dictate the order of renovations. If you go the DIY route, this is the rough order of events:
– Demolition
– Framing
– Electric, plumbing, and HVAC
– Drywall
– Flooring
– Cabinetry and countertops
– Backsplashes and sinks (wall tile and backsplashes sometimes go in before cabinetry)
– Plumbing follow-up to connect the sink, dishwasher, and ice maker (a gas range can be hooked up here too)
– Finish carpenter
– Painter
– Cleaners
This order can vary considerably, depending upon your budget and design plan. If you’re keeping your existing cabinets, for example, you may want to wait until your new countertops and backsplash are in before installing your flooring. Or if you’re refinishing your existing hardwood floors, you may want to do that well ahead of other parts of the project, given how much dust you’ll kick up in the process. You can also save it for last, so the floors won’t be damaged when other elements go in—but you’ll almost certainly need to pay for a professional crew with experience in renovation cleanup to come through your house at the end.
10Do I need a permit to remodel my kitchen?

According to the Federal Emergency Management Agency, (FEMA) most remodeling projects require at least one permit before work can commence. But even though building codes are written for a national, or international, audience, they’re only adopted and enforced locally. Call your town building department, also sometimes called a code enforcement department or office, before you hire a contractor or pick up a hammer. While some people grumble about the tedium or added expense of permits, it’s the best way to make sure the work performed by you, or your contractor, is safe. Even if the work is done perfectly, failing to obtain permits can result in fines or a stop work order from your town. It can even potentially block you from selling your house in a few years, if your town suspects illegal work was performed without its knowledge—far more inconvenient than just sorting out the paperwork to begin with.
11How do I design a kitchen remodel?
The National Kitchen and Bath Association (NKBA) certifies design pros and maintains a registry of nearly 13,000 experts across the country. It also offers five levels of certification, so you can find a pro at a budget that pairs well with the cost of your actual remodel. You can also search online for designers who work remotely, often called E-designers; they can help save on costs but still provide you with a framework to take to a contractor. Big retailers including Home Depot, Lowe’s, and IKEA also offer free design services. Naturally, those services include products sold at the respective retailers. IKEA also offers free remote consultation and design sessions online.
There are hundreds of free and paid apps and websites that let you tinker with your kitchen design, too. SketchUp is a free program with peer-to-peer support and renderings, so if another user uploads a design you just love for a kitchen island, you can use that same element in your own design. Punch! Software Home Design Studio is paid software with an optional content pack of kitchen-related elements. Apps also exist for the smartphone, of course, such as Planner 5D and Home Design 3D, which are both available for iPhone and Android. Many of these smartphone apps are free with in-app purchases, but keep in mind that you’re a little limited by the size of your phone screen.
12What measurements do I need to know?
All of them! And then a whole host of measurements you’d never think would matter, too, like the distance from your open dishwasher door to the nearest exit. The NKBA has had standards and guidelines in place for many years, including door and aisle clearances, counter depths for seating, and measurements on landing zones for dishes and hot objects. A designer can help with any and all of them. If you’re attempting to tackle the design yourself, check with your town building department about any safety and code requirements, which often stipulate things like the maximum distance between outlets or minimum clearances around an island. Next, look at the measurements for your new appliances, since they offer less flexibility than cabinets. Build in space for those appliances, and remember that each will need a small clearance on the sides. Don’t forget to factor in things like cord and hose lengths for dishwashers, ranges, and refrigerators. Custom cabinetry is built for a precise space, so you’re always guaranteed a perfect fit—but even stock and semi-custom cabinets can get you very close to a perfect fit, since any small gaps can be filled with trim by a carpenter.
13What else should I know about my kitchen before I get started?

The most important thing to remember is that kitchen renovations are expensive, difficult, and stressful, but ultimately worth it. “Consumers overwhelmingly report a sense of happiness after completing a kitchen remodel,” says Jessica Lautz, vice president of demographics and behavioral insights for the National Association of Realtors (NAR). The group surveys homeowners and asks about their experiences embarking on different household remodeling projects, compiling satisfaction into an index it calls a Joy Score. “Complete kitchen renovation is one of the only projects in our survey to earn a perfect Joy Score of 10/10,” Lautz adds.
14I rent. Which of these things are for me?
Renters have two additional considerations to make before embarking on a project: what your landlord will allow, and what improvements are worthwhile in a rental. Landlords may balk at the notion of allowing you to gut your kitchen or blow out a wall, but some may be totally open to the idea of allowing you to paint the existing cabinets, replace door hardware, or even put in a backsplash. Ask, and get permission in writing, before you start the project. Some landlords may even be open to the idea of subtracting material or labor costs from your rent if the improvement will allow them to charge more rent in the future. Because many of these projects can be expensive, you’ll have to decide for yourself what’s worth a splurge if you’re only going to be in the rental for a few years. Peel-and-stick tile backsplashes, fun knobs and door hardware, and floating vinyl plank flooring are all good rental options because they can be removed before you move out—just be ready to do some sanding and painting if you opt for the backsplash (though that’s still a lot easier than chipping out tile adhesive).
15How much value will a kitchen renovation add to my home?
Value added, which is commonly talked about in terms of return on investment (ROI), is as fickle as the whims of the real estate and design markets. “No project earns a 100 percent return on investment,” says Lautz of the NAR. “But it’s not just about getting back every penny you put in. In addition to loving your home more while you live there, a remodeled kitchen can really make your listing sparkle online when you do go to sell.” According to 2019 survey data from the NAR and NARI, you should expect a 59 percent cost recovery for a complete kitchen renovation, and a 52 percent recovery for a kitchen upgrade.
16Are there any upgrades that aren’t worth it?

“I usually like to say that you almost never regret spending a lot on a major kitchen renovation, but you might regret not getting everything you wanted,” says H-Millard. That said, H-Millard acknowledges the need to work within a budget, and stresses the importance of consulting with a designer who can help you make those tough choices. “If I were working on a tight budget in the kitchen I would forgo custom cabinetry, while areas I would not skimp on are appliances and countertops,” she says.
All About Cabinets
17How do I renovate kitchen cabinets?
If you’re not replacing your cabinets, the choices are dictated by what you currently have. Solid wood cabinets offer the most in the way of options. You can replace the hardware or the doors, paint them, or sand, stain, and reseal the doors and frames (also called refinishing). You can also retrofit wood cabinets with aftermarket options to give your current kitchen a more upscale feel. Rev-A-Shelf is one company that makes pull-out garbage and recycling cans, pot and pan holders, and even pet food bins, all of which come on their own gliding tracks and are designed to fit inside your existing cabinets.
18How do I paint my cabinets? Can I leave the doors on?
Generally speaking, any cabinet can be painted—but if yours are in bad shape, with dangling doors and warped cases, it may not be worth all the work. If you opt to paint, it’s easier to take the doors and hinges off the cases than it is to paint around the hardware. For wood cabinets that are in good shape, start by removing the doors and hardware, including the hinges. Sand the cabinet frames and both sides of the doors with 100- or 150-grit sandpaper, then again with 180- or 220-grit sandpaper—the finer the paper on the final sanding, the smoother the finish. Use a damp rag to wipe away any sawdust and let the cabinets dry. Apply a single coat of primer and two coats of paint, allowing each layer to dry. Once the final coat has dried, reinstall the hardware, and mount the doors back to the frames.
Composite or laminate cabinets can be painted as well, following the same procedure as with wood—but make sure to use a primer specifically formulated to help paint adhere to the slick surface of laminate, referring to the instructions as to whether or not you should sand. Metal cabinets usually have permanently installed hinges, so you’ll need to leave the doors in place when you paint these. Make sure to use a paint that’s formulated for metal.
19How much time will it take to paint my cabinets?
Partner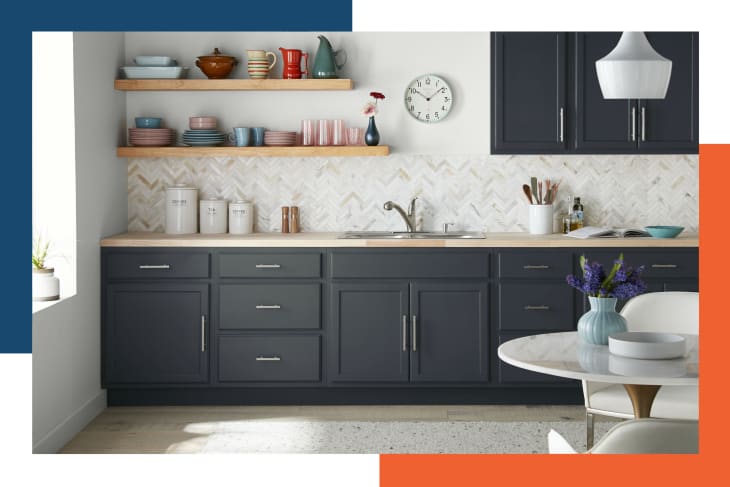
Plan on this job taking a week to do properly. Every kitchen is unique, of course, and if your cabinets have extensive detail, the priming and painting steps will likely take longer. But for most kitchens, this is your timeline:
Day 1 — Prep your kitchen and work area. Protect all the surfaces around your cabinets, remove hardware from your cabinets, and lightly sand your cabinets so they’ll have a good grip.
Day 2 — Fill in any dents with wood putty and then prime your cabinets. You can paint your first coat today once your primer is dry.
Day 3 — Paint your second coat.
Day 4 — Return your hardware to the dry cabinets. Don’t reinstall your cabinets today, though; let them hang out for about 12 hours (overnight) so they are thoroughly dry… even if you’re using paint marked as “fast-drying.”
Day 5 — Reinstall your thoroughly dry cabinets. Read more about planning your project here.
20How do I pick my cabinet color?
There are no hard and fast rules about cabinetry color—just consider which kitchen elements are most important to you, then make choices about those elements first. If your kitchen fantasy involves an artsy, intricate backsplash, or bold, colored appliances, and you view cabinets as a practical necessity, you might consider sticking with more traditional cabinet colors, like white or stained hardwood. But if you’d like the cabinets to be the star, you might lean toward a bolder paint color.
21What materials do I need for this project if I’m doing it myself?
Partner
You’ll need construction paper to protect floors, painter’s tape, a screwdriver to remove hardware, wood putty and a putty knife to fix dents, small buckets for paint so you can move around easily, paintbrushes (one for primer, another for paint; add more if you’re working with other people), primer, paint, a paint cleaner to clean splatters and mistakes, and garbage bags for cleanup. Read more about planning your project here.
22If I hate my cabinet doors, do I have to replace the whole cabinet?
If the cabinet frames and cases are in good shape, there’s no need to replace them. Companies like Fast Cabinet Doors and CabinetNow both make custom doors in a huge number of styles and ship directly to your house. Most of these services offer your choice of door style, as well as wood species. Some will even paint the doors for you, though you’ll typically be limited to the color options from a single paint manufacturer. You can usually order samples to make sure you select the right finish.
Follow door sellers’ directions to determine which type of doors you currently have. These can range from inset, which sit inside the surrounding frame of the cabinet; half-overlay, which slightly overlap the face frame of the cabinet; or full-overlay, which almost completely cover the face frame of the cabinet. Order doors of the same style as the ones you already have to ensure they’ll open and close properly with your existing cabinet frames. Expect to pay about $40 for an unfinished 12-inch-by-30-inch door with borings and standard hinges.
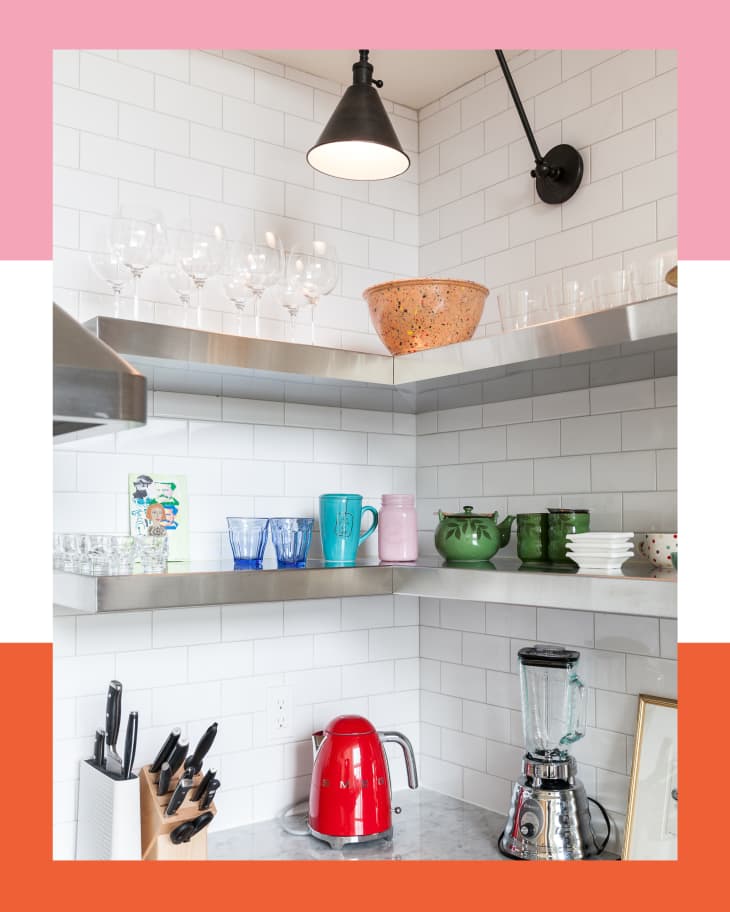
23Should I go for open shelving or not?
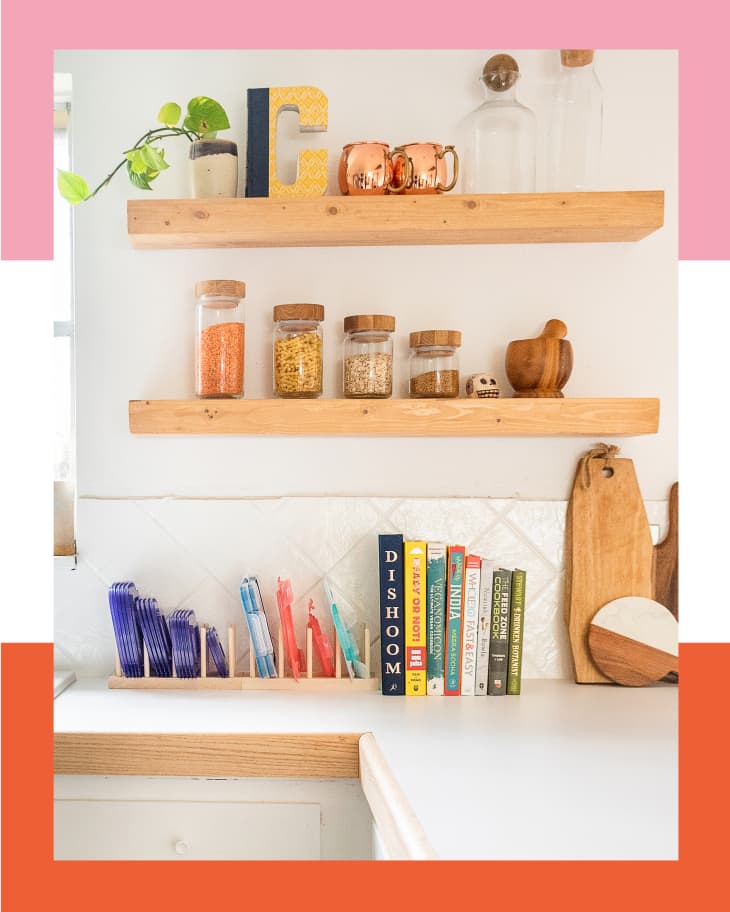
Open shelving can be a cost-effective and attractive alternative to some upper cabinets, but only if the space is used wisely. “Generally, I say open shelving is best for homeowners who tend to stay quite organized,” says H-Millard. “But even then I use it in targeted ways, like as a cookbook station or a chance to display pretty pieces. You don’t want it to become a junk station.” If you have a tendency toward letting objects pile up, H-Millard suggests adjustable track shelving, since the shelves can be reconfigured if you find that they’re becoming a catch-all for anything that won’t fit in a cabinet. Keep in mind that with any open shelving, grease and dust can accumulate much faster, since items aren’t safely housed inside a closed cabinet.
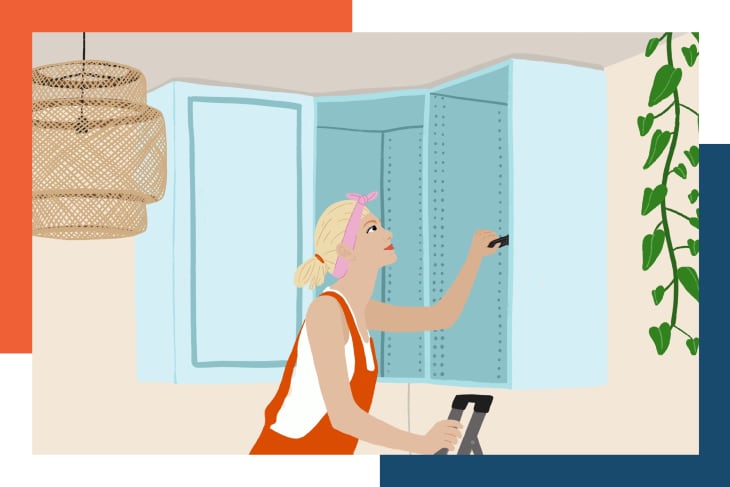
24Should my cabinets go all the way to the ceiling?
Only if you need them to, or prefer the look. “People assume that the more cabinet space you have, the better,” says Bertrand. “But I always remind clients that you’re probably going to fill any cabinets or drawers you have.” That’s not always a good thing. Practically speaking, if you upgrade to ceiling-height cabinets you can gain some valuable storage space—or you can potentially save money by buying fewer cabinets and leaving some space for open shelving if you like that look better.
25How do I maximize storage if I’m not changing the size of my kitchen?
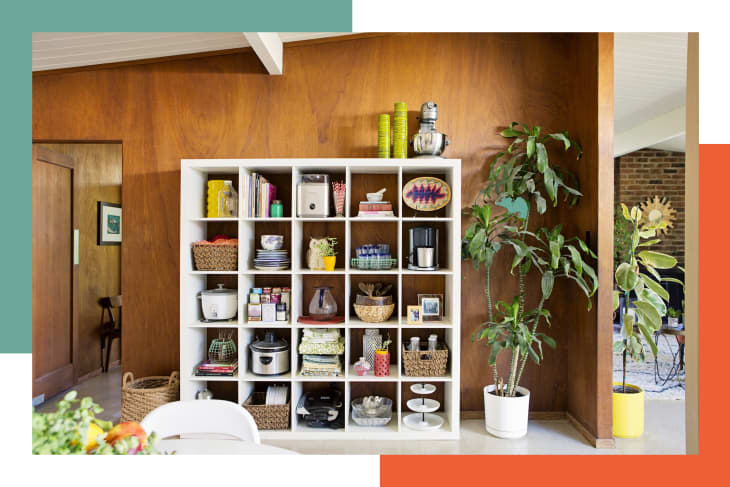
There are plenty of ways to get creative, or even redefine where your kitchen storage can begin and end. “One family I worked with actually rarely ate at their dining table, so I found a way to work seating into a new kitchen island,” says H-Millard. That kind of change allows for added cabinetry in a dining space, where you can store dishes, bar supplies, and glassware. “Even if you keep a dining table, I like to encourage full-height hidden storage right in the dining room,” says Bertrand. If you can’t swing the cost of custom cabinetry in a dining space, consider a standalone piece like a tall hutch or generously sized buffet, which can double as a serving space.
26Is it better to get cabinets with doors or with drawers?
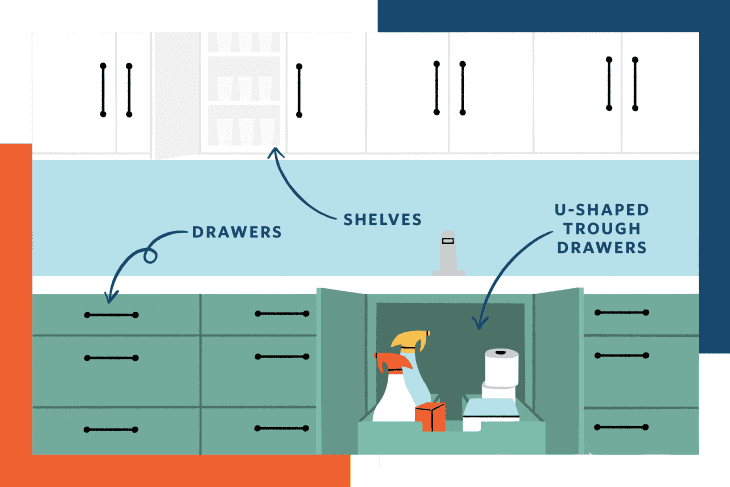
Ultimately, it comes down to what you’re storing, and how often you need those items. “Generally speaking, I almost always design kitchens with drawers in the lower cabinets and shelving in the upper cabinets,” says Bertrand. She even opts for U-shaped trough drawers beneath the sink. “That way everything is accessible and in plain view,” she adds.
27What if I live in a rental—is there anything I can do?
While it would be silly to install new custom cabinetry in your rental—even if your landlord did allow it—there are options that minimize damage to the space while letting you live more comfortably. If you have available wall space, open shelving remains very much in play. “You’ll need to secure brackets for the shelves directly into wall studs,” says Robert Degni, a general contractor in New York City, who has had many clients who rent. “But if and when you move, the holes left behind won’t be much worse than for, say, a wall-mounted TV, or even a heavy piece of artwork.” Check your lease or ask your landlord about policies pertaining to damage to walls. If your landlord is planning on painting before re-renting your apartment, they may be completely amenable to allowing the shelves. If they’re hesitant, you can even offer to patch the holes yourself before moving out as a condition of getting back your security deposit—a small can of spackling compound and a 2-inch putty knife will do the trick. Buffets, jelly cupboards, and hutches are also great options for adding extra storage space, and they can come with you when you move.
All About Countertops
28What are my countertop material choices?
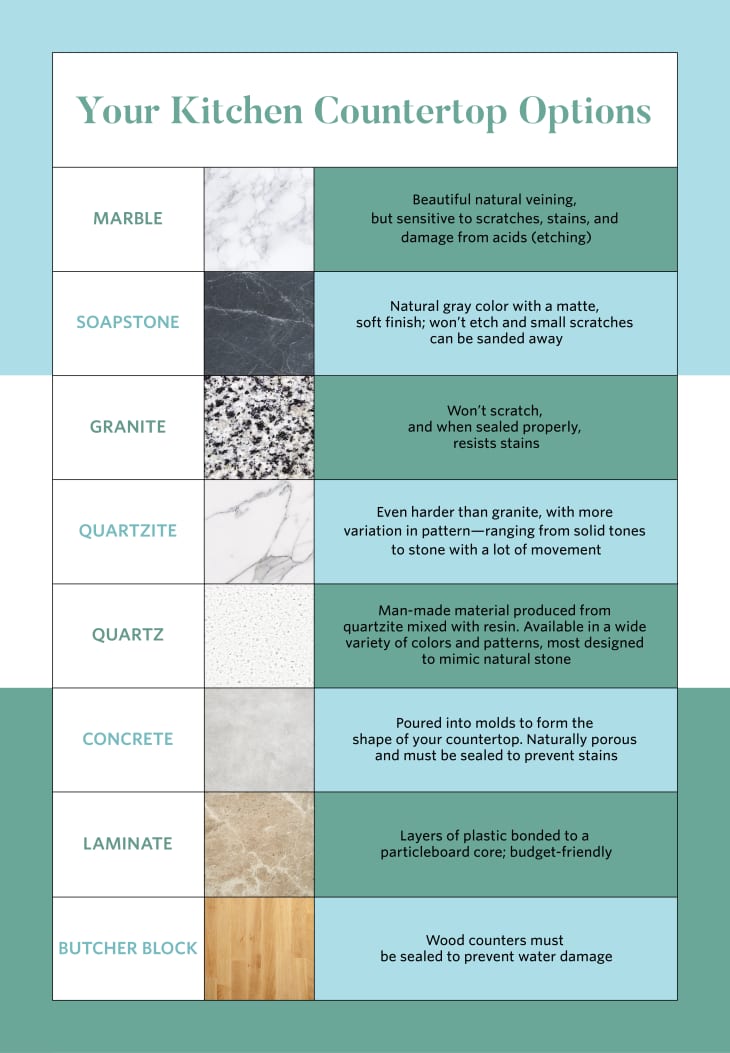
Countertops can be broken down into a handful of categories. Natural stones—such as marble and soapstone—tend to be naturally beautiful, with each slab offering a totally unique finish. But even with protective finishes, they tend to wear more than manufactured surfaces. Granite and quartzite are the exceptions—when sealed properly, they resist scratching and stains.
Quartz and solid surfacing, the latter of which includes manufactured products like Caesarstone and Silestone, don’t have the same natural variations as stone. But patterns in these manufactured products can appear random and unique, as with natural stone—and as a group, they tend to be more resilient than natural surfaces. Some incorporate other materials, like recycled glass, for aesthetics.
Concrete, which is poured into molds and allowed to dry and cure, is naturally porous. It can be sealed to protect it from spills. Laminate is a manufactured product, typically made of layers of plastic bonded to a recycled core (often particleboard); Formica is probably the best-known brand. Laminate tends to be significantly cheaper than other options, with patterns that can mimic anything from natural stones like granite and marble to a single, solid color.
From a design standpoint, quartz and marble remain the aspirational options. “Quartz really continues to take the industry by storm,” says H-Millard. “It’s low-maintenance, consistent, and it never needs to be sealed.” In some higher-end renovations, H-Millard says that marble remains the material of choice—particularly the white Carrara variety.
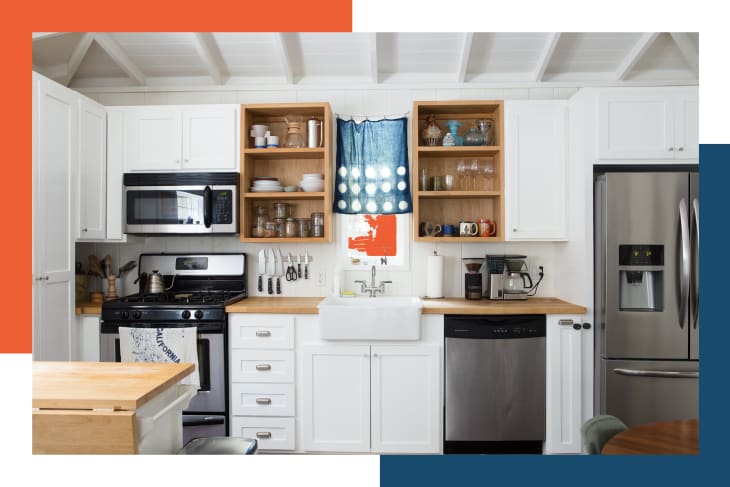
29What about butcher block?
Butcher block is made from many individual pieces of hardwood, held together with wood joints and/or ultra-strong adhesive. Historically, it had a reputation for being susceptible to scratches, burns, and water damage. But newer options have improved exponentially. “Modern butcher block is not what you remember from your grandma’s kitchen,” says H-Millard. “It’s become luxurious, with beautiful joints and different grains—it can evoke the feel of other natural surfaces like marble.” You can also cut directly on some newer options, though note that butcher block is prone to burns if you set a hot pan directly onto the surface. Sealants, which may need to be periodically reapplied, can prevent water damage—even around a sink.
30What’s the easiest to maintain?

For most people, quartz is the easiest to maintain. It never needs to be sealed; it resists burning, etching, and light scratches; and it’s stronger than granite. Granite can come close to matching the durability, but it does need to be sealed. Laminate surfaces are prone to damage from hot pans—and they can scratch—but the material never needs to be sealed. Plus, laminate doesn’t discolor (or “etch”), even when exposed to acids like lemon juice or tomato.
31What countertop material lasts the longest?
Any surface can last a long time—sometimes even indefinitely—if it’s properly maintained. (Granite, for instance, is likely over 1 billion years old by the time it reaches your kitchen.) Instead, consider your own comfort level with your countertops changing over time. “I always laugh when people fret over marble staining—marble literally worked for kings and queens,” says Bertrand. “It’s going to be fine in your suburban kitchen.”
All jokes aside, marble—like all natural stones—does start to show its age over time, appearing dull or worn in some spots. Some people embrace that look, or even prize the material for the natural patina it takes on with age. Bertrand acknowledges that the worn look is more widely accepted in Europe than it is in the United States, which might partially explain why kings and queens were content with the material. Quartz and engineered stone are the smart bet if you cringe at the thought of your counters aging before your eyes. They’ll retain their like-new look for years. Again, the same goes for properly maintained granite, or any laminate surface that you protect from damage. Natural stones like marble, soapstone, and limestone can all be sealed to fend off some wear. If you love the look of natural stone but aren’t sure how it’ll age, ask a friend who’s had the surface for a few years, or see if a designer can arrange for you to see it in the home of a former client.
32How do I pick the right color countertop?
First, remember that there’s not really a wrong color. “It comes down to whether you want a monolithic or cohesive look,” says Jonas Carnemark, CKD, CLIPP (certified living in place professional), who owns CARNEMARK design + build in Bethesda, Maryland. “And it’s also important to consider color, finish, and material at the same time.” For example, Carnemark notes that a polished black granite will show off water marks and crumbs; on the other hand, a matte white surface of nearly any kind will conceal water spots, but showcase things you do want to deal with quickly, like food stains. “Patterned surfaces like quartz or many natural stones have so much going on that they can conceal blemishes, too,” Carnemark says. He adds that many homeowners have a sense of the countertops they want at the start of the process—or at least, a feel for the space they want to create. If you’re having trouble deciding, and don’t find yourself drawn to a particular color or finish, it might be best to play it safe. White and black, with simple patterns, are two jumping-off points.
33Do I have to reinforce my floors for any of these options?
Technically, it’s not really your floors you need to worry about— it’s the joists beneath them. There’s a limit to the weight you can have in a single room without reinforcing framing, and heavy countertops of any kind can contribute. BuildDirect estimates that 1¼-inch-thick granite weighs 18 pounds per square foot, so if you’ve got 32 linear feet of countertops going in, that’s nearly 1,200 pounds of added weight. Solid wood cabinetry, cast-iron enamel sinks, and pro-style appliances all factor in, too. Only a structural engineer can answer precisely whether your remodel requires structural changes. As with other pros, you can find them through friends, family, or a referral service. Someone from your town’s building code enforcement department may even be able to recommend one or provide a list for your area, since they’re sometimes called upon for permitting inspections. According to HomeAdvisor, the national average cost to hire an engineer for this kind of consultation is about $500, but it might be less if your questions are limited in scope to just the kitchen. Of course, it may add to the cost of your remodel if you need the engineer to draw up plans for reinforcement, or oversee that work performed by a contractor.
34Are any of these countertops DIY-able?
In general, most DIYers will only be able to tackle laminate and butcher block countertops themselves. Both of these options can be cut to size using a circular saw—we’re talking regular butcher block here, not exotic hardwoods—and you can create a cut-out for a drop-in sink with a jigsaw. Keep in mind that premium butcher block options may be too thick to cut with a regular circular saw. Natural and engineered stones are almost always delivered and installed, but only once pros have come to your house to take precise measurements (a process called “templating”).
All About Backsplashes
35Why do I need a backsplash, anyway?
Practically speaking, a backsplash performs two functions: It protects walls from grease and water splatter, particularly behind a sink or stove, and provides a resilient surface that can stand up to periodic scrubbings. But a beautiful backsplash is also an opportunity to tie together the other finishes in your kitchen. “Your backsplash can really be eye candy and a chance to add in some textures and patterns,” says H-Millard. In an ideal renovation, your backsplash will serve all three functions.
36What are my backsplash choices?
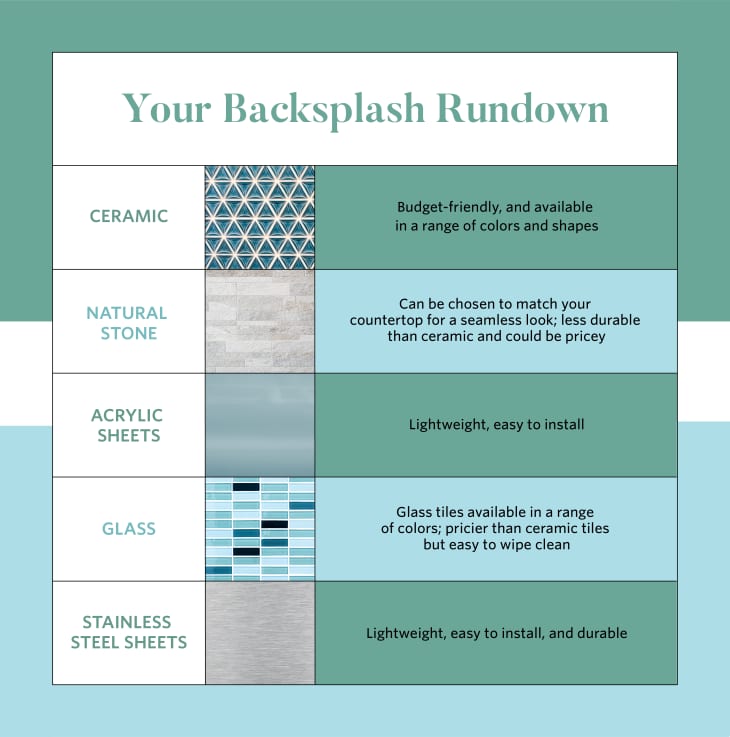
Ceramic and natural stone tile are probably two of the most popular options, but you can make a backsplash out of any material used for countertops, too, such as slabs of quartz or marble. Acrylic and stainless steel sheets are two more options, both of which are lighter and easier to install. Glass tiles offer yet another choice, with plentiful colors to pick from. “We love to use back-painted glass in large-format tiles,” says Carnemark. “They’re easy to clean, there’s no grout, and reflective options can pull light from other parts of the room and illuminate the area where you’re working.” While not inexpensive, Carnemark notes that the installation is so simple for these panels that the installed cost is usually in line with more premium stone tile installations.
If you want a backsplash that’s simply a continuation of your countertops, it’s best to buy it at the same time as your countertops for a perfect match. In addition to materials, you also have options when it comes to spacing between your tiles, as well as your grout color; these include the classics (white, gray, black) as well as more whimsical colors and even glitter grout. One more thing to consider? Whether you’d like your backsplash to end at the bottom of your upper cabinets, or extend all the way up your wall.
37Can I use paint for my backsplash?
Partner
You sure can, but Josh Wiener, builder and president of the contractor firm SilverLining, says to make sure your counters and appliances extend four inches up the wall at the back. When a pan bangs the wall behind it, the lip will shield the wall from getting dented. And when you spill something, it will keep the liquid from making direct contact with the wall itself.
If you do use paint, Wiener says it’s necessary to use an excellent primer that is moisture-resistant and paint that is proven to be cleanable. He also says not to use a matte finish, but a semi-gloss or above for durability and ease of cleaning.
38Can I install a backsplash myself?
If you’re opting for tile, especially ceramic, give it a try! If it’s your first time tiling, read up on the topic first. For simple ceramics that are large enough—think a 3-inch-by-6-inch subway tile—you can make the vast majority of your cuts with a manual tile cutter. You’ll still want a wet saw—which you can rent at a home center or buy for as little as $100—for any intricate cuts, such as those around outlets, or for cutting narrow strips to complete a course that ends just shy of a wall. Smaller tiles, which often come pre-spaced on sheets, are often more difficult to cut. You’ll also need to nail the spacing from one sheet to the next or else the entire sequence of tiles will be off.
When you go to grout, consider dirt and grime as you choose a color. White grout looks beautiful when brand-new, but it can stain over time. “When people do choose tile, I always encourage them to use epoxy grout,” says Carnemark. “You’ll still need to scrub occasionally to really get it clean, but it doesn’t hold onto stains the way traditional grout does.” Slab materials like quartz, granite, steel, glass, and acrylic all require specialty tools to cut properly, so unless you’re able to score the exact sizes needed to install, it’s best to leave those to the pros.
39How do I choose a backsplash color?
Sometimes it’s possible to pick out all of your finishes and fixtures up front, but it can be a lot to balance in your head at once. If the look of your cabinets, countertops, and appliances takes priority for you, consider the backsplash later on. “In my process the backsplash often comes after other key elements,” says H-Millard. “There are so many more choices than there are for things like flooring and cabinets—they just offer endless ways to customize color.” Unless you’re opting for a really exotic tile or a material that might take a while to ship, you can even wait until other parts of your kitchen are installed before making a final decision about a backsplash that’ll tie together your space and really pop.
40What about backsplash tile size?
Subway tile remains the de facto choice for lots of renovators. A standard subway tile is 3 inches by 6 inches and for many people, those proportions seem to hit the sweet spot. Subway tile can enhance without stealing attention from other elements, and the grout lines don’t dominate or make the room look too busy. In general, simpler patterns and larger tiles rescind into the background and can shift the focus to the full room, while smaller tiles, particularly those with an intricate, repeating pattern and contrasting grout lines, demand attention of their own. Size, color, and pattern need to be considered together—and the choice should be fun to make, not stressful! “The backsplash is really eye candy and exists for the purpose of creating visual appeal,” says H-Millard. “Consider something that’ll flank your range hood beautifully, and experiment with texture too, not just size and color.”
41Any rental-friendly backsplash options?
There aren’t a whole lot of options for a rental—unless your landlord is open to the idea of installing the backsplash, and you’re ready to foot the bill. Otherwise, one option to consider are peel-and-stick tiling sheets. These sheets are designed to spare you the step of applying mastic or tile adhesive to a wall. Instead, you apply sticky faux tile sheets, often made of resin, directly to the wall. Read the directions carefully—some sheets may damage a wall when you go to remove them. But you still won’t have to attack the wall with a chisel, as you would to remove traditionally set tiles. You can also consider less traditional options, like thin sheets of cork board cut to fit. No, it won’t hold up like ceramic tile or natural stone—but if you’re only in the rental for the short term, it doesn’t need to, either.
All About Walls
42What type of paint and primer are best for the kitchen?
Partner
Kitchens need primer that is marked as mildew-resistant. Their paint sheens need to be semi-gloss or above. Paints with gloss are easier to clean and harder to mark up. We explain how to choose the right primer and paint for kitchens in this article.
43Can I wallpaper a kitchen?
Yes, with a few caveats. Moisture is the enemy of most traditional wallpapers, so you’ll want to choose a variety made of vinyl, which resists damage from water. You’ll also first need to apply a mold-resistant layer of wallpaper primer, and use mold-resistant paste for the application. For an extra durable layer of protection, consider sealing the wallpaper with a protective finish, like acrylic varnish, or even covering the paper with acrylic sheets. Remember that with a bold pattern, a little can go a long way, so consider using wallpaper as an accent on a backsplash.
44What if I’m renting?
Peel-and stick-vinyl wallpaper is a great choice for renters, but they’re not the only ones who might benefit here. Unlike regular wallpaper, peel-and-stick wallpaper is easy to patch up in case of damage—if an individual panel gets ripped or stained beyond repair, you can simply replace it without having to start from scratch.
45What color should I choose?
Partner
“When choosing kitchen colors,” Amy Krane, architectural color consultant and founder of Amy Krane Color, tells us, “I would consider the style of the house and the materials chosen for the kitchen fixtures. Are the appliances stainless, colored, hidden with paneling and built-ins? Is the style country, eclectic, modern, or traditional? Will there be upholstered furniture in there like a sitting area, a breakfast nook, or bar stools with colorful seats? Those offer more opportunities to introduce color and pattern into the room which might influence you to go more sedate with cabinet and wall color while still getting your color punch in.”
Krane reminds us that hardware, plumbing, and lighting fixture colors should be coordinated, and that the largest plane of color will likely be your floor: “The floor color has to be taken into consideration in a big way. Wall and cabinet color can work to highlight a beautiful floor or mitigate the impact of a less than desirable one.”
The big takeaway is that all the colors in your kitchen are interdependent, and changing one shifts the whole palette. Remember this and choose colors you like, and you’ll have a kitchen you love spending time in.
All About Appliances
46Where’s the best place to put my appliances?
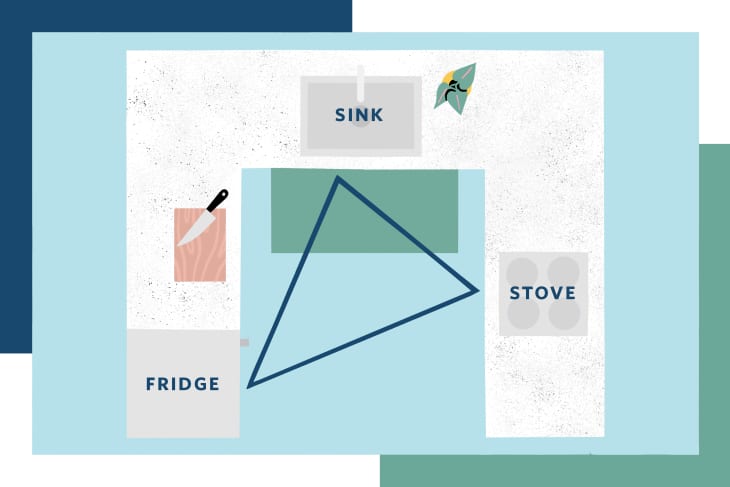
The old rule about forming a triangle between your range, fridge, and sink does still apply—but not at the expense of flow! “It doesn’t have to make the room feel archaic, and you’re not beholden to it,” says Bertrand. Instead, focus on how the kitchen needs to function. “If you find fridges unsightly, consider stashing yours away in the pantry,” says Bertrand. She also notes that covered panels, designed to blend in with the surrounding cabinetry, are a solid option for masking appliances. You can supplement the traditional triangle with an island outfitted with microwave drawers, an induction cooktop, built-in refrigeration, or a sink. Any of those options can help improve the flow of traffic in your space, since you’ll effectively be creating multiple work zones to prevent congestion.
47How hard is it to change an electric range to gas?
Most serious cooks favor gas because it responds instantly when you adjust the burner and it provides constant visual feedback on the level of heat hitting your pan. If you have gas or propane service at your house already, and an existing hookup where you want to install your new range, then the swap is fairly simple. Call your utility company or gas provider and inquire about having the line and valves tested before hooking up the new appliance. If you have gas service in another part of your house, say the basement for a furnace, but not in your kitchen, a licensed plumber can typically run a new branch line to the kitchen to connect the range. Expect to pay $256 to $790 for labor and materials, according to pricing data from HomeAdvisor, or about $15 to $25 per linear foot of pipe—the exact cost will depend upon the distance and complexity of tapping into an existing line.
If you don’t currently have gas service, you’ll have to install a propane storage tank and pay for delivery. You’ll also have the added expense of running the new pipes from the tank to your house. “A propane company typically works with the plumber to determine who will tackle which parts of the new line for a propane line running to your new range,” says Steve DiDona, a licensed plumber and owner of DMJ Plumbing & Heating in Brewster, New York. Just for the plumber’s portion of exterior and interior pipe, plus the connection, DiDona estimates an added cost of $1,500 to your project, plus whatever you pay to the propane company to install the new tank. The project can quickly climb into the thousands and is generally only cost-effective if you also want to swap out a dated furnace and water heater to more energy-efficient models that run on propane.
Instead of shelling out for a gas conversion, consider swapping out your electric range for an induction range. They use the same electrical connection as your old electric stove, but they boil faster and simmer more steadily than a gas range. You can find some induction options that aren’t much pricier than a traditional smooth-top electric range.
48Do I need a range hood?
Yes. (Usually.) If you’re averse to the idea, start by checking in with your town building department to see if you’re required to have one once you remodel. Next, check the specifications that come with your new range, assuming you’re buying one; you can find those online. The specifications will state whether or not a hood is required for that particular range. But even if it’s not required, it’s a great idea. Without one, every time you sear a steak or broil a piece of fish you could end up smelling the residual odors for days.
Range hood performance is measured in the cubic feet of air the hood can exchange, or move, per minute (abbreviated as CFM). If you’re installing a pro-style gas range or cooktop, add up the maximum output of all the burners, then select a hood rated at 1 CFM per 100 BTU output of the burners. So, for example: If you choose a four-burner range and each burner is rated at 15,000 BTUs (for a total of 60,000 BTUs), you’ll want a range hood rated at 600 CFM. Sound is generally measured in “sones.” That measure is best used as a comparison point between different models. Remember: The more powerful the hood, the louder it will likely be.
49Do my appliances need to match?
Ideally, yes. All of your appliances should be stainless steel, black stainless, or whatever other finish you choose. And if you’re exacting, you’ll want to get appliances from the same brand. Stainless steel is far and away the most popular finish, but not all stainless steel is identical. It comes from different sources, it’s sold in different grades, and different appliance manufacturers might have slightly different hues in the steel they use. “Matching finishes is a big deal,” says H-Millard. Buying appliances from a single manufacturer also ensures emblems and handles will match as well. Be mindful to stay within the same line—Frigidaire is different from Frigidaire Gallery, just as GE is different from GE Profile. You can buy your appliances in a “suite,” which ensures a streamlined look and can often help you save money by bundling, too.
50Is running a water line to a new fridge worth it?
There are two really good reasons to run a water line to your new fridge. First, nearly every refrigerator has built-in filtration, so it’s the perfect way to get filtered water without fussing with a pitcher. But many refrigerators also have a built-in ice maker, so you can get a never-ending supply without filling trays or buying ice in bags. “If you’re lucky enough to have an existing water line with a shut-off valve, then the connection will only cost about $150, including the materials,” says DiDona. “If you need to run a new line with valves, and have an open basement or garage beneath your kitchen, the project will usually cost about $450 including all materials.”
51How do I make my appliances match my cabinets?
If you want your appliances to truly blend into the surrounding cabinetry, high-end built-in models are really your only option. Built-in refrigerators and dishwashers from pro brands like Miele, Thermador, Sub-Zero, and Viking can typically be configured to accept custom wood panels designed to conceal the entire surface, minus the hinges. For cooking appliances, which can’t be outfitted with panels, you can get an understated look by opting for a cooktop and separate wall ovens. “An induction cooktop with digital controls blends right into the countertop,” says H-Millard.
52Where the heck do I put my microwave?
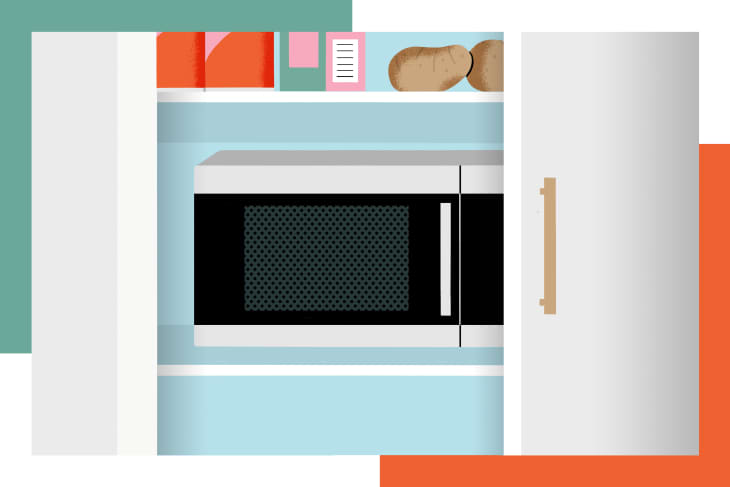
Almost anywhere—just not over your range. Sure, an over-the-range microwave seems like a double-duty problem solver at first glance. But you’re essentially opting to put the ugliest appliance in your kitchen right at eye level over your centerpiece appliance. On top of that, an over-the-range microwave is probably way bigger than you need it to be, since they’re designed to extend the full width of a standard 30-inch range. That’s especially true if you’re the type to just use the appliance for reheating a cup of coffee or a plate of leftovers. The good news is that a microwave can be stashed in a cabinet or even a pantry. Because these appliances don’t actually generate heat, you needn’t fret about damaging your cabinetry. “I always push clients to consider microwave drawers in an island as an alternative,” says Bertrand. “Otherwise, I say shove it in the pantry if you’ve got one!”
All About Sinks
53Should I do a single-basin sink or a double?
The choice comes down to how you do dishes and how much countertop real estate you want to dedicate to the task. A single-basin sink takes up less space, but often provides more room to work on scrubbing a large pan. Even though double-basin sinks are bigger, each basin tends to be smaller than the one basin found on a single-basin sink. But a double-basin does offer a few advantages. First, you can soak cookware overnight in one basin and still have a second basin free for other tasks. You can also fill one basin with suds and the other with clean water, so you can wash and scrub on one side and rinse on the other. Lastly, if you don’t have a lot of dishes in the first place, a double-basin sink outfitted with a small dish rack on one side might be ideal, since it can take up less space than a single-basin sink and a dedicated dish rack on the counter.
54Apron-front or drop-in sink? What about undermount?
Drop-in sinks (also called overmount sinks) tend to be the cheapest, while undermount and apron-front sinks can get pricey. Drop-in sinks have the distinct advantage of being a DIY-friendly project, provided your countertops are laminate or butcher block—you shouldn’t attempt to cut through natural or engineered stone yourself. But drop-in sinks all have a lip that wraps the perimeter of the sink and clings to the countertop. That lip makes it harder to wipe crud from your countertops directly into the sink, which is the primary selling point of undermount sinks.
Undermount sinks also tend to look a little more finished and refined, but they’re definitely not a DIY job. You’ll sometimes see promotions on countertops that include a free undermount sink with purchase. That’s an ideal option because you’ll get professional installation performed by the same company that’s measuring and installing your countertops and cutting out for the sink anyway. Apron-front sinks have a tall, visible front panel (the apron) that protrudes past the front edge of your countertops. They come in drop-in and undermount varieties.
55What about sink material?
For drop-in sinks, your choices tend to be limited to stainless steel, porcelain, and enamel, which is applied over cast iron or steel but looks very similar to porcelain. Solid porcelain is the most breakable, but enamel sinks can still chip—you’re just less likely to damage the metal core. Stainless steel sinks are the most common of any material. The thickness is measured by gauge; the lower the number, the thicker the metal. Stainless steel can scratch, and thinner gauges can even dent. Running water can be loud too, especially if the basin is deep—think about the sound of rain on a metal roof. With apron-front or undermount sinks, the choices include all of the options above and extend into premium materials like copper, zinc, and fireclay, which is like a hardened porcelain designed to resist heavier impacts.
56Should I get a pot filler?
Probably not. The problem with pot fillers is that they’re sold on the promise that you’ll never need to lug a heavy stockpot filled with water from the sink to your stove again. But in truth, you’ll still need to carry that same heavy pot from your stove to the sink when it’s time to drain whatever you’re cooking. If you’re gravitating toward a shallow sink and a lower faucet, a pot filler can make sense, since you’ll find it hard to fill a large pot with water under the faucet. Bear in mind you’ll need to wash that pot under the faucet when you’re done cooking. In short, a pot filler can save you exactly half a headache, but it’s not essential for every kitchen. Consider the added cost carefully. “Under ideal circumstances, like open walls and an existing water pipe nearby, installing a pot filler will cost about $300 for labor, and another $100 for the raw materials, not including the fixture itself,” says DiDona. “But if you splurge on a really high-end fixture, that piece alone can add another $500 or more.”
57How do I pick which kind of faucet to get?
Your faucet should blend form and function because it’s on full display, and probably used more than anything else in your kitchen. Finish options include stainless steel, chrome, brass, copper, and painted metals. Most bare metals are available in either a polished or matte finish. Polished surfaces tend to pop more, but matte does a better job concealing handprints and water spots. As far as function, high gooseneck faucets offer the huge advantage of providing clearance for cleaning large pots and pans, or filling a deep pot with water. Choose one with a pull-down spray arm to make it easier to wash dishes, but opt for a deeper sink to avoid accidentally getting sprayed. With huge variations in price, you should pick an option that makes sense in the kitchen you’re building. “In a premium kitchen where everything has to be impeccable, I urge people to look at the warranty,” says DiDona. “Faucets from premium brands might cost $1,000 or more, but often come with a lifetime warranty on the parts, so you know you’re covered for a drip that starts a decade after your renovation is complete.”
58Can I put a faucet in myself?
In many cases, yes! You should only drill the hole(s) yourself if you’re going into a wood or laminate countertop. Otherwise, have the countertop fabricator pre-drill for either a one-hole or three-hole faucet. This doesn’t apply if you’re installing the faucet directly into a pre-formed hole in your sink, or if you’re simply swapping out an old faucet for a new one. The process is straightforward (at least, in theory). You’ll connect the two water hoses to plumbing supply valves, as well as a retaining ring to fasten the faucet to the countertop; then, you’ll tighten each with a pair of slip-joint pliers. If you have a deep sink with limited access to the underside of the countertop, splurge on a plumber. “Those complex jobs just require specific tools that most homeowners don’t have, or won’t ever use again—like a basin wrench,” says DiDona. He also advises hiring a pro for high-end faucets to ensure a perfect installation. “If you’re doing a high-end remodel, you don’t want to install a $3,000 faucet yourself only to end up with water leaking into the cabinets below and causing damage.”
All About Lighting
59Is under-cabinet lighting expensive?
No, but the installation can be. Generally, if you’re adding under-cabinet lighting as part of a full renovation, having an electrician install receptacles in a concealed spot or having them hardwire the lights directly to a switch isn’t a huge added cost. Depending on the complexity, you should expect to pay $50 to $100 per hour for the work of a licensed electrician, according to data from HomeAdvisor. Some electricians may charge a visit fee or a higher rate for the first hour of their work. As far as the specific type of lighting to get, “recessed LED strips are a great choice because they provide task lighting in a certain spot but can double as accent or atmospheric lighting,” says Carnemark. If you’re installing the lighting after the cabinetry is already in, you’ll be limited to plug-in options.
60How big should the lights over my island be?
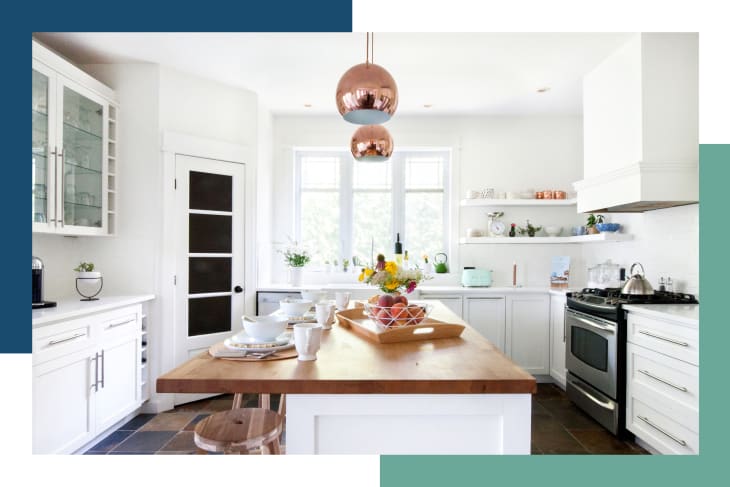
That really depends on the rest of the lighting in your kitchen. “The only rule you need to follow is to have nice, even light throughout the space,” says Bertrand. “But I love to go for a large, dramatic ceiling light installation in place of pendants over an island.” Other designers share this philosophy. “I like to think of a central fixture as an art piece,” says Carnemark. “It should light the surface below, but some fixtures also uplight the ceiling and reflect light throughout the room.”
61What lights should I pick if I have a dark kitchen?
The first question to ask is whether or not your kitchen needs to be dark. “I always try to work in natural light first, then supplement,” says Bertrand. “Sometimes that’s working in a skylight, or a solid bank of windows at the end of a galley kitchen.” Once you’ve maxed out your natural light, think of how to layer light across your space. “The idea is really to have different sources of light that can work independently or in tandem,” says Carnemark. He uses a combination of subtle task lighting and attractive fixtures, and always includes an option to flood the space with bright light for cleaning. “When you have multiple pieces that pair well together, and walls that reflect the light across the space, it’s just so much more pleasant to work in than when you have a single hot fixture in the middle of your ceiling, lighting the entire area,” he says.
All About Flooring
62What’s the most durable floor type for a kitchen?
“Durability” means different things depending upon who lives in your house. Wood can scratch, and the finish can wear down, but hardwoods like oak, maple, or cherry are hard to dent. Tile— even in natural stone options—won’t scratch like wood, but a single dropped skillet can chip or crack a tile entirely. And if a tile does break, it can be tough to replace in a seamless way—you’ll need to have extras on hand to ensure a perfect fit, and you’ll need to match the grout color when you install the new tile. “I’d say the split is about fifty-fifty between clients who favor wood or tile,” says H-Millard. She also notes that while tile can be beautiful, solid hardwood or high-quality engineered hardwood can both be sanded down and restained for a fresh look. “You really want the floor to be something that you can love at 50, 70, or beyond,” she says.
63Are heated floors worth the cost?
In short, it comes down to what’s above them, and what kind of heat you opt for. Heating is either hydronic—which circulates heated water, not unlike a radiator or hot water baseboards—or electric, which relies upon electric pads laid beneath your floor. Hydronic heating can outright replace ducts or radiators as a primary heat source for your kitchen, but electric heated floors are more often used to take the edge off a chilly floor. Hydronic heat can cost $10,000 or more in some applications, since it involves intricately laying flexible hot water lines. An electric heated floor can be installed by a skilled DIYer, and the mats themselves can cost $10 per square foot, or even less. “I think a heated floor is a high-priority item in a kitchen with a tile floor,” says H-Millard. “Otherwise, it would be one of the first items I’d cut.”
64Shouldn’t I put the floors in before the cabinets?
Nope, and there are a few good reasons for that. First, consider the obvious: There’s no benefit to installing flooring any sooner than you need to, since all you’re doing is increasing the likelihood that it’ll become damaged before your remodel is complete. Next, not every remodel is a gut job. If you’re keeping your existing cabinets, it doesn’t really make sense to take them out temporarily, only to install a new floor beneath them. Instead, install the floor toward the end of your remodel, and butt the new floor up against the existing toe kick on your cabinets. Conceal the gap with molding.
65What if I just want to make the floor I already have look better? Is there anything I can do?
Sure! How you can do that depends upon what you have. Wood that’s lost its luster can be treated with restoration products from brands including Bona, Rejuvenate, or Minwax. These products are designed to fill scratches in a polyurethane topcoat. If those don’t cut it, consider screening. This process, performed by a professional, lightly agitates the existing topcoat of polyurethane on your floors, and allows a new coat to be poured on top; this eliminates heavier scratches and blemishes. It’s much simpler than a full refinishing, since you’re not sanding off the entire finish and reapplying stain. But since it only addresses the polyurethane topcoat, it won’t get out any dents or damage that extend all the way to the wood. A full refinishing is a big project, but still usually a lot cheaper than installing a new floor. Expect to pay $3 to $8 per square foot, including labor and materials, according to HomeAdvisor. The bigger and simpler the job, the less you’ll generally pay per square foot.
For tile floors, you can replace an existing cracked or damaged tile if you have an extra. You’ll need to chisel out the old tile first, then sand off any tile adhesive on the floor so the new tile will sit plumb with those around it. Once it’s set, you can re-grout any grout you chiseled out in the process.
All the Rest
66Phew, that was a lot. What if I don’t want to do a full reno? What pieces should I do first? What smaller projects could I do instead to feel like my kitchen is different?

Don’t feel like a full renovation is your only option, especially if your space is actually functioning well for you. “If you’re on a tight budget and want to get a big impact without spending a lot, I always start by telling people not to change the layout,” says H-Millard. “Then liven things up by painting your cabinets, changing light fixtures, and replacing hardware,” she adds. Another option is to make a dramatic change to an existing island. “Wrap it in beautiful new trim, add some corbels, paint it, or replace the countertop,” she says. That one change to a major focal point can make you feel like you’re in an entirely new space.
67How do I survive a kitchen remodel and live my life without a kitchen for 10 to 12 weeks?!
The best thing you can do to guard against being without your kitchen for too long is to map out your renovation carefully so you can minimize downtime. If you’re working with a general contractor and designer, they should handle this part of the process—but it doesn’t hurt to check in and remind them of classic trouble spots. The same holds true if you’re doing your own remodel. Those trouble spots include:
– Permits: Make sure to learn the lead time your town inspector needs, and apply for permits early.
– Flooring: In addition to the time it takes to ship, solid wood flooring needs to acclimate to its surroundings for two weeks before being installed. Order early.
– Cabinets: The lead time to order cabinets can be six weeks or longer. Measure carefully and order early.
Aside from minimizing the time your renovation will take, set yourself up to stay sane elsewhere. Create a workstation with a microwave, toaster oven, or other countertop appliances in a dining space, so you can still prepare meals. Use paper plates and napkins, or buy a few bins to transport dirty dishes to another sink in your house, such as a laundry room or basement (the faucets on most bath sinks make it difficult to wash anything larger than a plate). And if you plan on keeping your old fridge, move it to its new home in the basement or attached garage before beginning work, so you can still store food while your kitchen is torn apart. Beyond that, find small ways to keep your cool. Pick a special night to have dinner out each week—even if it’s at a diner—or splurge on an overnight stay in a local hotel to get away from the dust once in a while.
68How do I make sure I’ll still like my kitchen in 10 years?
Kitchen renovations are expensive, messy, and stressful, so it’s only natural never to want to embark on the process again. But don’t let angst about future taste changes hold you back from making bold choices now. “Human beings naturally crave change over time,” says Bertrand. “So don’t let that keep you from taking risks right now.” Aside from aesthetic choices, it makes sense to invest in functionality that’ll help the space work for you for years… even if it means spending a little more. “You’ll almost never meet someone who wishes that they spent less money on their kitchen remodel when all is said and done,” says H-Millard. But she says the opposite happens too frequently. “Things like heating a tile floor, working a second sink into an island, or paying a premium for connected appliances that can improve functionality are all things that can help your remodeled kitchen stand the test of time.”