
This 15-Minute DIY Made My Living Room Sofa Look Like a Million Bucks (It’s So Vintage!)

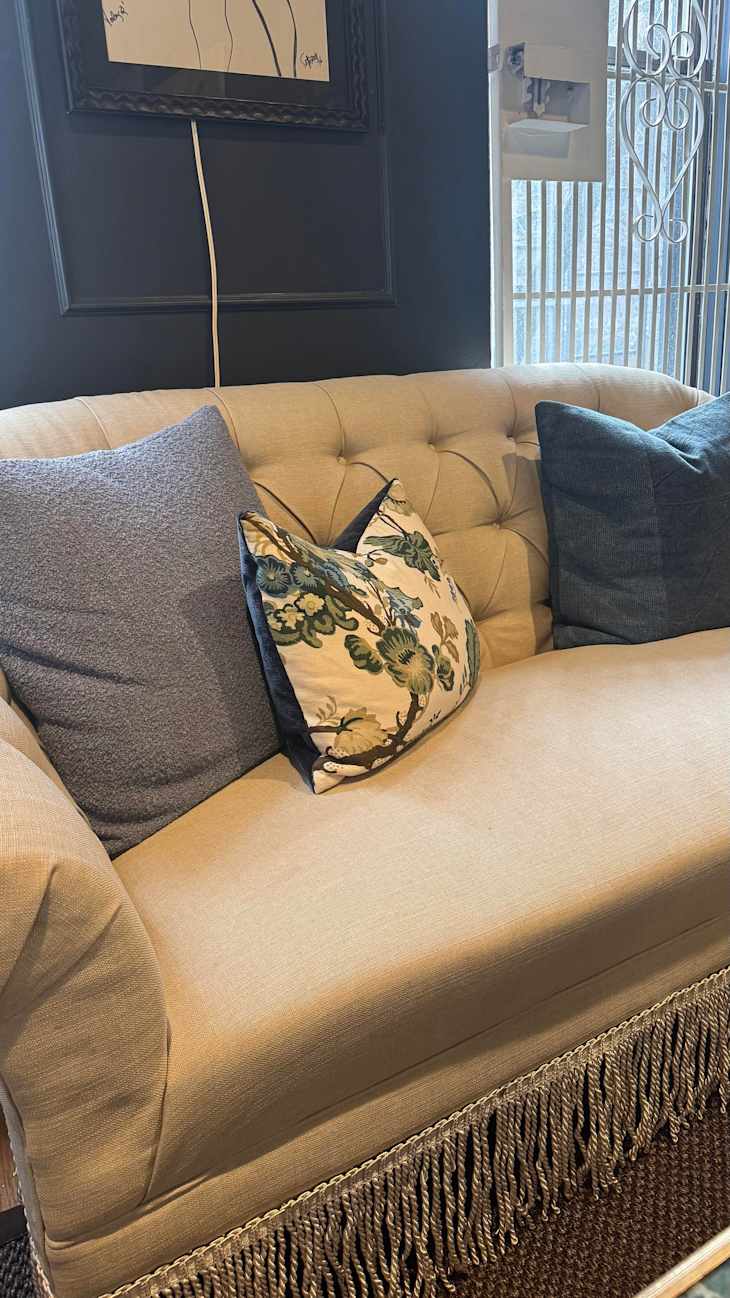
I’ve always loved fringe as a decor accent, especially on furniture. While I’ve come across many beautiful sofas with bullion fringe trim over the years, most of these pieces have fallen outside of my budget — a few even teetering on five figures! So when shopping for a new couch a few months ago, I had an idea: Why not buy an affordable sofa and add my own fringe onto it?
This simple, tufted sofa from Wayfair caught my eye, and it arrived at my doorstep in just a couple of days. The exact style I ordered is now out of stock, but you can find many similar pieces. I wasn’t crazy about the nailhead border around the bottom of the piece, but that didn’t actually matter, as I knew I’d be covering it up with the fringe trim anyway.
Once the sofa was assembled, I turned to Google in search of a DIY fringe trim tutorial. I was in luck: Lauren Shaver, the author behind one of my favorite DIY blogs, Bless’er House, had posted the instructions for a similar project, and I was eager to follow them given that her own sofa had turned out beautifully.
Using Shaver’s guidance, I measured the distance from the nailhead border to the floor to determine what length of fringe trim I should order. Note that most people would be able to base this off of their sofa leg height, but I had to go a bit higher to cover the nailhead.
I decided that while bold-colored fringe trim can look beautiful, I was most comfortable opting for something neutral since the rest of my living room is plenty vibrant already. After a quick search, I found 15 feet of 9-inch-long beige trim on Etsy and placed my order immediately.
Installing the trim, the idea of which daunted me a bit, was actually incredibly easy. Shaver noted in her tutorial that the process took her just 15 minutes, which seemed shocking to me initially, but was accurate. Using the $6 straight pins I ordered at Shaver’s recommendation, I tacked the fringe trim to my sofa with ease, placing it where I wanted it to go around the sofa base’s perimeter and sticking in the pins at intermittent intervals to secure it in place.
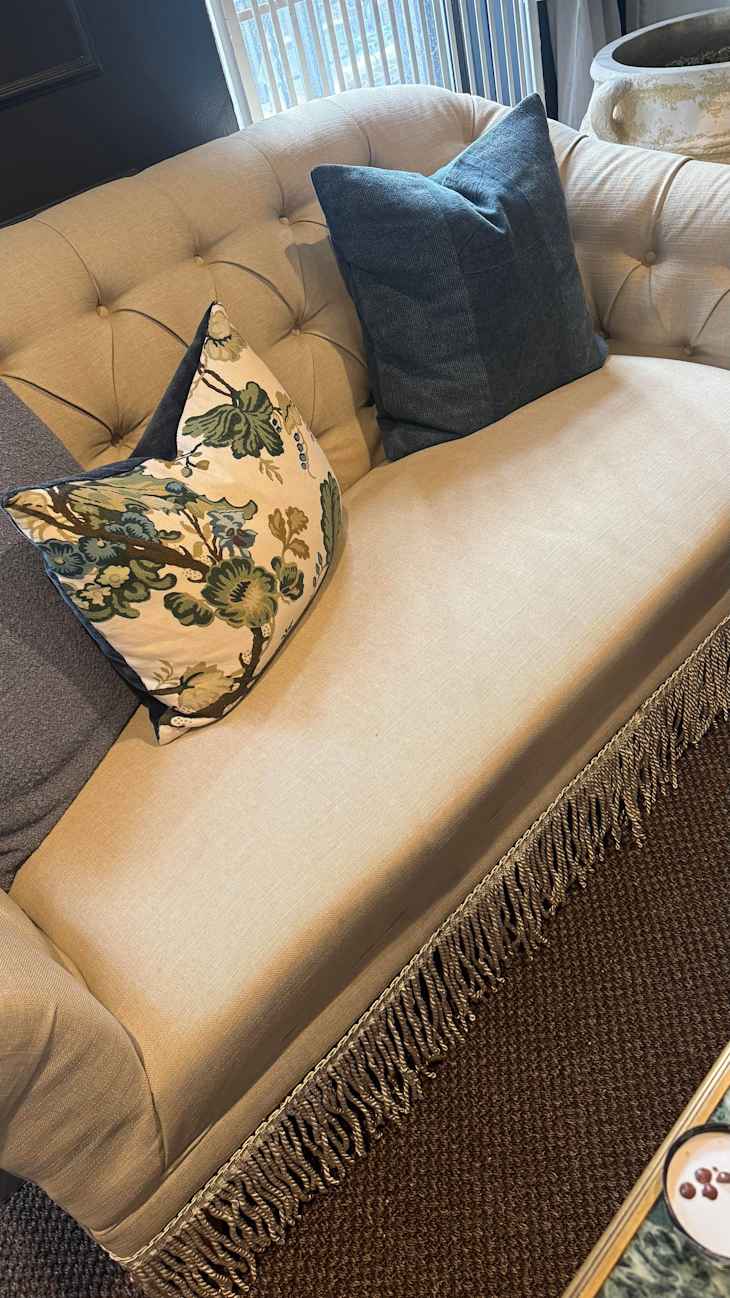
I used far fewer pins than Shaver did, opting to only place them where I felt necessary. I did this because I didn’t want people to notice the pins, figuring fewer would mean they’d be more discreet on the whole. While you can definitely still see the pins I used if you look for them, I wouldn’t say they’re glaringly obvious. And the fringe trim is still nice and secure despite me skimping a bit pin-wise.
I can’t believe such a simple DIY project changed the appearance of my sofa so dramatically. The finished product looks so elevated and fits my design style to a T. Better yet, in the event my personal aesthetic changes and I want to remove the trim, I can easily do so in minutes. Had I shelled out thousands of dollars for a premade sofa with trim, I wouldn’t have the same option!
Design Defined
Never miss the style inspo and recommendations you crave with Design Defined. Follow along each week as our Home Director Danielle shares the best style advice, latest trends, and popular decor finds you just can't miss.