
This 100-Square-Foot Kitchen Got a Big, Beautiful Upgrade for Just $2,100
There are good times to move and bad times to move. One thing Christine Han (@dearsaturdays) can say for sure is that July 2021 was definitely a bad time to look for a home. Real estate inventory in Manhattan and Brooklyn was low during the pandemic.
But Christine, who runs a popular cooking blog called Dear Saturdays, and her partner desperately needed more space to work and live.

They knew they’d likely have to make some concessions to get that additional space, so when they saw a cool-looking, roomy apartment in a former cigarette factory in central Williamsburg, Brooklyn, they went for it.
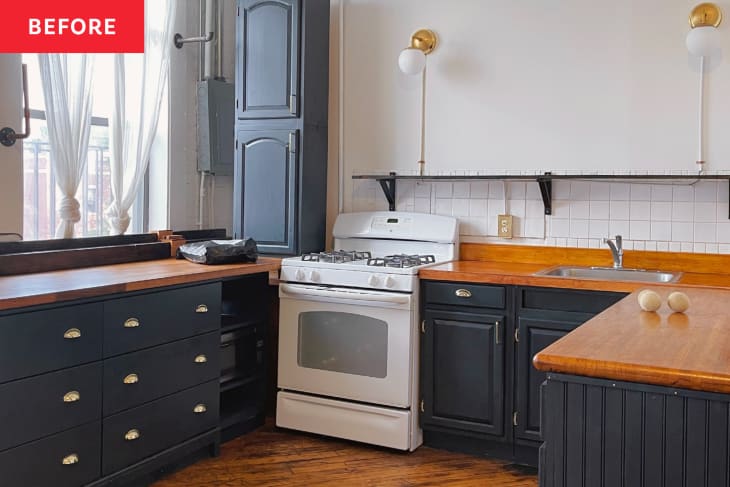
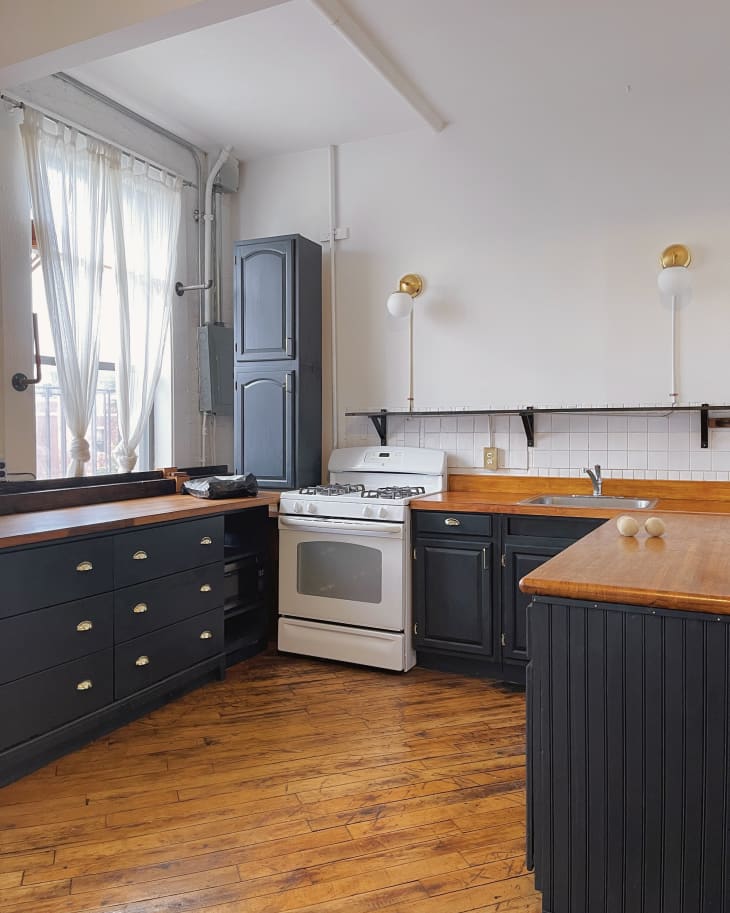
Even though they could clearly see from the listing that the kitchen had some intensely mismatched IKEA cabinets and oddly painted tile, they knew that with enough creativity and determination they could make it work.
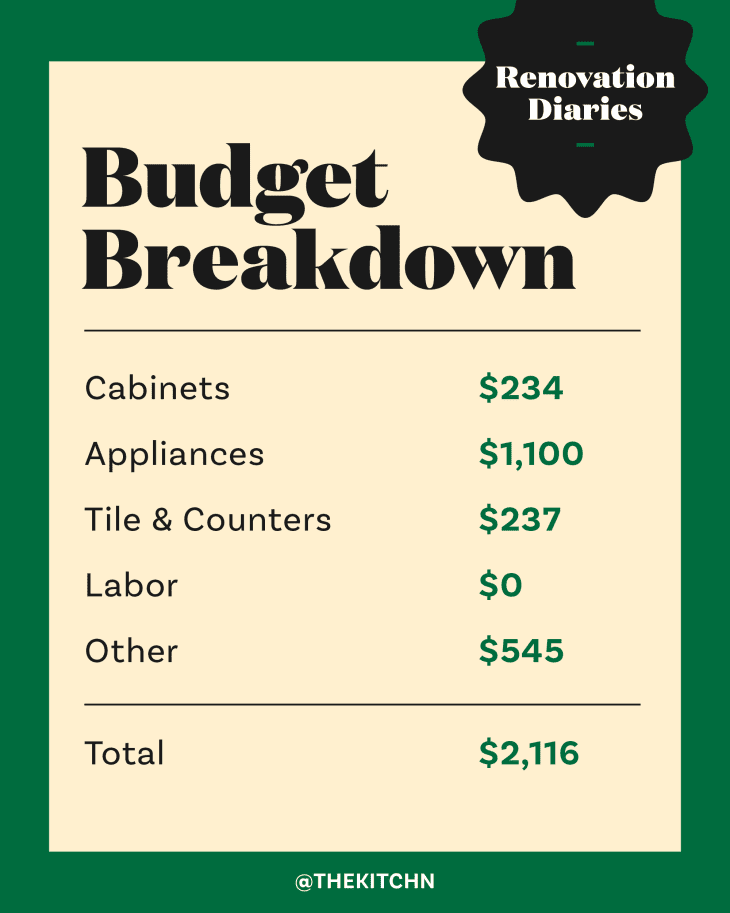
See the couple’s full budget breakdown:
This Apartment Kitchen Got a Major Makeover for $2,100 — Here’s How the Creative Renters Stretched Every Dollar
When they first moved in, the couple realized the kitchen needed even more work than they had anticipated. The oven was crusty on the inside with stained juice on the outside, and the butcher block countertops were covered in an odd, sticky glaze. Oh, and the sink was broken, too: When you pulled the handle on the faucet, water would actually burst out.
After getting permission from their landlord to make changes, the couple began fixing a number of other problems in the apartment to make it livable. Eventually, they went all-in on a master plan to transform their 100-square-foot kitchen into a functional, blog-worthy, colorful space.
The couple had not handled a renovation anywhere near this big before, but Christine had grown up with a mom and aunt who were serious DIYers and able to do their own renovations without any help. “My mom would pull apart the master bathroom and retile it on her own,” Christine says. So the blogger felt confident she could do it, too: “Once I set my mind to something, that’s it,” she says, smiling.
Christine and her partner started with the cabinets. As things were, there were too many cracks and gaps where food could fall and pests could linger. Plus, some of the cabinets weren’t even structurally sound.
Luckily, it turns out you can learn a lot from YouTube. The couple spent late nights and weekends watching numerous videos to make sure the foundation for the cabinets was set correctly and asked plenty of questions at their local hardware store. After all, they had to get it right. A functional and efficient kitchen was important to Christine, who spends much of her time cooking and developing recipes for her blog.
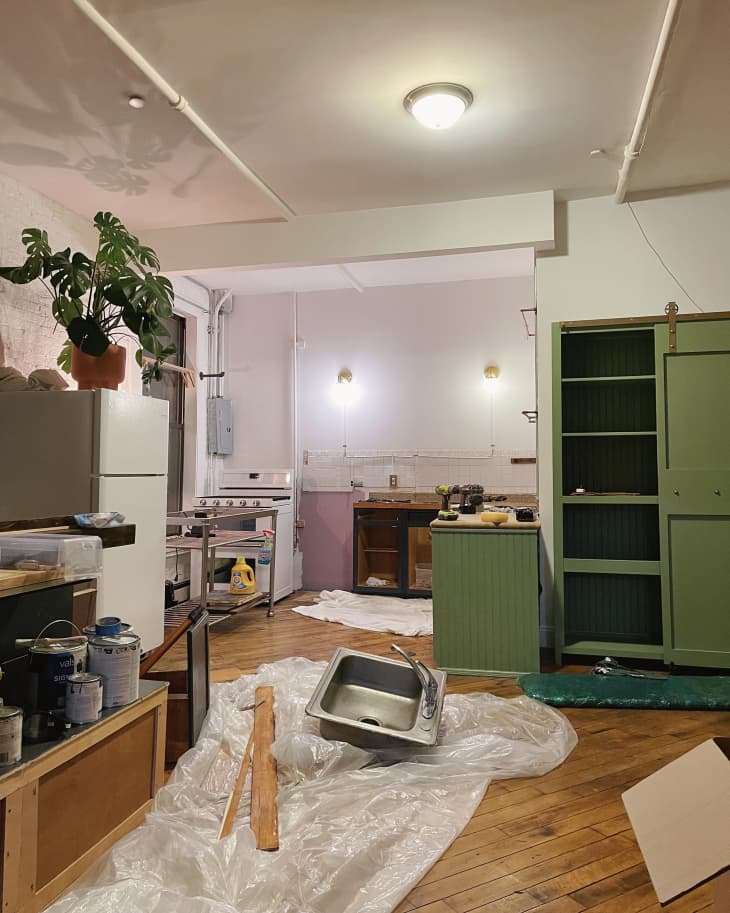
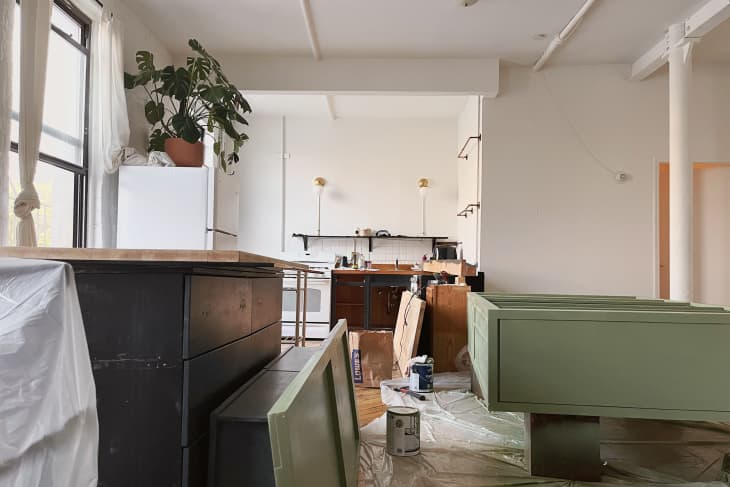
Answers in hand, they began tearing apart the kitchen — pulling out all of the base cabinets and patching up holes in the walls and floors. They also chucked an old IKEA dresser that the previous tenants had installed to use for kitchen storage. The hardest part of that whole two-week demolition phase was dealing with the wood countertops, which they had to pry off the wall. In fact, that part of the job took a full day. And that’s saying a lot, considering the couple even had to remove the existing backsplash tile using an oscillating tool and grout rake.
Once everything was out, they started the long process of putting it all back together. They replaced the kitchen dresser with a kitchen cart Christine brought with her from her previous apartment. And they sanded the sticky butcher block countertops down so that they were able to repurpose them.

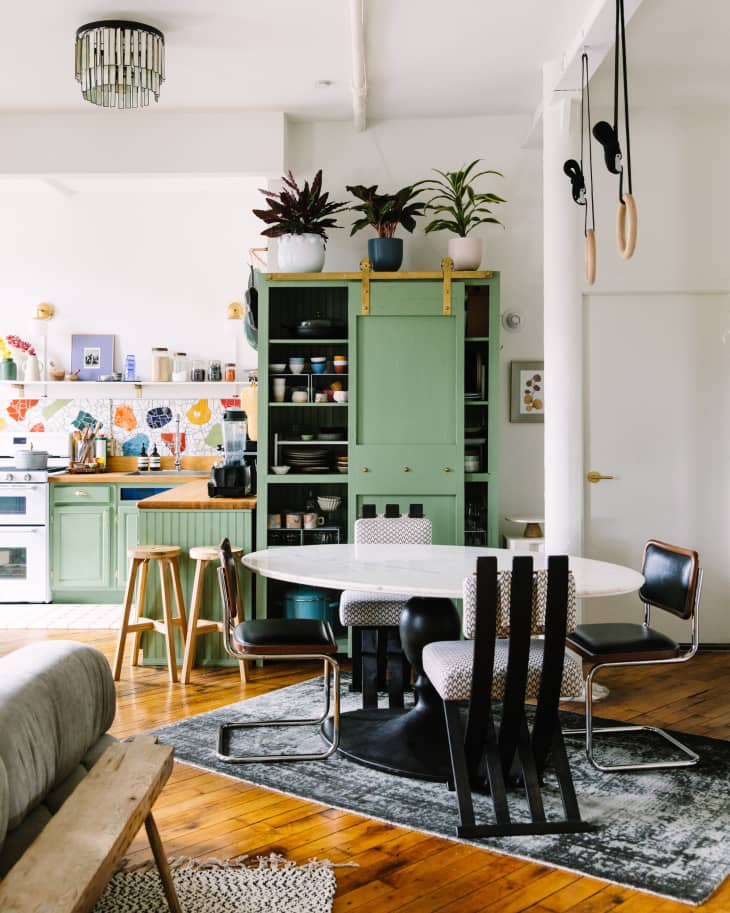
Shortly after, they painted the existing kitchen cabinets a celadon green (Valspar’s Cactus Shadow) with a spray gun. Shades of green and brass are associated with celadon or greenware pottery commonly found in ancient Korea during the Goryeo Dynasty. As a Korean American, Christine was inspired by the beauty of celadon and used that to guide the color of the cabinets.
After the cabinets were painted, the couple also touched up the walls using the apartment’s existing white paint that Christine was able to get from her superintendent.
Upcycling and going the DIY route meant that the couple saved some money. They installed the newly painted cabinets and replaced the sink, which wasn’t really functional, with a stainless basin they found on Facebook Marketplace. The new sink happened to have the same dimensions as the previous one. This was important so that they could slide the sink right into the existing counter.
Best of all, they scored a new, spring-style faucet on Amazon to complete the look — and did every bit of installing, including the plumbing on their own! “I watched YouTube videos to learn. There were so many helpful resources,” Christine says.
Christine’s Renovation in 14 Easy-ish Steps
- Step 1: Move in and get permission to renovate from the landlord.
- Step 2: Demolition time!
- Step 3: Pull out cabinets, patch up holes in floors and walls, fix cabinet foundation.
- Step 4: Paint the cabinets and put them back in place.
- Step 5: Touch up walls with matching white paint.
- Step 6: Sand countertops to give them a fresh new look.
- Step 7: Install the new sink.
- Step 8: Install the new stove.
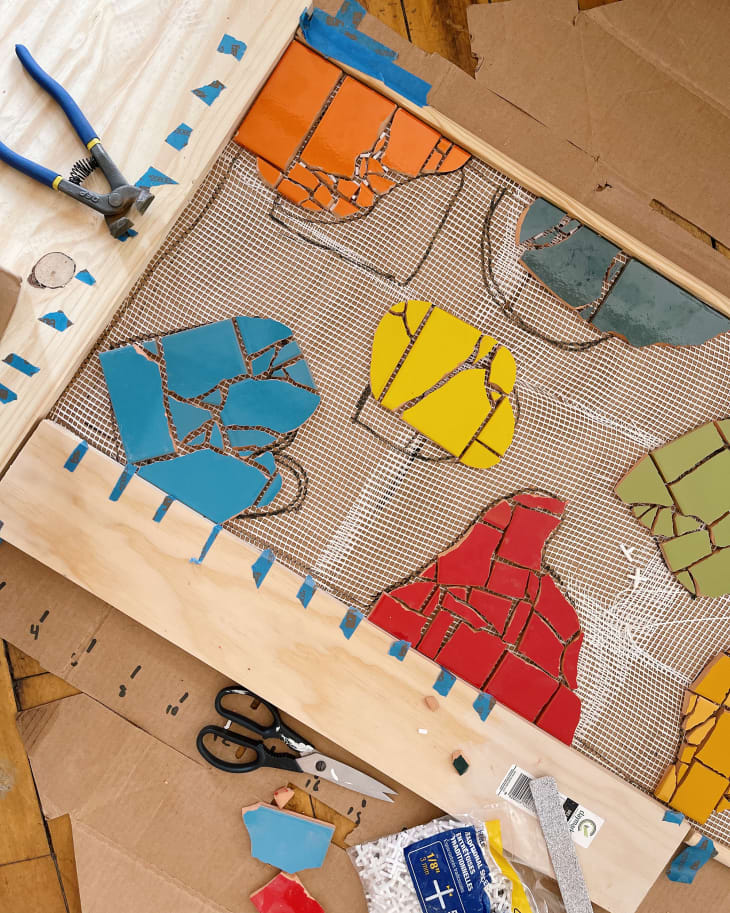
- Step 9: Create tile mosaic with an organic pattern on the iPad.
- Step 10: Install tile backsplash.
- Step 11: Reinstall washer and dryer.
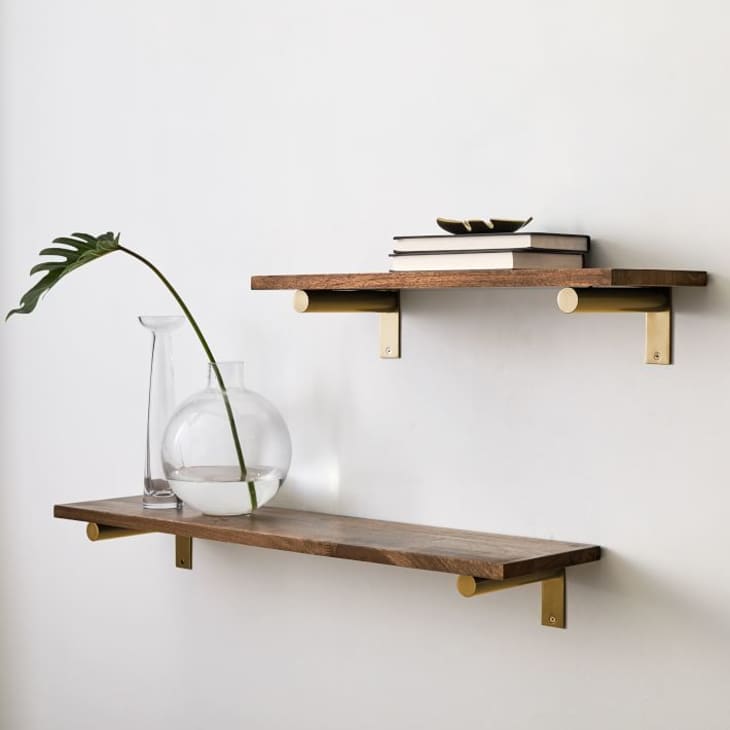
- Step 12: Create a floating shelf with brackets from West Elm.
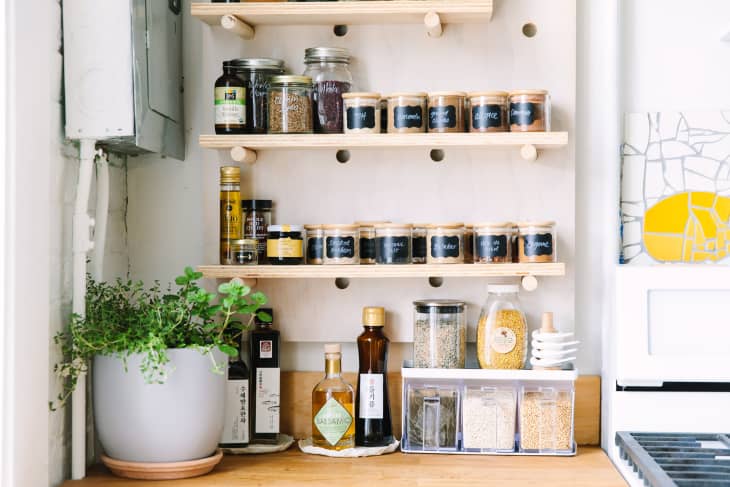
- Step 13: Stain and install Julia Child-inspired peg board.
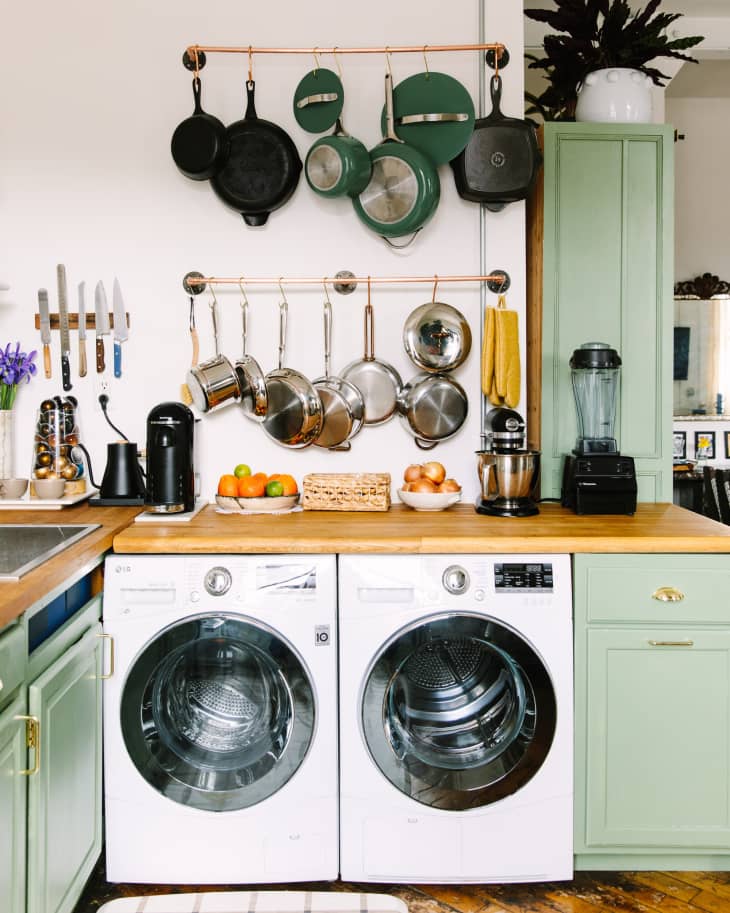
- Step 14: Add finishing touches, such as pot racks and a comfy House of Noa mat.
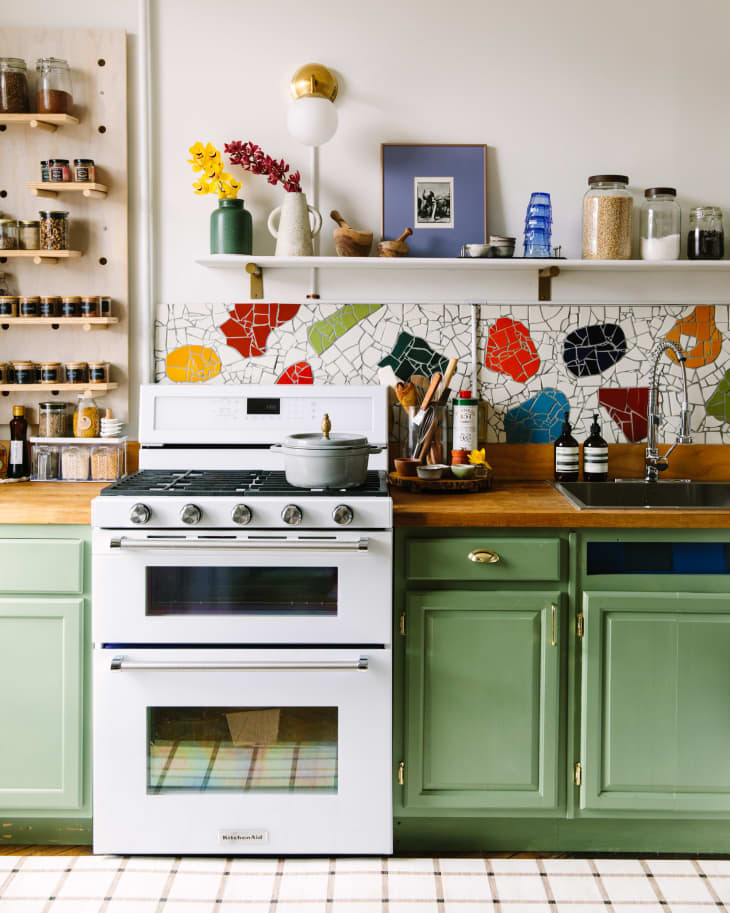
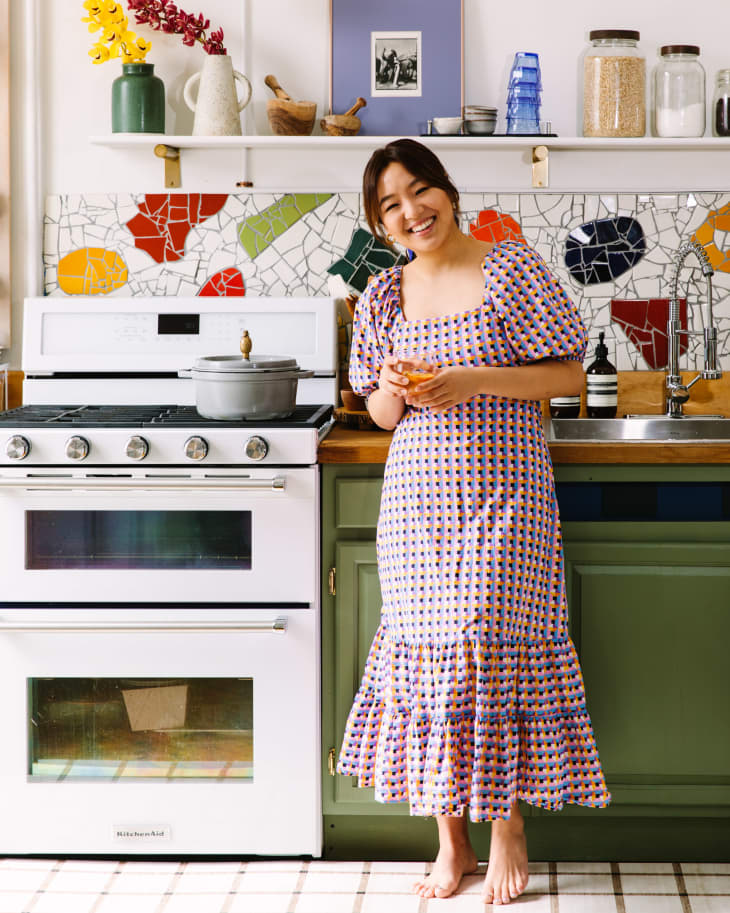
Because of Christine’s line of work, the couple agreed to spend money on a new KitchenAid gas oven, which Christine found on Facebook Marketplace for just $900. They then started working on the biggest part of all — the new, showstopping tile backsplash.
The design was inspired by the label of the couple’s favorite bottle of wine, Casal de Ventozela’s Pseudónimo Pet-Nat. With the idea of using broken shards of tile, which they found off of Houzz, her partner was able to lay out the custom design on his iPad. After mapping out the fun design and placing it on sticky mesh, the couple painstakingly attached and grouted it all to the back kitchen wall themselves.
Once the tile was on, things really got moving. They put back the rest of the appliances, including the side-by-side washer and dryer that had come with the space. They created a floating shelf to hold plants and their prettiest serveware, and then built a stylish peg board (a la Julia Child) out of plywood from The Home Depot to keep Christine’s impressive collection of spices organized. To give a more finished look, the couple decided to stain the peg board a white-gray.
They also included a few clever storage tricks to maximize their space, such as two rail racks to hold all of their pots and pans and an accessible magnetic strip for storing their most-used knives. By late August (just a month and a half after moving in!), they had created a custom, personalized kitchen that they proudly built themselves!
Thanks for sharing, Christine!
To see the rest of Christine’s apartment, check out Apartment Therapy’s House Tour.
This post originally appeared on The Kitchn. See it there: Before & After: This 100-Square-Foot Kitchen Got a Big, Beautiful Upgrade for Just $2,100