
Before and After: A Luxe $800 Redo Snaps This Bathroom Out of Its Dreary Basement Vibes
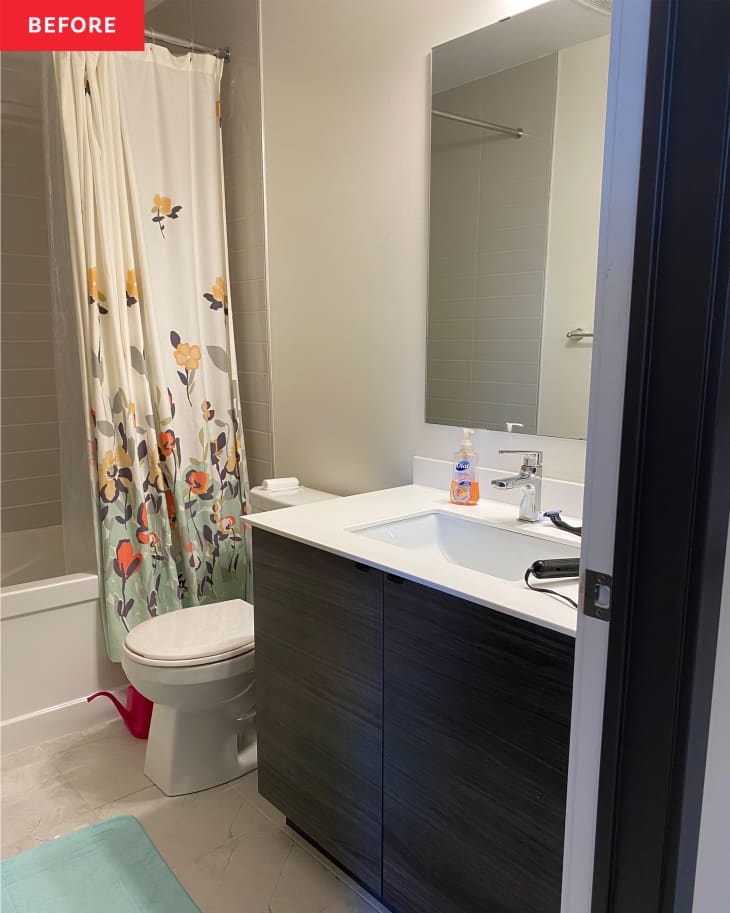
Basement bathrooms (and basements in general) can feel a bit blah since they typically lack windows to let in natural light. But they don’t have to be that way! There’s no reason that the most standout room in your home can’t be in the basement (and here are some seriously stylish basement redos to prove it). There are a few options for brightening and luxe-ing up small rooms with no windows: Mirrors are great, as are vibrant colors via wallpaper or paint, fun light fixtures, and glam hardware. DIYer Hana Irfan’s basement bathroom redo relies on all of the above.
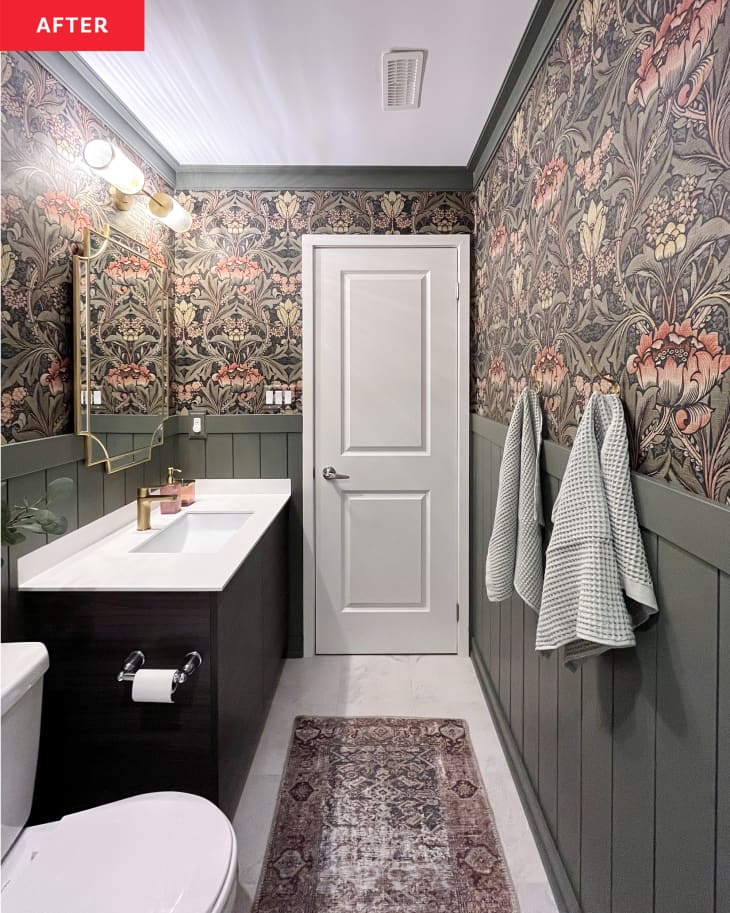
“There were three major changes in the bathroom,” Hana says. “It lacked character, but I knew I could make a big impact without a big budget or renovation.”
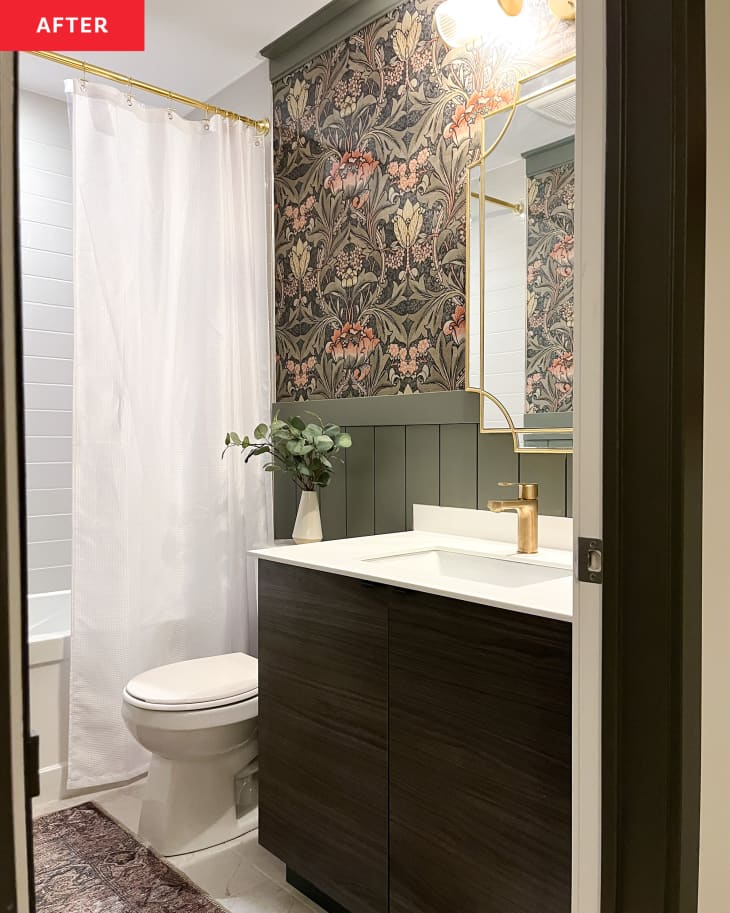
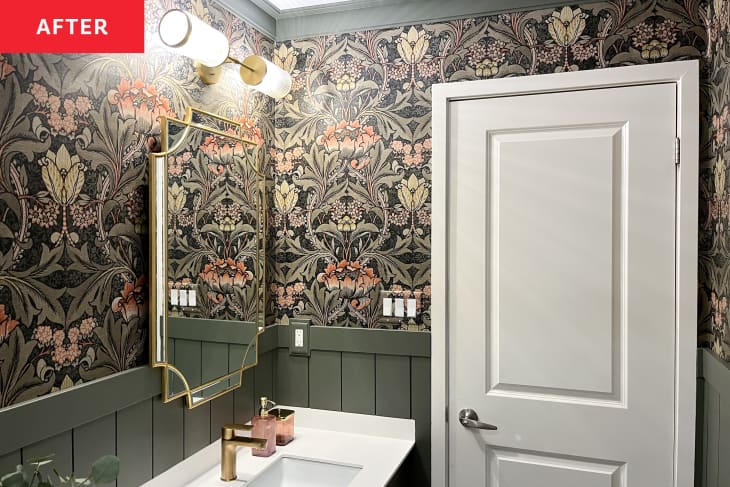
The three changes were pretty basic by themselves, but work together to make a big difference. The first is peel-and-stick wallpaper with a classic William Morris-inspired design from Burke Decor. Hana used it on the upper half of the walls, and finished the bottom half with vertical shiplap painted olive green (Sherwin-Williams’ Thunderous). She also used that wood paneling, combined with some extra trim pieces, to create her own custom crown molding. “This shiplap ceiling trim cost $30 versus crown molding, which would have been $100 for this tiny bathroom,” Hana says.
Aside from being cheaper, the shiplap was much easier to cut than angled crown molding would have been. Hana has installed several accent walls before, but she hasn’t installed shiplap, and she was surprised by how fast it went. “Most of the boards just went up with no issue,” she says. “Just a few took some time to install, like around the vanity and outlets.” She used a jigsaw to cut around those obstacles as well as the toilet and plumbing.
Hana definitely recommends shiplap for future DIYers as well as peel-and-stick wallpaper. “Installing wallpaper around the door and in the corners can always be tricky but luckily peel-and-stick wallpaper is pretty forgiving in that you can reposition it a few times before it loses its stickiness,” she says. Eagle-eyed observers will notice how Hana used the peel-and-stick wallpaper to cover her light switch plate, too — not a necessity but an extra special detail for a seamless, luxe look.
After the big yet budget-friendly changes to the walls, Hana focused on finishing touches.
“I changed the faucet, spray painted the toilet paper holder, and swapped the shower rod. Hanging it high made such a huge impact in drawing your eye up in this space!” Hana says. She also replaced the builder-grade sheet mirror with one from Wayfair. Her total cost for this project was $800, though it looks much more expensive.
“There were a lot of little steps in this project that amounted to this beautiful bathroom,” Hana says. In other words, small changes can make a big difference. She kept her dark brown vanity and now thinks it pairs nicely with the green shiplap, and she covered her white tile floors with a vintage rug to make them feel a little less sterile. Now, her boring basement bathroom feels anything but basement-like. In fact, it looks like something out of a luxe hotel!
“By using the existing materials in this space, I saved a ton of money, and let’s be honest — who wants to gut an entire bathroom?” Hana writes on her blog. “It’s dirty and dusty and takes FOREVER. Updating a small bathroom with accent walls is a budget-friendly way to add character.”
If you’re feeling motivated to follow Hana’s lead, find even more bathroom renovation inspo here, and more basement renovation ideas here.
Inspired? Submit your own project here.