
Here’s How to Photograph Your Holiday Decor Like a Pro
Many of us put a lot of effort into decking the halls. Then, you blink, and it’s time to pack everything up and say goodbye until next year. My solution? Go full on paparazzi and document every last bow, bauble, and branch. Mostly, I do this for myself because I enjoy seeing how my style changes year after year or how I use the same decorations in new way. Quality hasn’t always been my top priority, that is, until I happ ened upon Andrea Ahedo’s Instagram, and it made me want to up my game.
You may already know the husband-and-wife duo behind the popular home blog Chris Loves Julia. Ahedo is Julia Marcum’s sister. In addition to leading CLJ’s visual department, she’s a professional photographer that formerly taught graphic design. I’ve fallen in love with her relatable, detailed Instagram tutorials on styling and shooting everything from food and interiors to, most recently, a Christmas tree.
Using an iPhone, Ahedo shared how to get the best lighting (it’s not what you’d think), find the perfect angle, and use exposure to your advantage. I reached out to her—as well as two other professional photographers—for more advice on capturing picture-perfect holiday decor. First, you’ll find a few general tips followed by more in-depth specifics .
Style your decor ahead of time
Do a once over and put away items that will clutter up your shot like, for example, a water glass or the TV remote. Janet Kwan, a lifestyle and commercial photographer, encourages people to “look in the foreground and in the background, where things can easily be overlooked.” Paying attention to little details—like fluffing the nearby sofa pillows and brushing pine needles off the tree skirt—makes for a better photo.
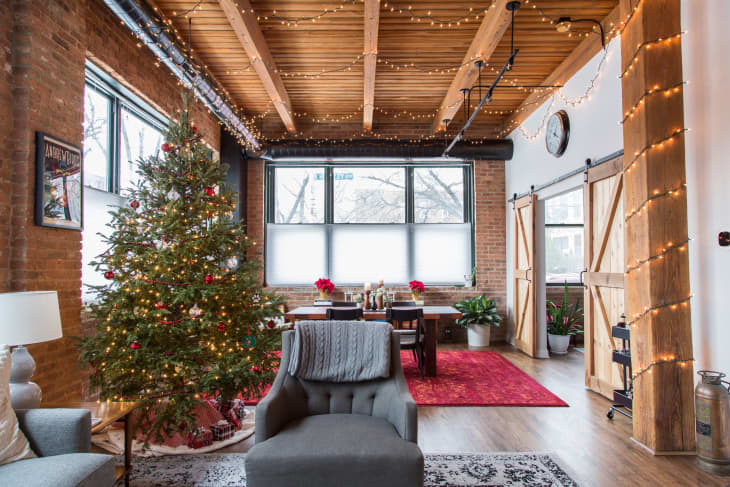
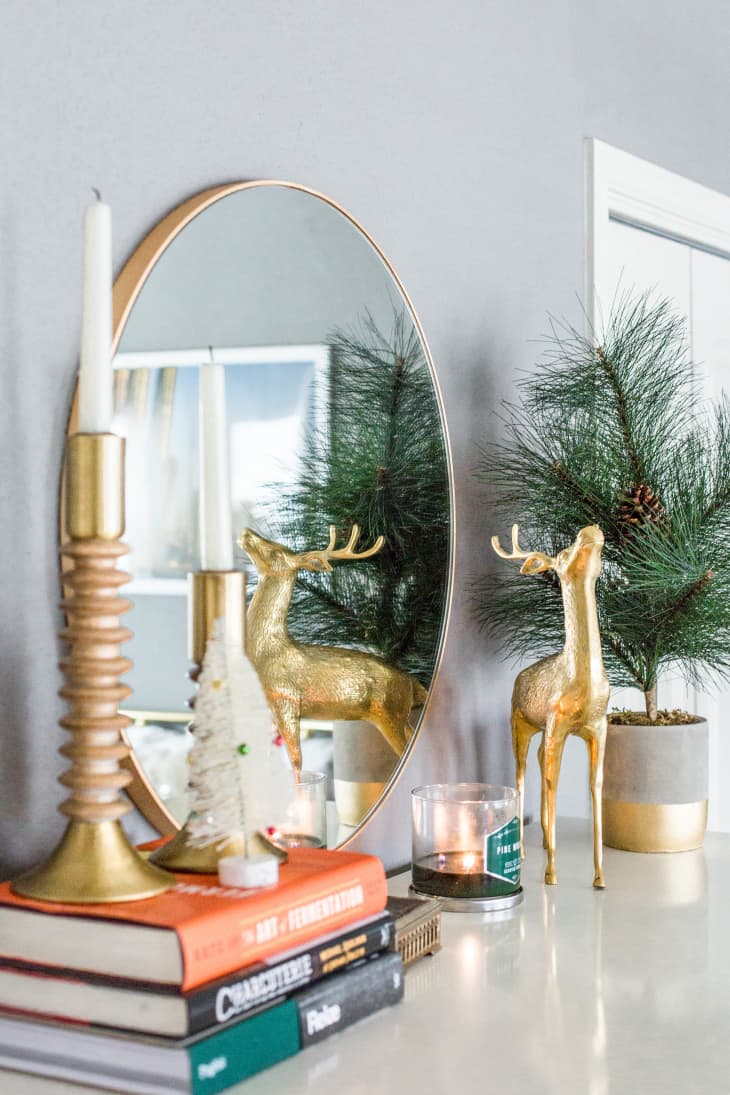
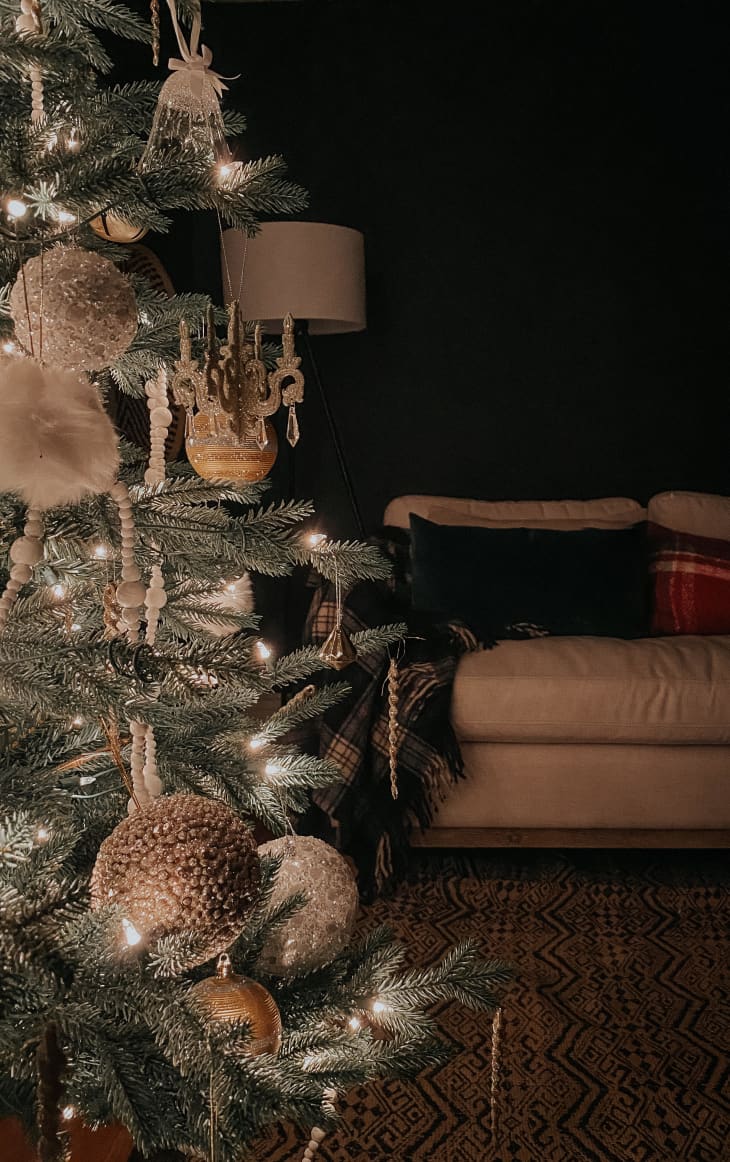
When framing the shot, Victoria Erdelevskaya, interior photography specialist at Heal’s, says less is more. “Try to avoid cramming too many elements into one photo, as this can make your image (and your Instagram grid) look too busy,” she says. One way to steer clear of this is to create tight vignettes. Rather than try to photograph your entire room at once, shoot a close up of the decked-out bar cart or focus on the garland you painstakingly hung from the stair banister. Take a tight shot of the bottlebrush tree and gold reindeer combo on your mantel, as shown above. Together, these photos will tell the whole story.
Wipe off your lens
Wiping off your lens sounds obvious, but it’s something people often forget yet makes a world of difference. One easy way to tell if your lens needs cleaning? According to Ahedo, a dead giveaway is when the lights on your tree look like little streaks in your photos. This blurring is caused by the oils from your fingerprints.
Find the right angle
People naturally tend to shoot at eye level, but that’s not necessarily the best vantage point for all images. “I’ve always told students in the past that the best shots you’re going to get are the ones that were slightly physically uncomfortable to take because you’re making an effort,” Ahedo says. That may mean you need to squat, get down on the ground, or even stand on a chair.
Erdelevskaya adds that the angle you select for your shot will vary depending on what you are shooting. For example, with a table setting, she recommends shooting from above for that “totally Instagrammable flat lay effect.”

Enlist the help of an editing tool
Even the best photographers can benefit from a little editing. Ahedo uses Adobe Lightroom, which costs around $10 a month. Another option is the VSCO app that comes with 10 free filters, or you can upgrade, and for $19.99 a year, get access to more than 130 filters. Of course, most phones also come with built-in editing tools that allow you to change the exposure, contrast, saturation, and more. Even if you use a preset filter, don’t be afraid to play around with the different settings to customize the look.
Now that the basics are out of the way, let’s discuss how to photograph specific scenes.
A Christmas tree
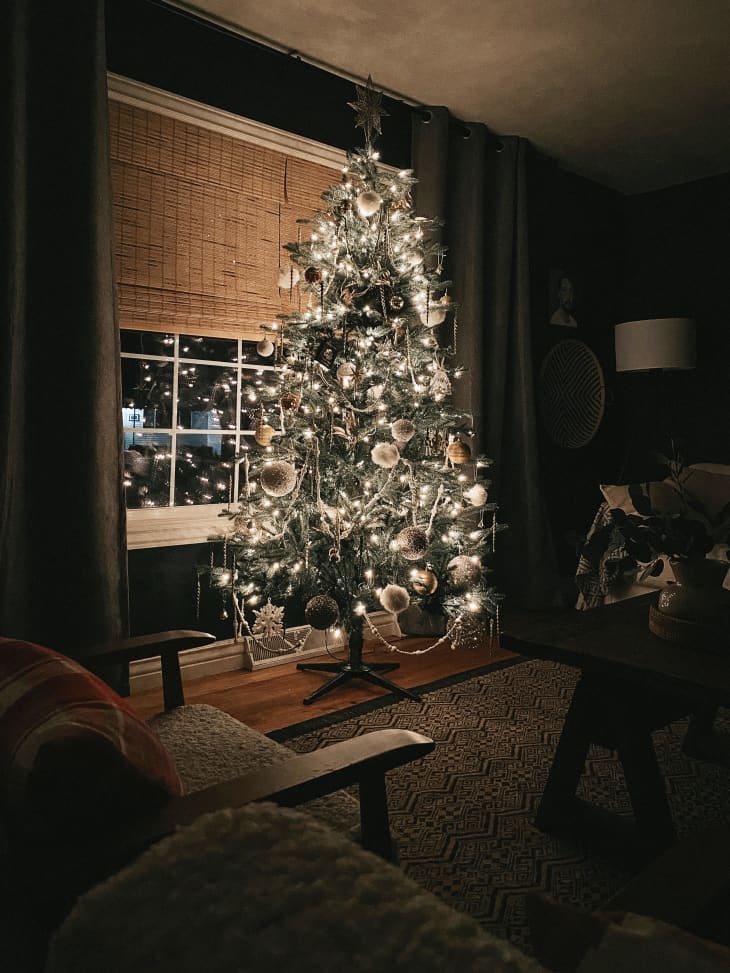
One of the golden rules of photography is to shoot with natural light whenever possible, but in order to capture the magical glow of a Christmas tree, Ahedo recommends shooting it at night and turning off all the lights in the room, except for the ones on your tree.
Next, fine-tune the exposure. If you prefer for the tree to be the main focus, hover your finger over it in the viewfinder and tap the screen. See how the rest of the room gets darker? If you want to include some of the room, like, say, your couch with festive throw pillows, tap that part of your screen. The camera will react so that the image is brighter, and other details will become more visible. Ahedo also adjusts the exposure within a specific area. To do so, hold the exposure button (it looks like a sun) and a slider will appear that allows you to make that area brighter or dimmer.
As for composition and cropping, Ahedo says to think about how much ceiling or floor you’re including. Be sure to mind the tilt that can occur when holding your phone; never, ever point your camera down. Instead of shooting your tree head on, Ahedo suggests two visually intriguing alternatives: Photograph only the top three quarters of the tree ,or stand to one side of it to encapsulate the branches and a merry background.
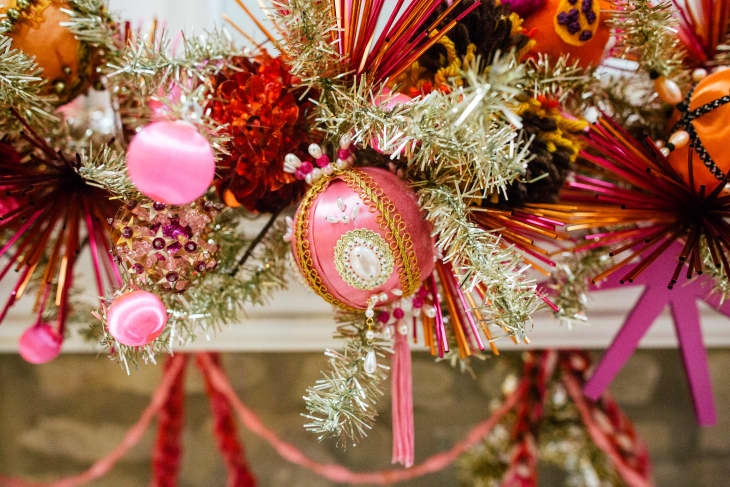
Ornaments
For the most striking ornament image, think outside the box. “Whilst it might be tempting to only shoot your decorations hung on the tree, you might find a more interesting shot elsewhere,” Erdelevskaya says. “Why not try gathering them in a bowl and stringing fairy lights across them for a magazine-worthy shot or even asking someone to hold them in their hands.”
I love the idea of a loved one holding a meaningful ornament, whether it’s a child cradling their handmade creation or a grandparent holding a vintage heirloom—what a way to record precious holiday memories!
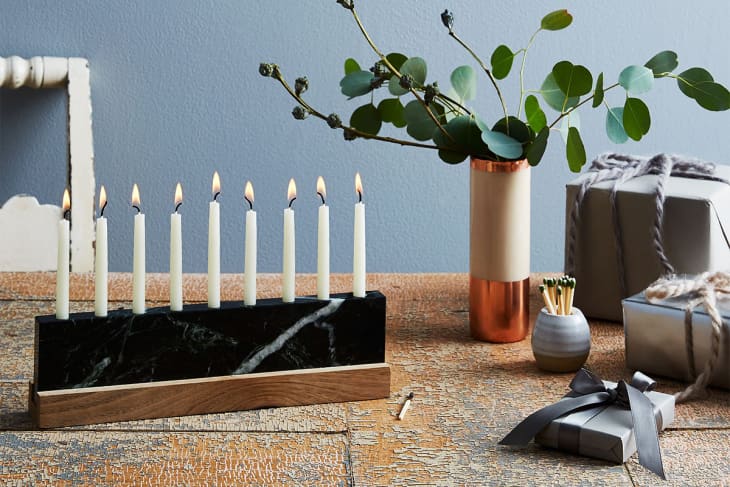
A menorah
When it comes to photographing inconsistent moving light sources like candles, Kwan recommends using a similar type of lighting in the room so that the colors are consistent. Don’t use flash, as that can drown out the warm glow of the candles.
Part of what makes photographing candles hard is the lack of light. Less light means your camera tries to compensate by using slower shutter speeds, which make it more sensitive to movement. To avoid a blurry photo, a tripod is best, but if you don’t have one lying around, try this hack from Ahedo: Use a shoe. Simply take a stack of books and set a sneaker on top. Once level with the height of your menorah, turn your phone on its side and place it inside the shoe. Set the timer and step back.
Last thing: More candles obviously equal more light, so wait until the last day of Hanukkah, and you’ll have an easier time getting your photo just right. This year’s festivities might have passed, but you can still get a snap if you haven’t put away your menorah, and definitely remember to use this tip next season.
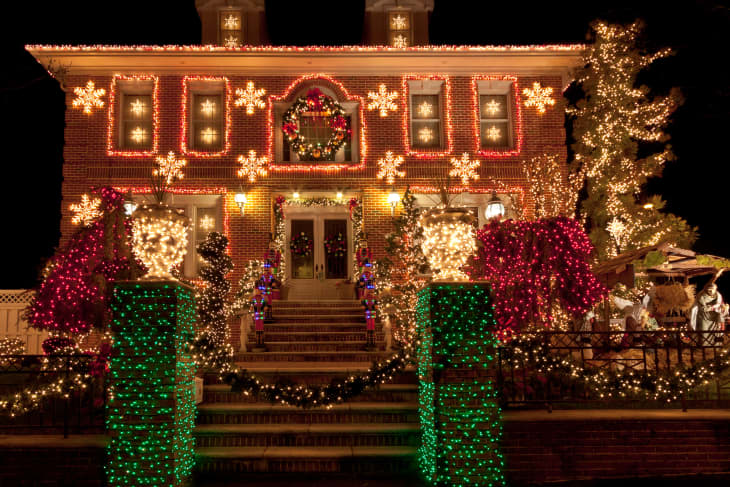
Your home’s exterior
To capture the full effect of lights on a home’s exterior, Kwan recommends shooting in the evening around dusk when there’s still that last bit of daylight left. If there are tons of exterior lights and lit decor (for example, a huge illuminated Santa), taking photos at night should also be okay. If you want to shoot during the day, early in the morning is another good option. Bright and colorful decorations also stand out on an overcast day.
Want to incorporate falling snow? It’s tough but not impossible. Ideally, Kwan says the snowfall needs to be heavier (i.e., clumps of snowflakes) and falling gently. “To make sure the snow shows up, the background should be darker than the snow so it doesn’t blend together,” she says. “If your phone or app has the ability to let you control the shutter speed, you’ll want to set the shutter speed to a faster one, such as 1/800, to freeze the motion depending on how fast the snow is falling.”

Special Moments
Holiday decor is about more than just displaying pretty things; it’s about creating an experience for you and your family to enjoy. So why not show that?
“Whilst they say ‘never work with kids or animals,’ these subjects will elevate your festive snap,” Erdelevskaya says. It may sound counter-intuitive, but for the perfect Christmas tree portrait, she suggests positioning your subject far away—aim for around five feet’s distance from the tree. Then, frame your shot and ensure you are focusing on the subject rather than the tree itself.
“Encourage your subject to turn to face the best and brighter light source in the room,” she says, adding that you may have to bribe them with treats or toys, but it will be worth it. “You’ll be left with a gorgeous portrait with your Christmas decorations providing a soft, festive backdrop.”