
4 DIYers Share How They Went from Beginners to Experts — and How You Can, Too
With home feeling especially important these days, you’ve likely created a list of all the things you want to do to improve yours, like redoing the bathroom, updating the living room, or renovating the kitchen. But in the face of such big undertakings, it can feel hard to get going, and taking on a capital-P Project can be intimidating and overwhelming. And after viewing stunning DIY before and afters on Instagram and online, it’s typical to wonder one thing: How did they do that?!
Here’s the good news: Everyone starts somewhere, so even those experienced DIYers you’re admiring had a just-starting-out stage filled with smaller projects. From there, they built up their confidence and skills until they were bonafide DIY experts. To learn more, I spoke to four full-time DIYers about how they grew from novice to power tool pro. Here’s what they have to say — and their advice on how you can do it, too.

Ursula Carmona of Home Made by Carmona
Reidsville, North Carolina-based Ursula Carmona of Home Made by Carmona is a designer, blogger, speaker, and self-proclaimed “frugalista” — who also happens to homeschool her three daughters. Carmona jokes that her full-time DIY life started when she had little kids and “no money to hire professionals to do work around the house.” She thought she’d document updating her home when she started a blog in 2012, only to later realize that she inadvertently launched a business.
“I was technically full-time from the beginning, as long as you don’t count all the hours put into homeschooling or handling other household duties,” Carmona says. “Lucky for me, I managed to turn my ‘around-the-house’ tasks into my day job, and challenge my skills with every new project.”
Carmona’s mission is to make her home a haven and help others do the same. Her style is sophisticated yet welcoming, with bright colors, bold details, and innovative organizing solutions. One of the more surprising parts of full-time DIY life, she says, is the community she’s found along the way — a community that will rally behind newcomers. As they get going, here’s what Carmona recommends:
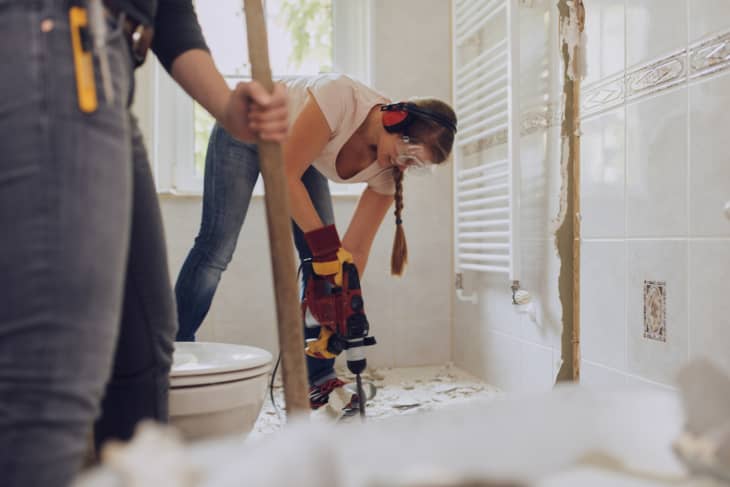
- Don’t wait until you can afford fancy tools to do a project. Instead, work your way up to each addition as needed. Carmona fondly recalls using a hand-me-down drill, a cheap jigsaw, and a hammer to get through her first projects.
- When it’s time to splurge, go for a miter saw and a jig for drilling pocket holes. Carmona recommends buying a Ryobi 12-foot sliding miter saw and a Kreg jig, which will help you assemble built-ins like a pro. “Those really upped the game for me,” she notes.
- Start small. After acquiring some confidence, push outside your comfort zone to keep your skills fresh.

Cass Smith of Cass Makes Home
As a child, Cass Smith of Cass Makes Home watched her parents restore their 1850s home, and tagged along while the women in her family went on excursions to collect antiques. These experiences — along with learning to be self-sufficient during her husband’s multiple deployments — have shaped the Gloucester, Virginia-based creator’s fearless DIY attitude and career.
“I started really taking it seriously once I realized how much fun it is to bring my ideas to life,” says Smith. “I would have a vision for something in my home that I didn’t have the budget to buy, so I would just go for it myself.” Smith’s first project was a fireplace makeover. It was also the first time she ever used a saw, and she was terrified. “After that project, which turned out to be more beautiful than I could have imagined, I began to realize my capabilities,” Smith says. “It helped me realize that fear is a passing feeling.”

For new DIYers, Smith suggests refinishing a smaller piece of furniture or making a picture frame to “get your feet wet in woodworking.” Here are a few other tips:
- Making mistakes is part of the process. Expect them to happen — you can always figure out how to fix them.
- The best tools are saws, clamps, and a miter saw, as well as a good pair of safety glasses. Smith also wisely cautions to “never get too comfortable using a saw.”
- Remember it’s supposed to be fun! Even if it feels like hard work, and it is, try to relish the process and be proud of your determination.

Alli Devlin of The Hoss Homestead
Two years ago, Alli Devlin of The Hoss Homestead bought a home on a beautiful property in Seattle, Washington only to discover how much work it actually needed. The builder-grade finishes made it lack character, which gave her an idea: She’d simply add it herself. After completing the first phase with a general contractor, she felt she’d learned enough to tackle the rest alone — and so she did.
“I was surprised at how easy it was to do common refurbishments, fixes, or surface updates that we always hired out before,” Devlin says. “Many projects are very achievable to do on your own.”

One of the most important tips Devlin wants to share is to disregard how seamless social media influencers make transformations look. Since DIY isn’t her main career, Devlin tries to keep realistic expectations around her project’s timelines— “otherwise, they can drag on,” she says. Her other advice for new DIYers:
- It’s quite all right to have to repeat a step. What matters is that everything is as it should be in the end.
- Keep in mind that your local home improvement store will cut your wood pieces for you. Sometimes it’s free and sometimes it’s for a small fee. Either way, it’s helpful if you don’t have power tools yet or aren’t comfortable with using them.
- DIY projects will give your bank account a break but do your research. Skimping on materials can cost you money in the long run and make the process harder than it needs to be.

Alexandra Gater
Voted one of Apartment Therapy’s 2020 “Design Changemakers,” Alexandra Gater is one of the most sought-after decor experts on YouTube. But when she started her eponymous channel after transitioning from a successful career at a women’s lifestyle magazine, she didn’t know where the idea would take her.
“Home decor combined all of the things I love: pretty things, composing a beautiful photograph, and working on sets,” she says. “I was inspired to start making over my own space, and once I started, I couldn’t stop!” Her videos seek to help people have cozy, stylish surroundings, and she routinely jokes that she can’t believe her job is to make crafts all day.

The Toronto-based DIYer focuses her content mostly on helping small-space renters beautify and maximize their square footage, usually on tight budgets. While she doesn’t consider herself to be an interior designer, her YouTube community of over 350,000 followers can’t get enough of her tips. Here’s what she thinks beginners need to know:
- Invest in the basics. Painting supplies, a hanging kit, and a good drill go far.
- Be prepared for the confidence using a drill will bring you. This will improve your comfort using other tools.
- You don’t have to know everything, but you do have to know your strengths. When needed, ask for help with bigger projects and the results will be better than you imagined.