
How To Fix a Running Toilet: Common Causes & Easy DIY Fixes
If you’ve ever heard a running toilet at home, you might have dismissed it as little more than a nuisance. But a leaky toilet can actually waste gallons of water per day, which can add up to lots of excess water usage (and a much higher bill) at the end of the month. But don’t despair! Unlike with major plumbing disasters, running toilets don’t usually need a pro to step in. Most often, it’s just a simple DIY fix, no tools — or plumber — required.
Below, you’ll find the most common culprits behind running toilets, how to identify them, and what you’ll need to do to fix them. Read on to save yourself hundreds on lost water (and even more not having to call a pro!).
How Toilets Work
The first thing you should understand before fixing a running toilet is that toilets work on gravity. When you push down the lever it lifts up a rubber flapper, allowing water to run out of the tank and into the bowl. Once the water in the tank runs out, the flapper closes and allows the tank to fill again. The tank water then slowly rises until a float closes the intake.
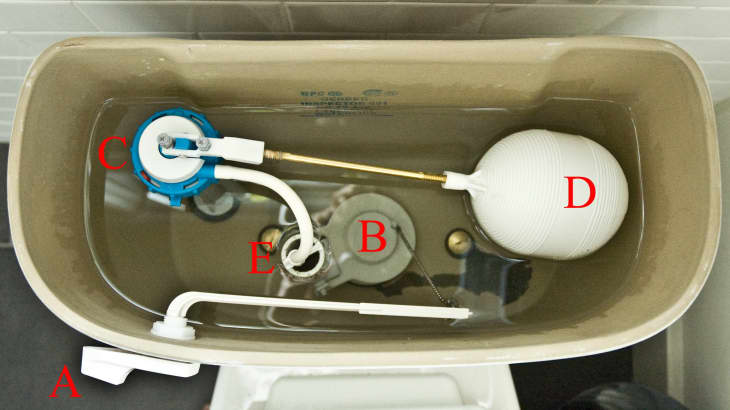
Parts of a Toilet
To figure out which part of the toilet is leaking, take off the tank lid and identify your parts. The following parts are labeled in the image above.
A: Toilet flush lever: This is what connects the flusher — what you push down to flush the toilet — to the chain and flapper.
B: Rubber flapper: This blocks the tank water from descending into the bowl until it’s raised by the flusher.
C: Pump: This is what refills the tank after it empties.
D: Float: This “floats” in the water, raising and lowering with the water level to tell the pump when to let water in the tank and when to stop.
E: Overflow tube: This sets the high water level in the tank.
Note: The water in the tank is unused and therefore clean. It’s perfectly fine to stick your hands in the tank to pull out or adjust parts. As with any home repair, just make sure to wash your hands when you’re done.
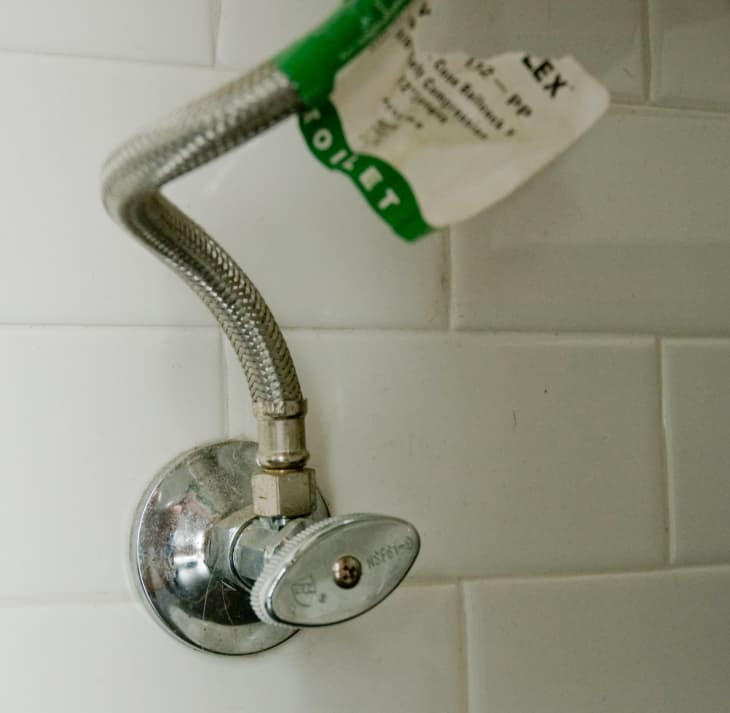
Before Investigating Running Toilets, Turn off the Water
Before you do anything else, it’s a good idea to turn off the water supply to the toilet. You’ll find the shutoff valve on the wall behind the toilet, controlled by a silver knob that’s connected to a water line (which feeds into your toilet’s tank). Tighten it all the way to the right to turn off the water.

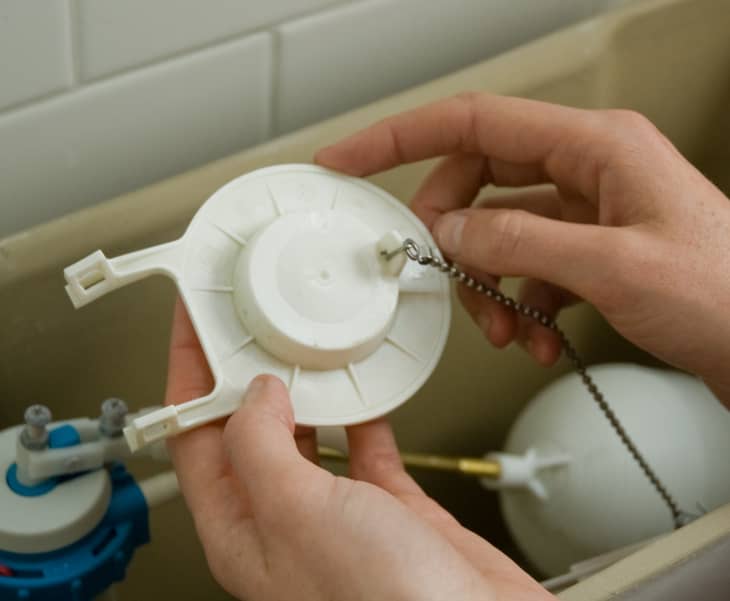
Common Cause #1: The Chain Is Too Short
Check the connection between the flush lever and the rubber flapper it’s attached to. Jiggle the flush lever and watch the chain between it and the flapper. If the chain is too short, it will constantly pull the flapper upwards even when the flush lever is at rest. That, in turn, can lead to water leaking through what should be a firm seal. If there’s extra length on the chain, simply move the clip down to “choke up” on the chain. If not, you can replace the chain with one of the proper length.
Common Cause #2: The Chain Is Too Long
If you jiggle the flush lever and see that there’s too much give on the chain, it might be too long. A too-long chain can interfere with the flapper closing. Move the clip so that the chain has no extra slack.
Tip: Some chains have floats attached (like the one above from Amazon). If there is a float on the flapper chain, make sure it’s loosely floating on the surface or else it also may be pulling up on the flapper. If it’s pulling on the flapper, you can either move the float up on the chain or remove it altogether.
Common Cause #3: Dirty Flapper
Over time, the flapper can warp or break at the hinge, and start to leak. To check on the flapper, first flush the toilet to drain the water out of the tank. Unhook the flapper from the base of the tank and pull it to the surface in order to get a closer look. Try cleaning off any buildup that might prevent the flapper from closing properly (a 50/50 mix of white vinegar and water will do the trick).
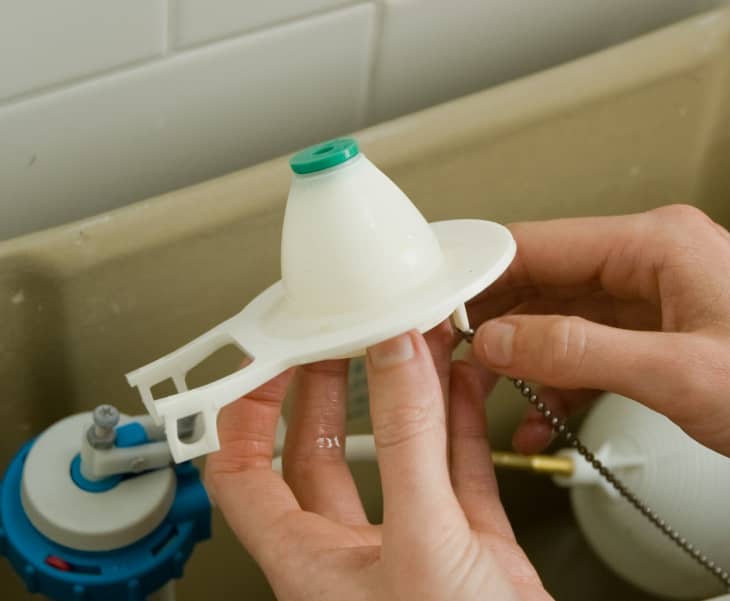
Common Cause #4: Warped or Broken Flapper
Turn the flapper over and look for any discoloration (which could be a sign the flapper is warped and needs to be replaced), warping, or any breaks in the plastic or rubber. Any breaks or warping will prevent the flapper from sealing properly.
If you spot any signs of warping or breakage, it’s time to replace the flapper. Thankfully, these are cheap and easy to swap out. Simply disconnect the old one from the chain and attach the new one. Then hook the new flapper back over the drain.
Tip: When buying a new flapper, make sure you get one that attaches to the chain on the thick center part, not the thin outer lip (where it’s more likely to warp).
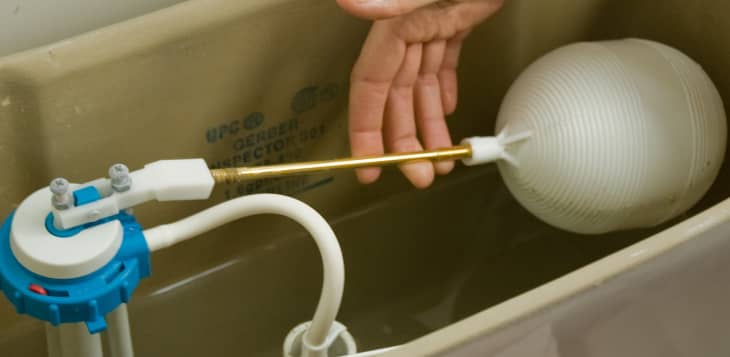
Common Cause #5: Incorrect Float Position
When a toilet is flushed, the tank should stop filling when the water is just below the overflow pipe. If it goes over and the tank is still filling, then the float for the pump is too high. Test this by flushing the toilet a few times, and noting where the water stops.
The simplest fix for a too-high float is to bend the rod connecting the float to the pump so the float is lower and will signal the pump to turn off sooner. If the arm won’t bend, then it might be time to call in a pro, who will be equipped with the right tools for the fix.
Check Before Calling a Plumber
Next time you hear the sound of a leaky toilet, get in there, poke around, and see if you can identify the most likely problem. Chances are good you can figure it out, make the easy fix, and save money on a plumber!