
How To Make an Origami Paper Boat
The art of paper folding has been around since the 1700s, is a simple process involving a piece of paper and patience (no batteries required!) and is an enjoyable way to pass the time when you just need to step away from technology for a while. While learning this process won’t actually grant you the title of Boatbuilder, it’s a great party trick to have in your back pocket-especially at pool parties!
Instructions
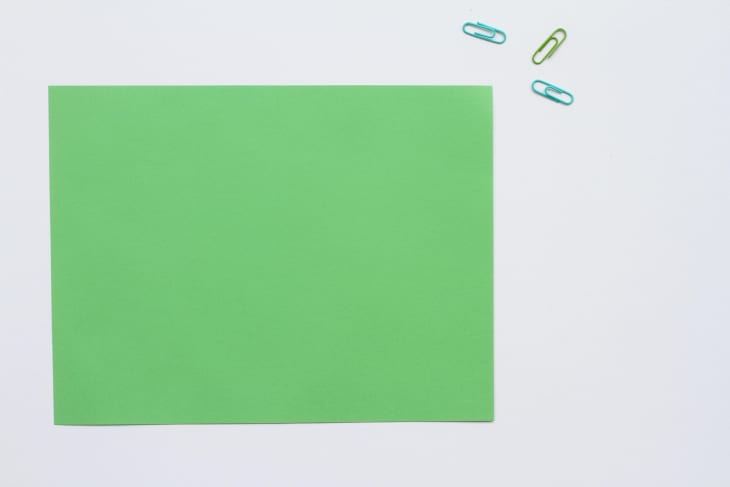
1. Start by laying an 8 1/2 x 11 sheet of paper horizontally on a flat surface.
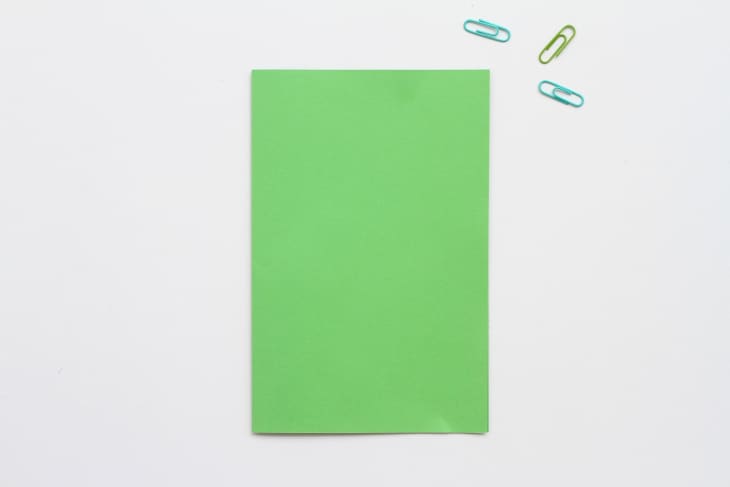
2. Fold the paper in half by bringing the left edge of the paper over to meet the right edge.
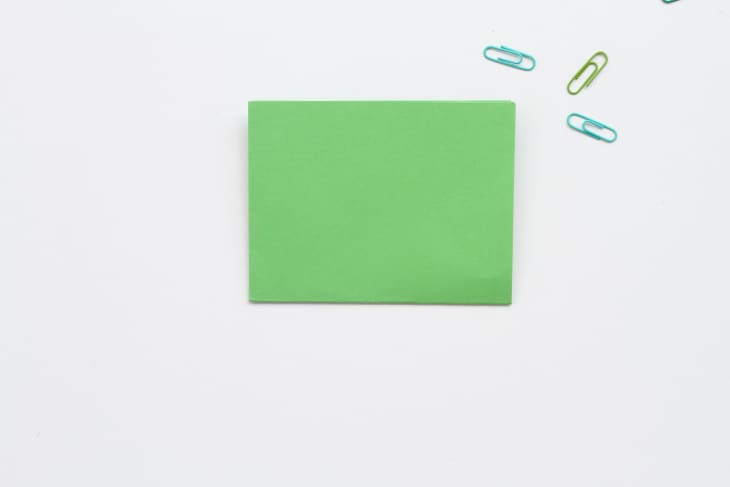
3. Fold the paper into fourths by bringing the bottom edge of the paper up to meet the top edge.
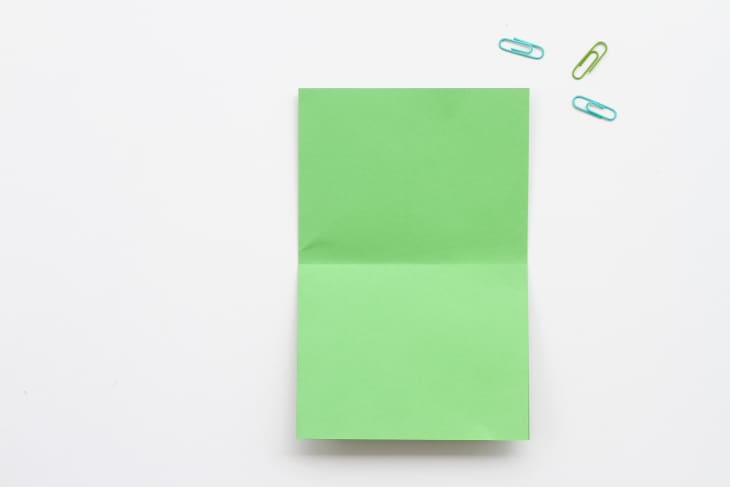
4. Unfold the paper one time so that the paper remains folded in half.
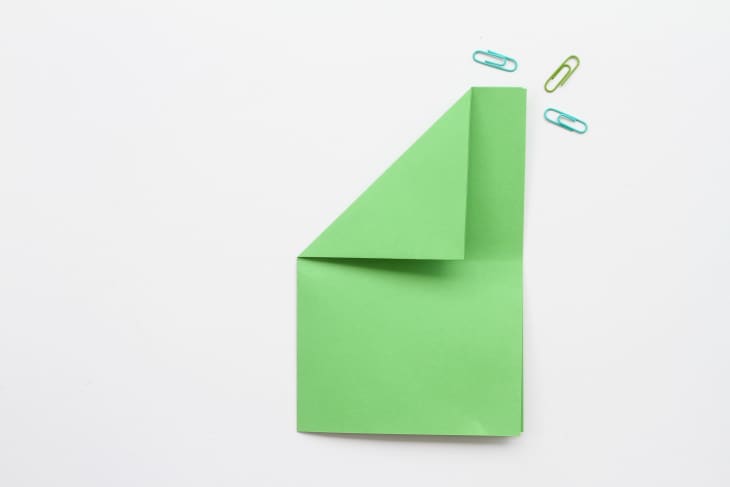
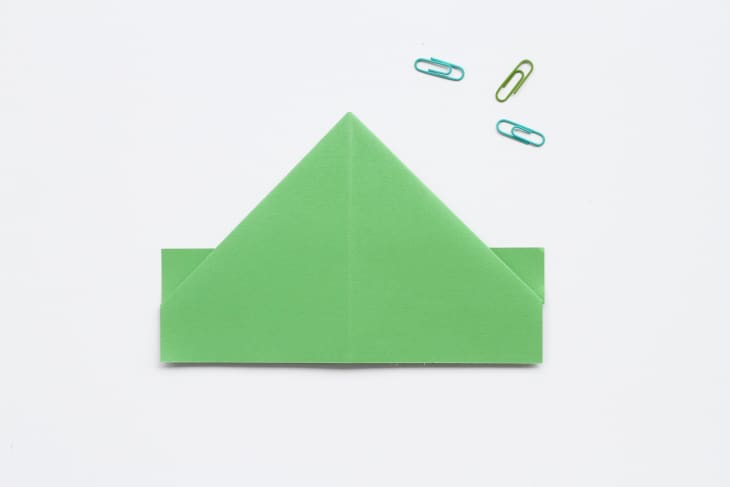
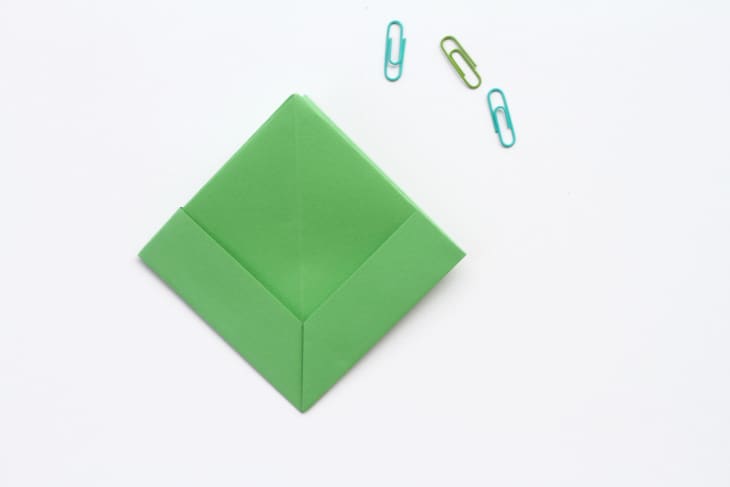
5. With the fold running lengthwise on the left edge, bring the top left corner down along the center crease.
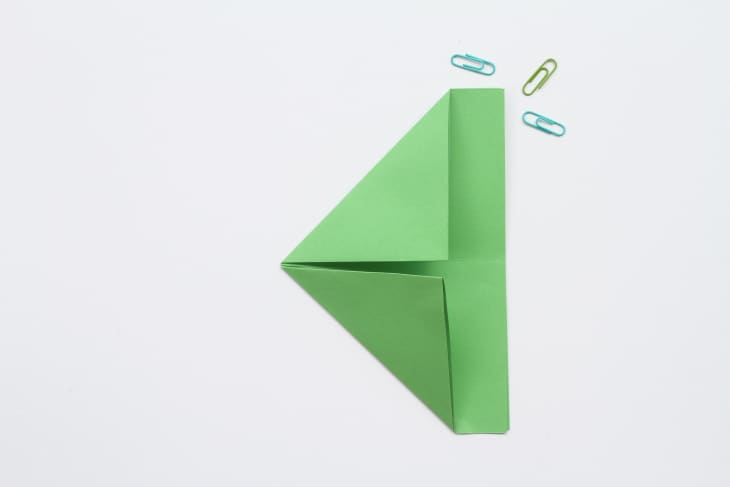
6. Repeat the above step with the bottom left corner.
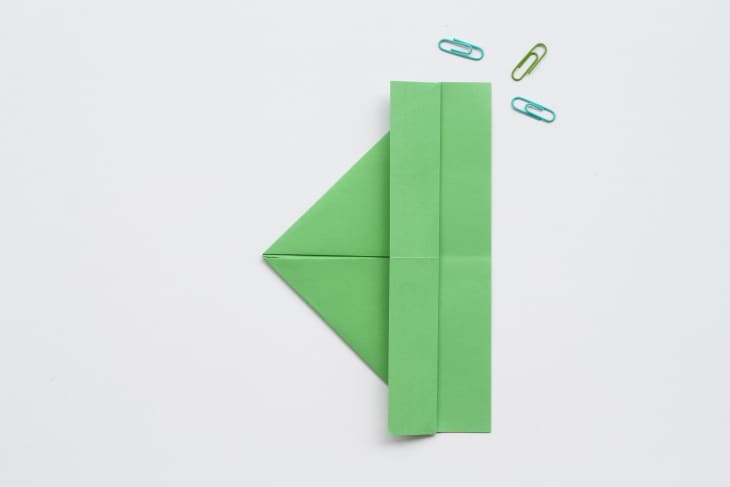
7. Fold the top strip along the right side (open edge) of the paper back over the last two triangular folds you created in Steps 5 and 6.
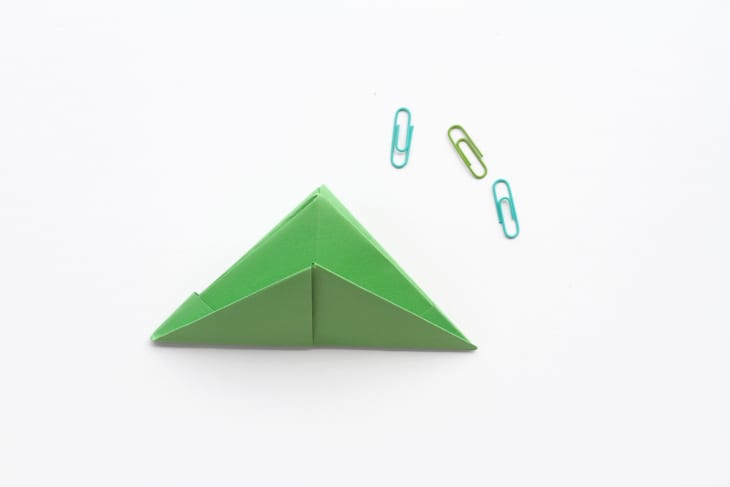
8. Flip the paper over.
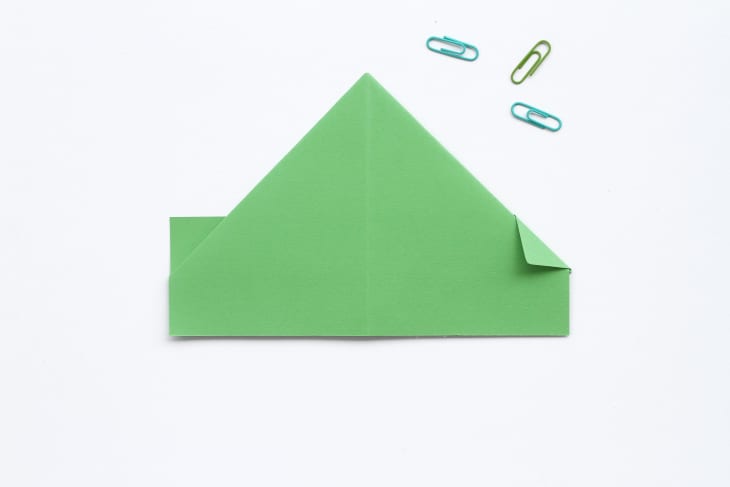
9. Flipping the sheet over will reveal two triangles peeking out from the back. Fold each triangle down towards you, so that they lay flat.
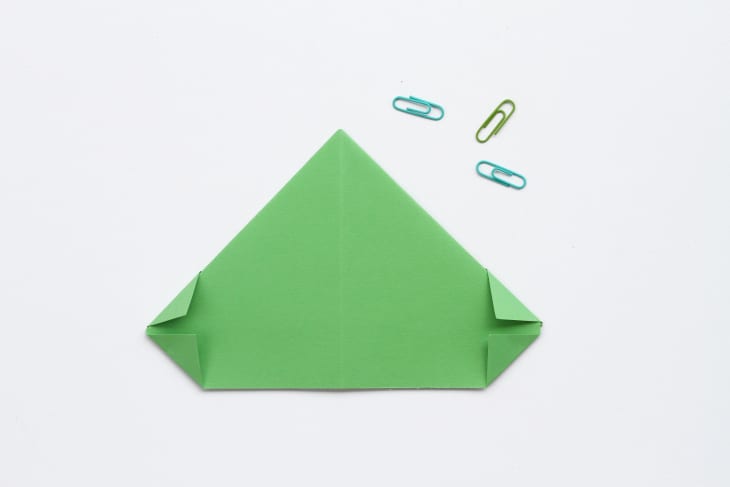
10. Create the same exact triangular fold along the bottom of the paper by bringing the bottom left and bottom right corners up, towards the triangles created in Step 9.
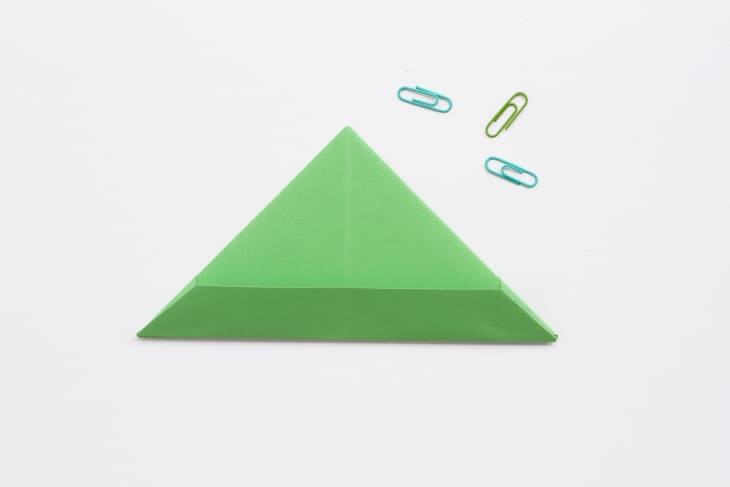
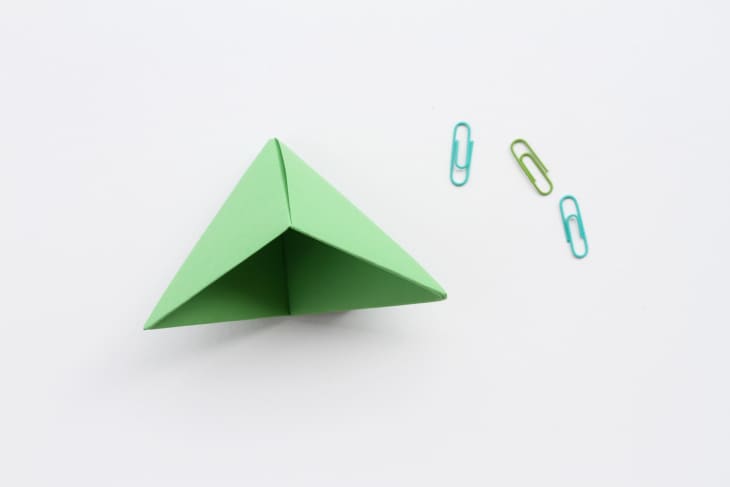
11. Bring the bottom edge of the paper up towards the center of the paper so that the folded sides align with the left and right sides of your triangle.
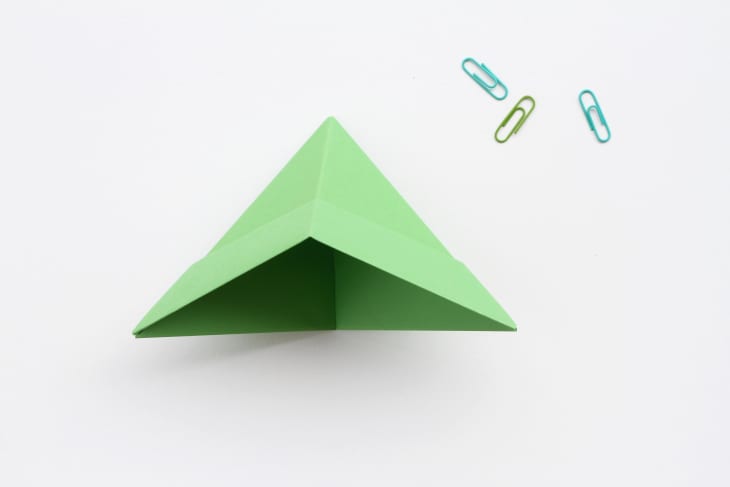
12. Pucker your fold by pushing the left and right points of your triangle together.
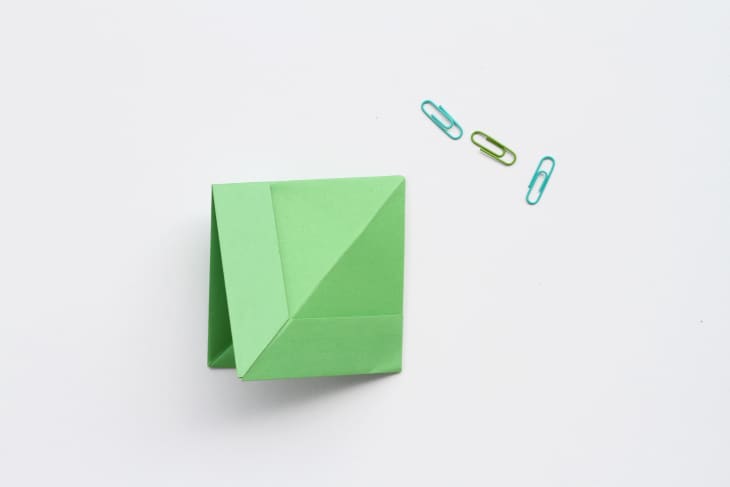
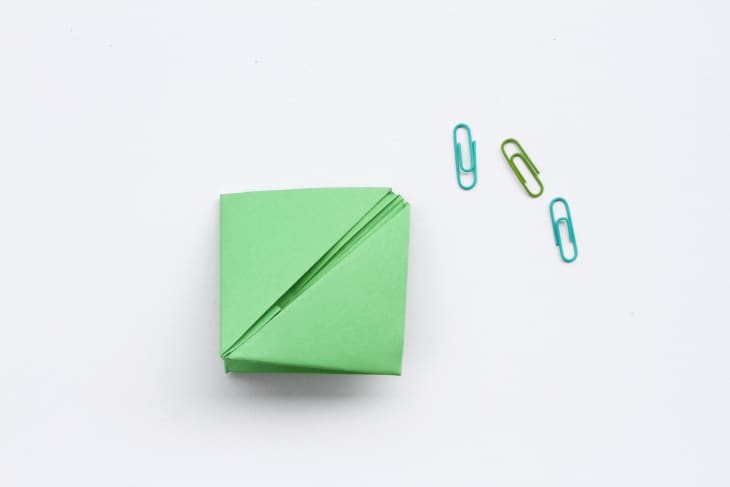
13. Lay the triangle on its side, so that it now is a square shape.
14. Position the paper in front of you so that the folded edge is pointing up, and the open edge along the bottom.
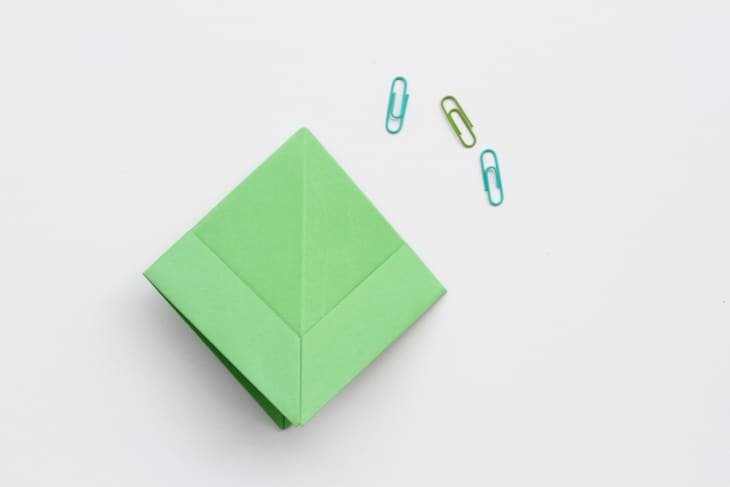
15. Flip up the top layer of the bottom of the square (along the open edge) and fold so that what was once the bottom point of the square is now laying on the top point of the square.
16. Flip the square over and repeat step 15 for the backside.
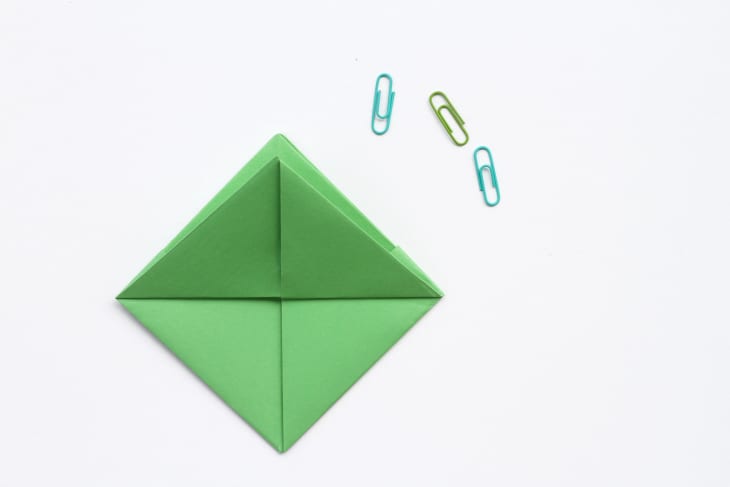
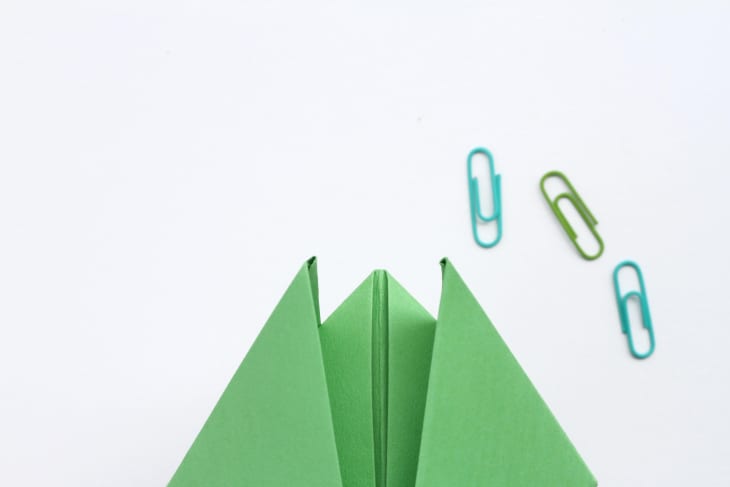
16. you should now have 3 triangular sections on the open end.
17. Point the triangle down towards your work surface and pop it open by sliding your thumb into the bottom opening and pushing the left and right sides towards each other with your fingers. Push the sides together until the paper forms into a square.
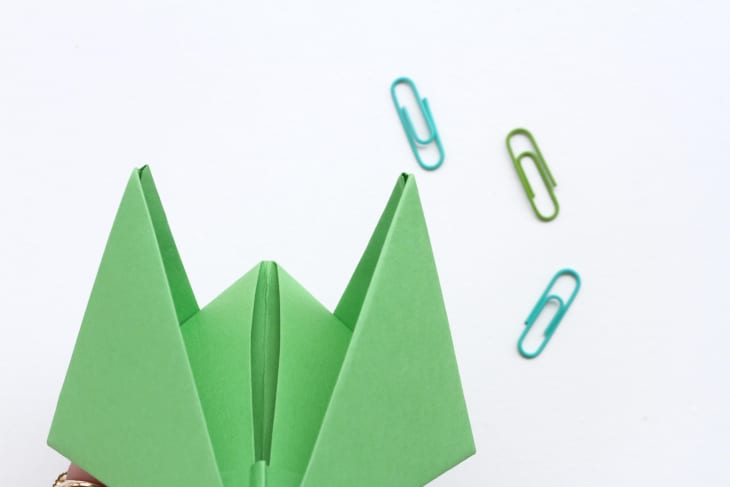
18. The top right corner of your square should look like the photo above.
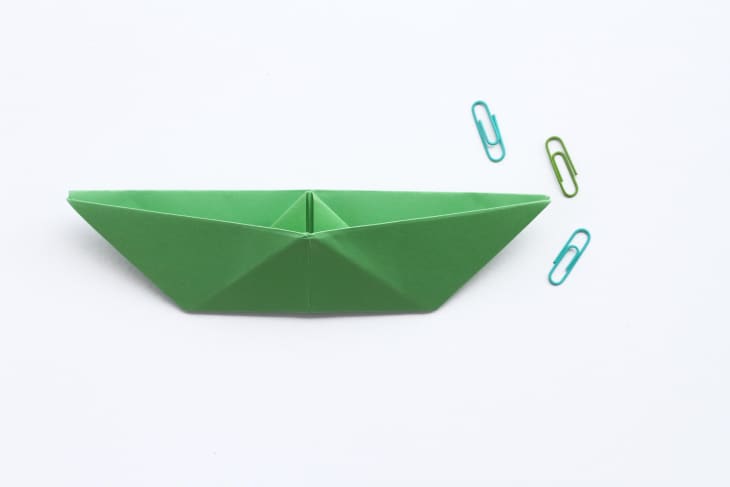
19. Reveal your boat by carefully opening the two sides of the paper like a pistachio shell.
20. Place your thumbs along the bottom of the square and open the points with both index fingers.
21. Once extended all the way, press firmly along the folds to define the bottom of the boat.
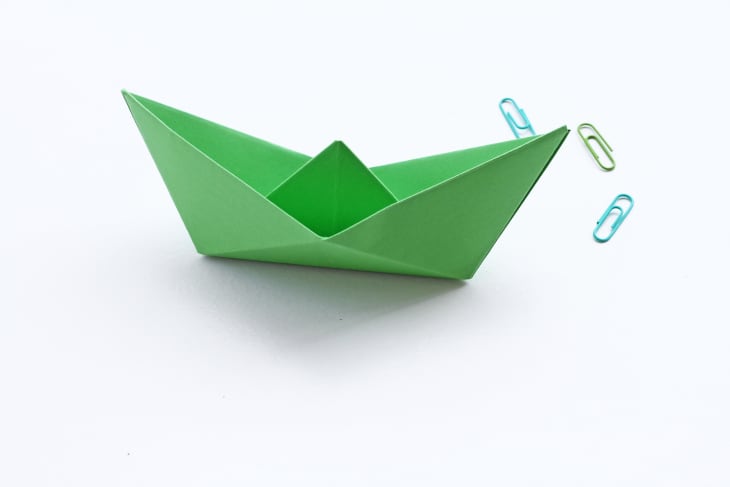
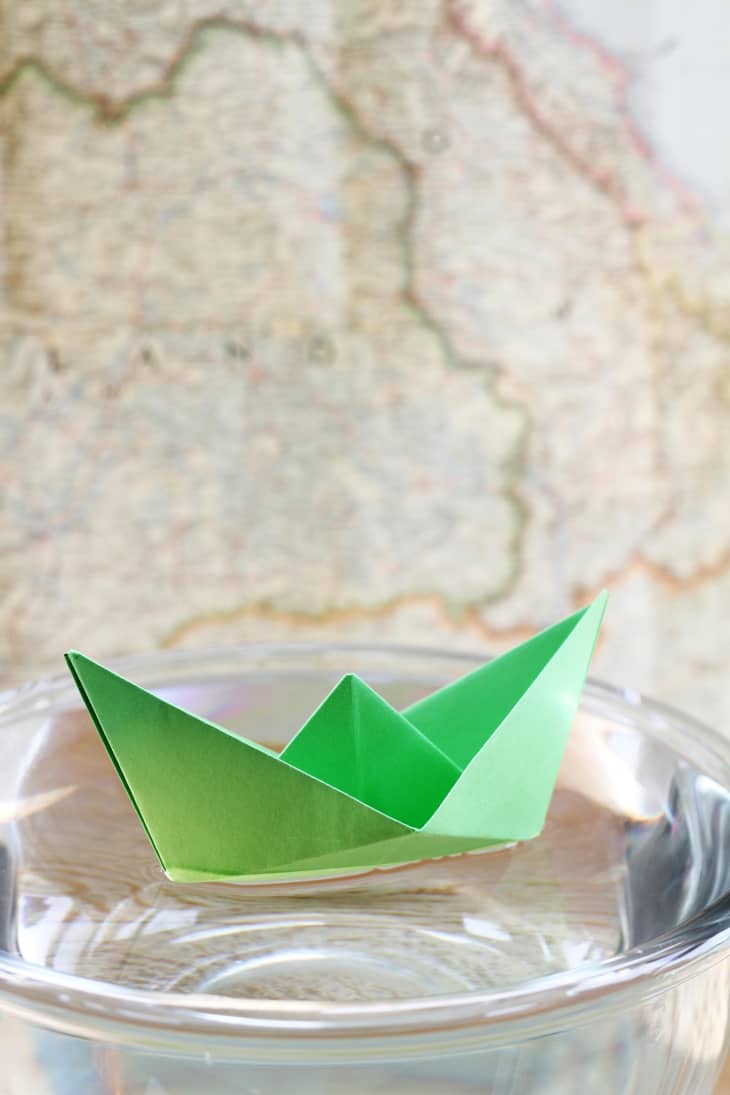
There you have it! A beautiful paper boat that floats!
Have a really great DIY project or tutorial that you want to share with others? Let us know! We love checking out what you’re making these days, and learning from our readers. When you’re ready, click here to submit your project and photos.