
The Right Way to Use a Drill for Beginner DIY Projects
The first set of tools I ever got was an IKEA hand tool set (filled with a couple types of wrenches, a hammer, and a multi-head screwdriver), given to me as a high school graduation present. But it wasn’t until I finished college and got my first drill (in fact, the same drill I have now!) that I felt like a real-deal adult. Learning how to use a drill opened up so many opportunities to customize my home to suit my needs and tastes.
A cordless drill can be intimidating to beginning DIYers, but it’s not as scary as it looks — and it’s well worth having one around if you ever want to do something as simple as install wall hooks or hang a heavy mirror. Here’s everything you need to know about how a drill works and how to use it around your home stress-free.

Parts of a Drill
- Chuck: This is what grips the bit, holding it in place while you use the drill. Twist it counterclockwise to open when you want to insert a bit, then clockwise to close.
- Forward and Reverse Switch: This changes the direction in which your bit is rotating, which determines whether it’s going forward (into the object you’re drilling) or in reverse (out of the object you’re drilling).
- Clutch Torque Selector/Clutch Collar: This is where you’ll adjust the setting you’re using for either drilling or driving. To drill a hole, set to drill mode. To drive a screw, twist this to higher numbers to increase the force, or torque, for harder materials; choose a lower number to decrease the force for softer materials.
- Trigger: Squeeze this to activate the drill.
- Battery: Every cordless drill will have a battery that needs to be charged occasionally.

What a Drill Can Do
The first and most important thing to know about drills: They do more than just drill. What you and I call a “drill” is actually a drill/driver, since it both drills (bores a hole into a material) and drives (fastens a screw into a material).
Drills can be fitted with various types of bits that are made for lots of different tasks, making them a super versatile DIY tool, but there are two common tasks you’ll do with a drill as a beginner.
Create Small Pilot Holes in Walls
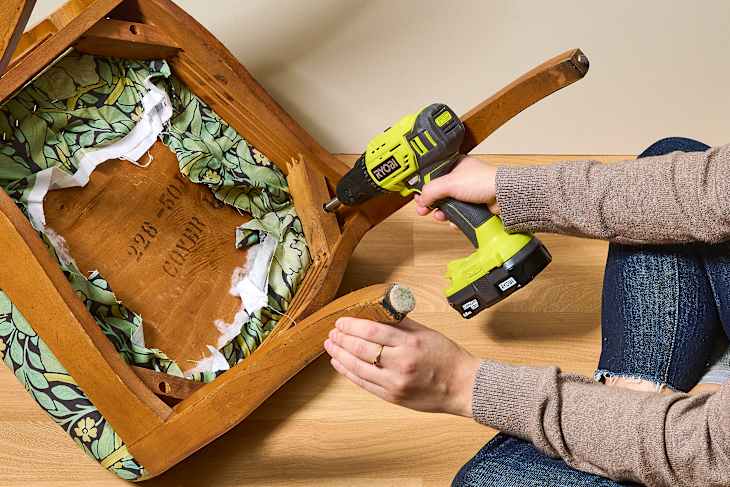
When hanging a heavy mirror, installing shelves, or mounting other items to your walls, use a drill bit to create a pilot hole — or a starter hole — for a screw before fastening it in. To do this, you’ll use your drill/driver in drill mode.
Drive Screws into Drywall and Wood
Use an impact driving bit with a head that matches your screw (Philips, flat head, etc) to drive in screws with ease. You’ll want to use this function to install the screws needed for installing shelves and other wall-mounted items, but also for putting together any stubborn furniture pieces that need a little more force than hand-screwing allows. To do this, you’ll use your drill/driver in driver mode.
Types of Projects You Can Do with a Drill
I think a basic cordless drill/driver is a must-have tool for beginner DIYers and first-time apartment dwellers because it comes in handy for a lot of projects. Here are some around-the-house DIYs I’ve done using my drill.
Where to Buy a Drill
A basic, beginner cordless drill will set you back anywhere from $50 to $125, depending on whether you also need to buy a battery and charger.

I’ve had my drill (this Ryobi one) for over 10 years, during which time it’s survived three moves and more uses than I can count. Other options suitable for beginners include this Dewalt 20V Max Cordless Drill/Driver Kit ($116.75 at Amazon) and this Milwaukee 18V Lithium-Ion Brushless Cordless 1/2 in. Compact Drill/Driver Kit ($99 at Home Depot).
Make sure to look for a “drill/driver” that will ensure you can both drill holes and drive screws with your new tool.
How to Use a Drill
When using a drill, there are a few techniques to keep in mind for both your safety and for the success of your project.
Choose the right bit for the job.
Make sure that the drill bit you use is made for whatever material you’ll be working with. Using a bit made for wood to try to screw into a brick wall could result in a broken bit or cracked masonry, for example.
If you need to drill pilot holes, make sure to select a drill bit in the correct size.
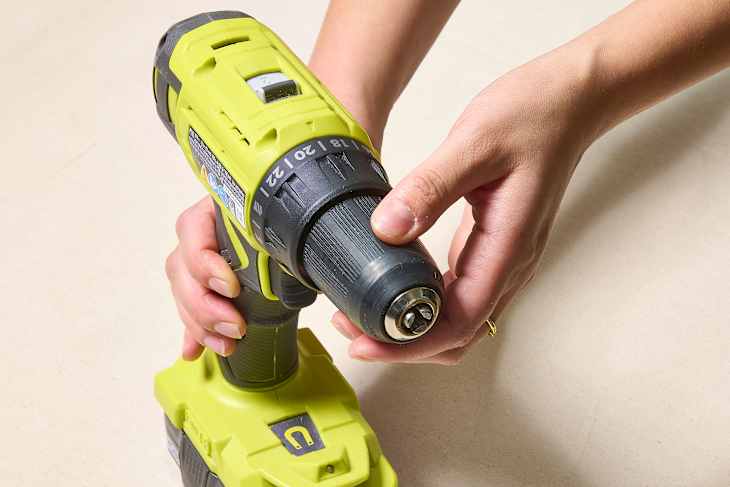
Install the bit securely.
To install a bit, make sure to first turn off the drill (and remove the battery for extra security). Then, twist the chuck counterclockwise to open it.
Insert the bit you’ll be using shank-first so that the smooth side is being gripped by the chuck. Then, twist clockwise until the bit is held securely and cannot move.
A bit that’s not fully secured in the chuck won’t stay straight and won’t effectively spin.
Choose the correct function.
Use the clutch torque selector to choose the correct function for your project. For drilling, make sure it’s set to the drill setting — neglecting to do so is a super common mistake and one I have made myself!
For driving, start with the lowest torque to test; if it doesn’t work, stop, adjust higher, and try again. Repeat until you find a setting that will allow you to drive a screw into the material of your choice.
You might also see speed settings on the top of your drill. Choose a lower speed for drilling and a higher speed for driving.
Wear protective gear.
It’s best practice to wear eye protection when drilling to help shield your eyes from dust and debris.
Maintain a light trigger finger.
The trigger is pressure-sensitive, so pressing down fully will spin the bit fastest. To ease in, pull the trigger lightly.
Keep slight pressure on while you work.
Use your working hand to keep a slight, steady pressure through the drill while you work, which will help the bit stay in place.
When you’re done and need to remove the bit from the project, use the “reverse” setting so that you can guide the bit back out of the project.