
I Superglued This $10 IKEA Find into a Small-Space-Friendly Storage Staple (It’s So Colorful!)

I like to live in a colorful world — even when it comes to storage. With a style that I call “maximalist Marie Kondo,” I curate my home like a museum full of funky decor (often thrifted on a budget), like vintage disco fruit and realistic food candles. I have cool mid-century tension rod shelving from the ’70s in a few rooms of my apartment, but there was a little spot I wanted to put a tall shelf to display my most prized pieces: my vast collection of food-themed bric-a-brac.
Looking in thrift stores, Facebook Marketplace, Craigslist, and budget-friendly stores, I didn’t find quite what I needed. But in my IKEA search, I stumbled across some on-sale KNARREVIK bright yellow metal nightstands that looked lightweight and durable. The DIY part of my brain lit up, and I went and picked up four (to stack together) and a tube of Gorilla Clear Grip Super Glue (similar to E6000, a favorite glue amongst makers).
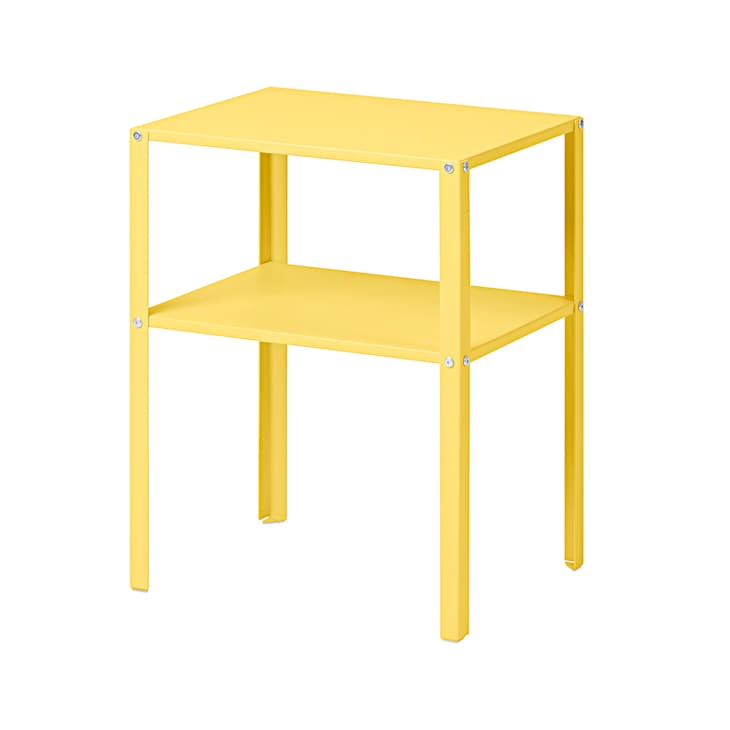
This glue promised a “permanent bond in seconds” that would work on metal and dry crystal clear, and that was almost true. After assembling all four IKEA nightstands, I first tried gluing them with the little plastic tabs still on the bottoms of the legs (meant to stabilize them on the ground). They didn’t attach, so I popped the pieces off with pliers and tried gluing again, being sure to press and hold each leg down onto the surface of the nightstand below to let it set before moving on to the next level.
I initially just glued two together, let them dry for 20 minutes, then came back to assemble the DIY shelf to its full height of 64 inches. To be safe, I let it sit overnight, gave it a shake to make sure nothing moved in the morning, and then added my favorite pieces to display.
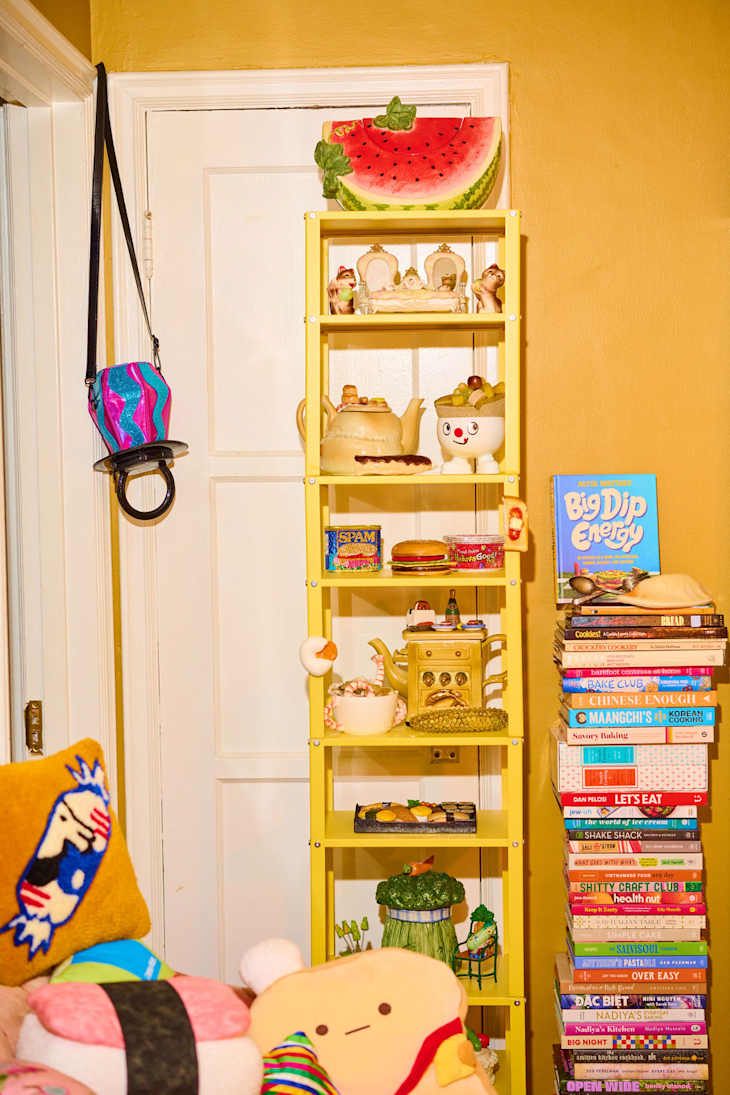
The final measurements for this custom shelf are 64” high, 12 3/8” wide, and 10” deep. The alternating shelves are 10” and 6 1/4” high for variance in tchotchkes displayed. The piece fit perfectly into a spot between my living room closet and another storage bookshelf and drawers from IKEA with fun vintage knobs added on. I even added a stack of books alongside the shelf during a photoshoot with my friend Rebecca, but you could also style these on the shelves themselves (the more colorful the spines, the better!).
While my collection is far from complete, this compact, bright shelf is a nice way to look at (and store) all my favorite stuff. Isn’t it neat? Bonus: I didn’t have to paint anything, and the entire project cost less than $50, which is cheaper than most new freestanding shelving units!
Get all the IKEA UPDATES
Sign up for The IKEA Edit, our twice-weekly newsletter with the latest IKEA finds, deals, and hacks.