
Before and After: This $700 Kitchen Redo is the Stuff Rental Dreams Are Made Of
This builder-standard kitchen’s strength lies in its plainness: there might not be a ton here to flip over, but there’s not really anything to be put off by either. Fortunately, this kitchen’s new renter found a way to play up its strength and minimize its flaws—and all for only $700!
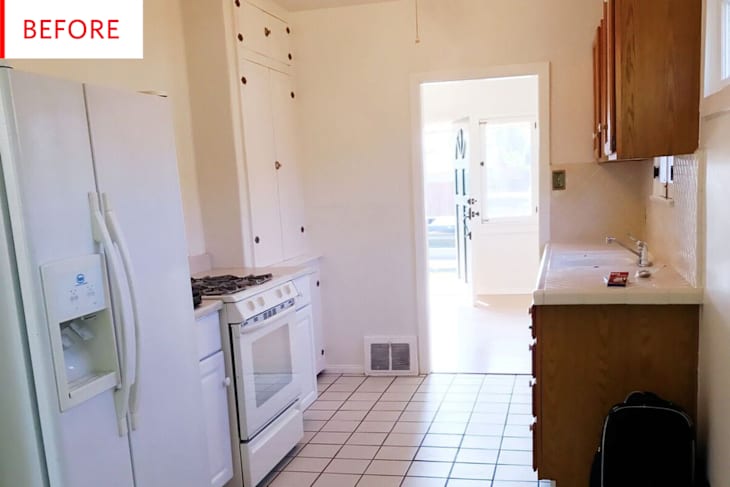
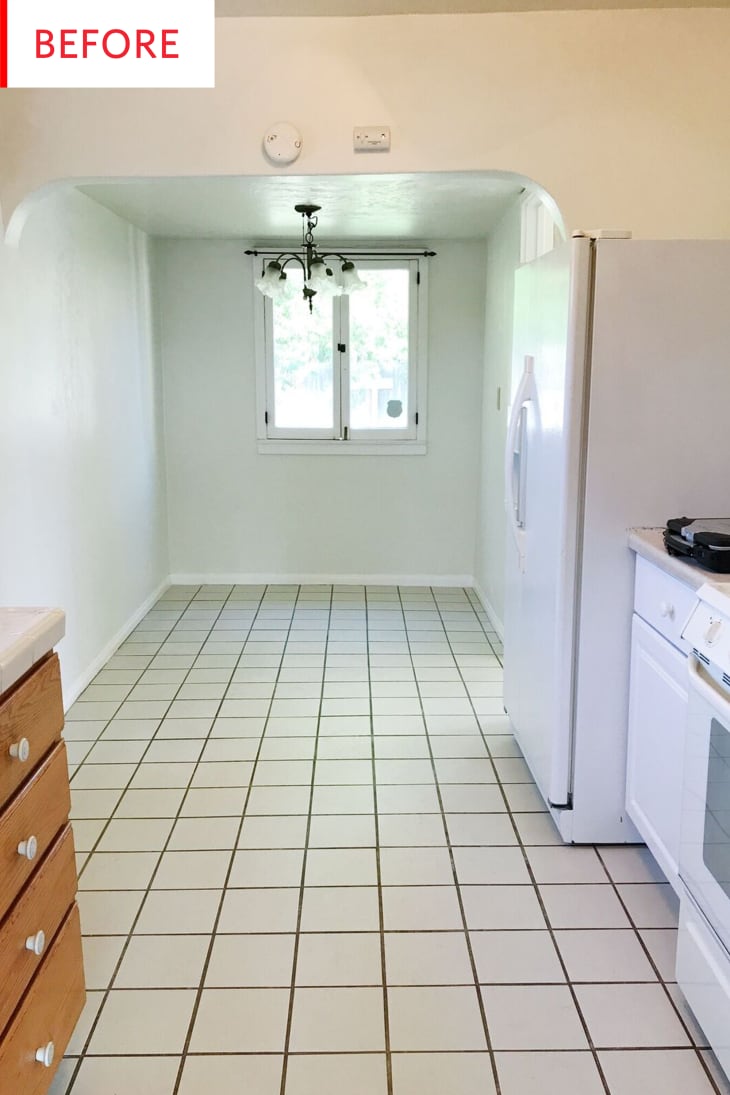
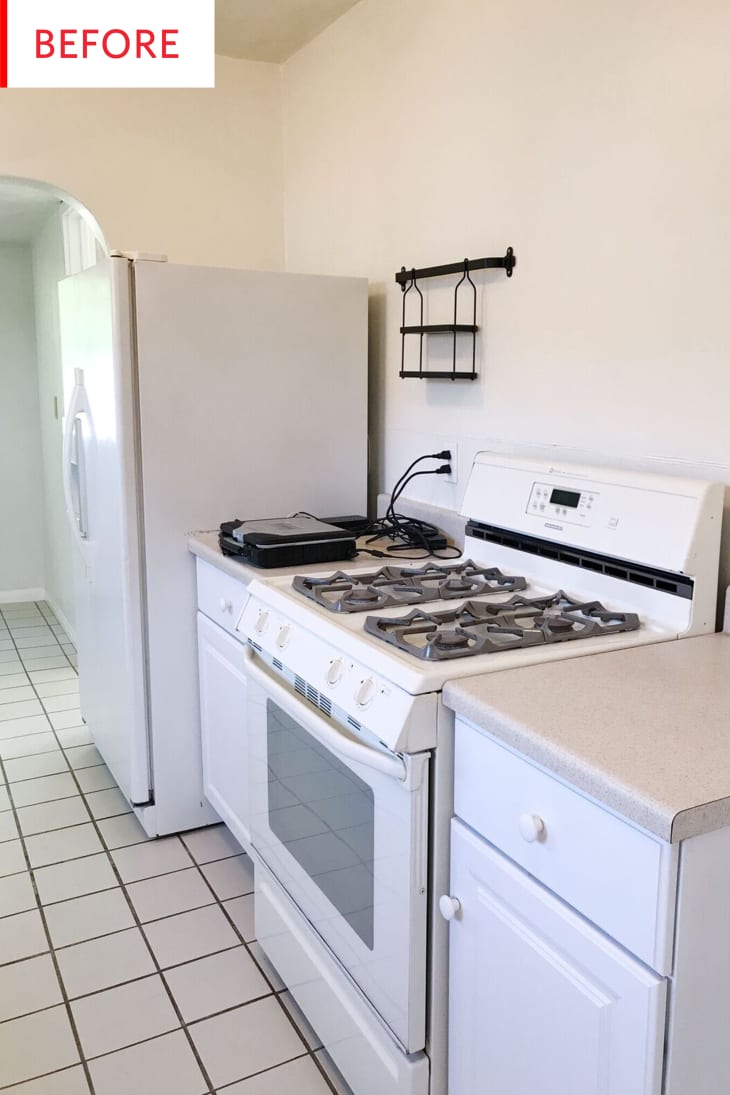
This full-length shot shows what Elizabeth of College Housewife encountered upon walking into a potential rental home:
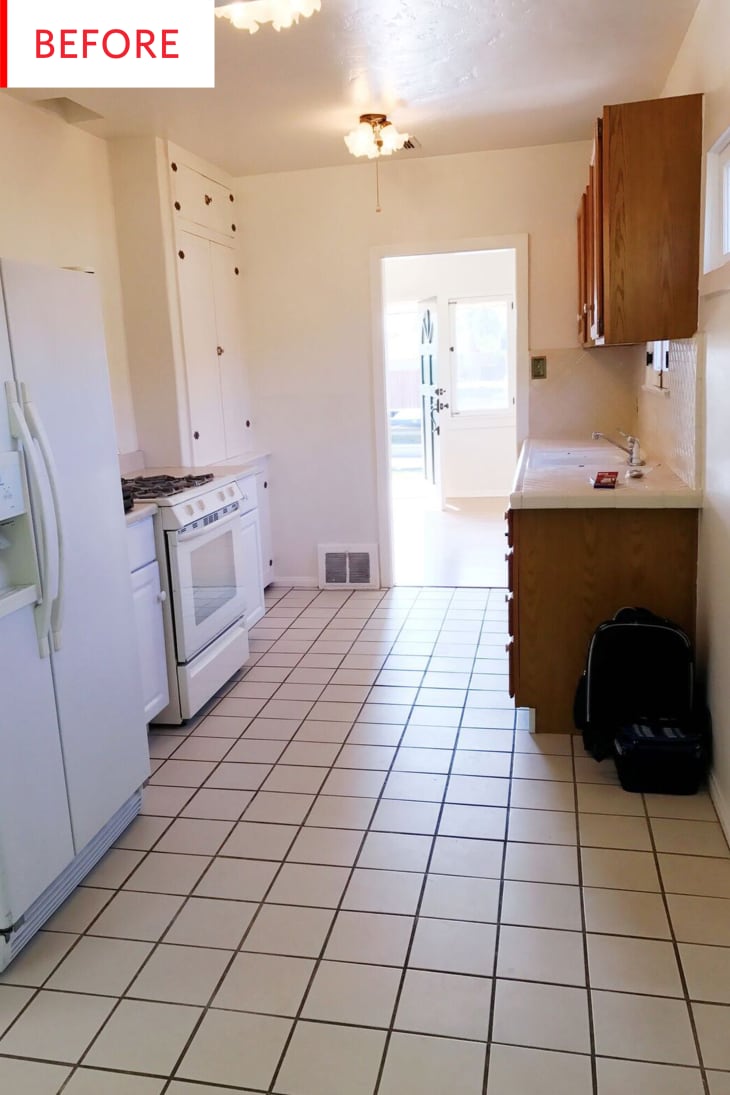
I knew within the first five minutes of our house tour that the kitchen had some mega potential. The all white base and huge wall above the stove was like a blank canvas begging for some paint. I was instantly drawn to the three large windows that flood in natural light. Most apartment kitchens only have one or two windows if you’re lucky! My second favorite feature was the built-in pantry! I knew I wanted to add in some extra storage ideas but the original built ins from 1929 gave the kitchen so much character! I couldn’t wait to get my hands dirty and give this kitchen the TLC it deserved!That pantry is indeed super-cute, and kudos to Elizabeth to seeing so many exciting possibilities in a fairly standard — if larger-than-average — rental kitchen. Interior Design Optimism is a great characteristic to have indeed.
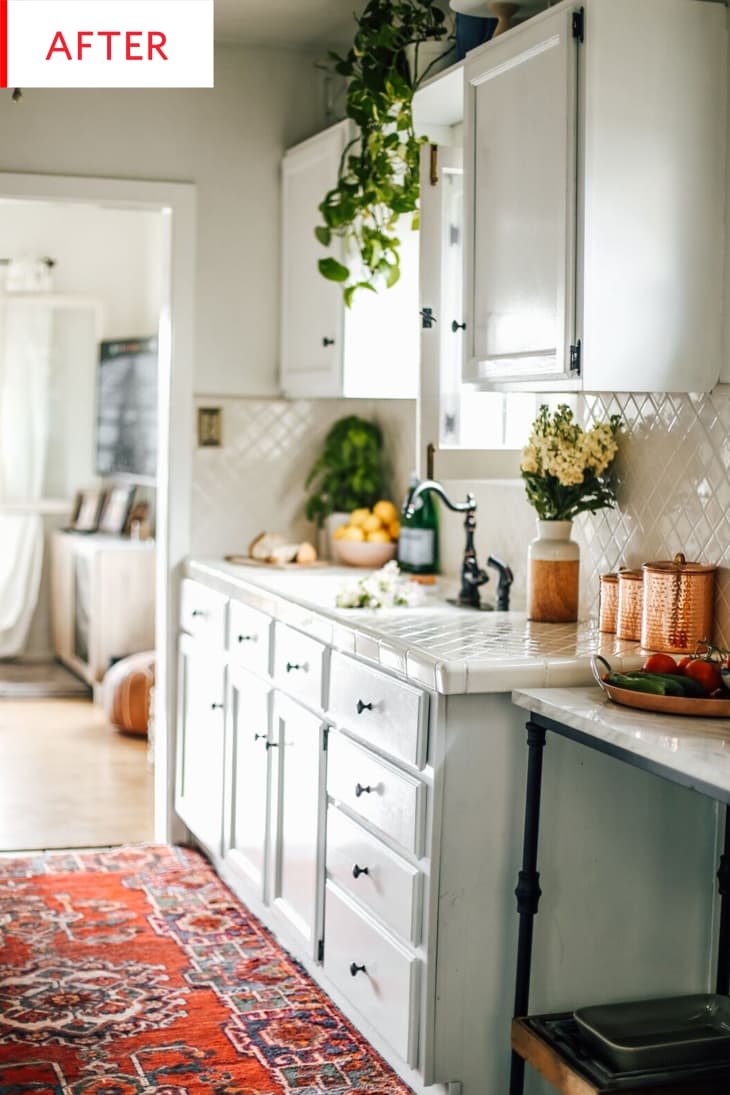
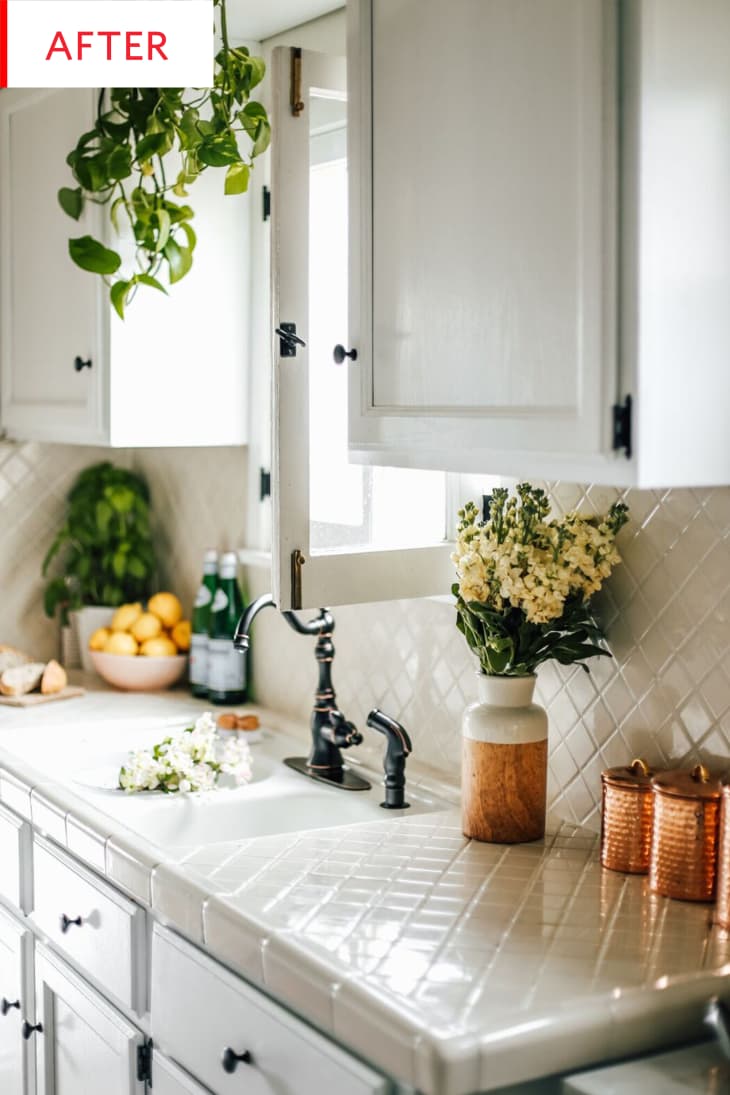
This is so pretty. The white cabinetry works perfectly with the quilted countertop and backsplash, creating a pleasantly clean glow. And since the warmth of the wood cabinets has been neutralized, Elizabeth smartly added other warm elements: copper accessories, wooden shelves (more on that below), and the beautiful rug. Using the top of the cupboards to display just a few key items—plant, cake stand—creates a feeling of expansive height without looking cluttered. Swapping out the silver and white hardware for dark metal knobs and faucets was also a good move; the new ones pop against the white.
How were all of these changes made in a rental? Elizabeth weighs in:
We began the process of sprucing up this galley kitchen in October. Three months and $700 later we finally achieved the rental kitchen of our dreams. We are lucky enough to have an easygoing landlord who seemed to be totally okay with what I like to call us ‘proactive renters.’ My boyfriend Jared and I have been living together for two years and have taken on sort of a ‘Chip and Joanna Gaines’ rental edition in every home we end up in. I love taking on easy weekend projects. I think a lot of people thought we were crazy for putting money into our rental, but, to be honest, it wasn’t enough to really break the bank and it made all the difference.My policy is that if you can afford it, your landlord allows it, and you see yourself living in your apartment for at least another year, investing in your rental is totally worth it. I painted the “bedroom” of my studio after living in it for five years (I lived there an additional three) and kicked myself for not doing it sooner. Such a huge improvement for the cost of a gallon of paint!
Speaking of paint:
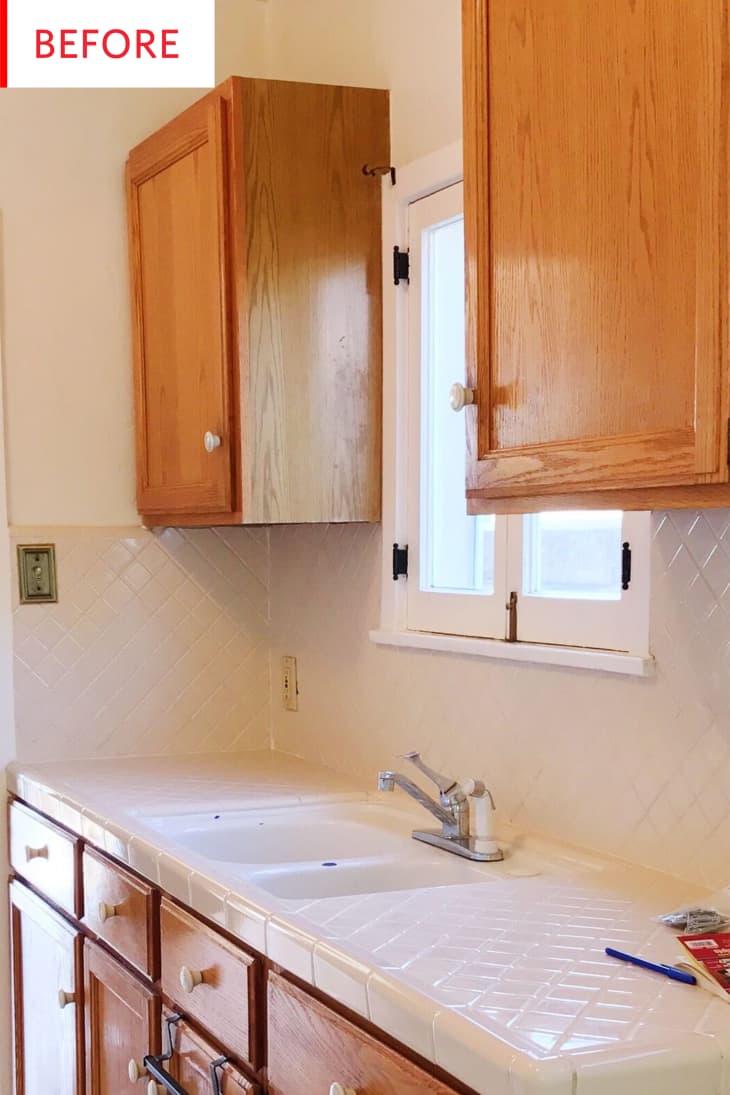
Our first step was a fresh coat of paint. The landlord was 100% okay with us painting the dated wooden cabinets. We went with white to match the rest of the kitchen. This was a super quick fix that instantly gave the kitchen a face-lift.
We did a few more minor things to the kitchen. One of the more ‘drastic’ things we did was swap out the faucet. The old one was silver and didn’t match the new hardware. I probably wouldn’t have done this but because we film quite a bit in the kitchen, it seemed worth it. Our landlord agreed to pay for the labor to put it in if we bought the actual hardware.
That is a good deal to strike with a landlord! It would never have occurred to me to ask but we should all ask from now on! Within reason! The new faucet is a good choice: the black is modern, but the shape is pleasingly old-fashioned, so it will probably look fresh for a long time. Also, those cabinet doors are way less dated than many examples we see here (and the ones in my own kitchen). While their honey hue is aggressive, their shape is pleasingly simple and classic.
This angle shows the dining space/breakfast nook and emphasizes just how much white there is in this kitchen; it makes sense to paint the cabinets white to create a cohesive whole.
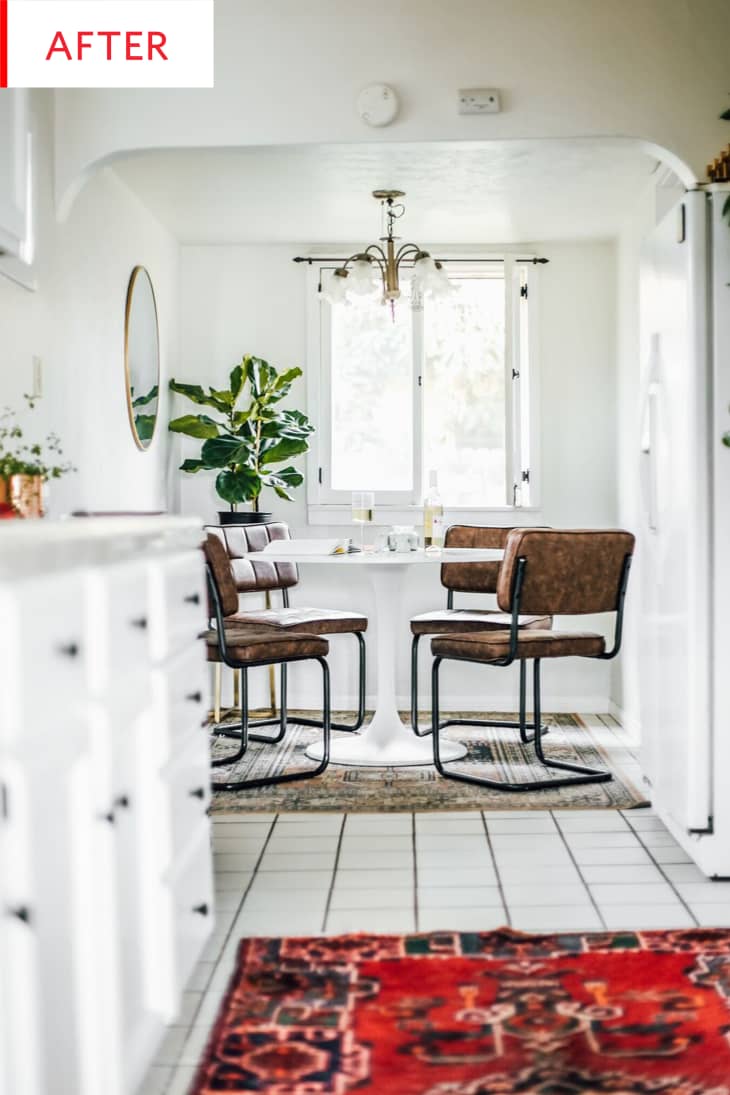
With the addition of that graceful table and luxurious leather chairs, suddenly the light fixture makes sense! It might not be exactly what Elizabeth would have chosen, but the modern decor showcases it well. Almost any less-than-ideal piece can look good against a modern backdrop. The dining room rug is an excellent choice, delineating the two areas and generally just being gorgeous. While there’s nothing wrong with the tile floor, there was a lot of it, and the two rugs break up the expanse nicely.
Here’s that big, blank wall mentioned earlier; it was indeed calling out for some sort of adornment, and Elizabeth knew just the thing:
While the kitchen was spacious, I knew we would need to add in some more storage. I’ve been a lover of open shelving for a while and it was on the top of my wish list for the kitchen.
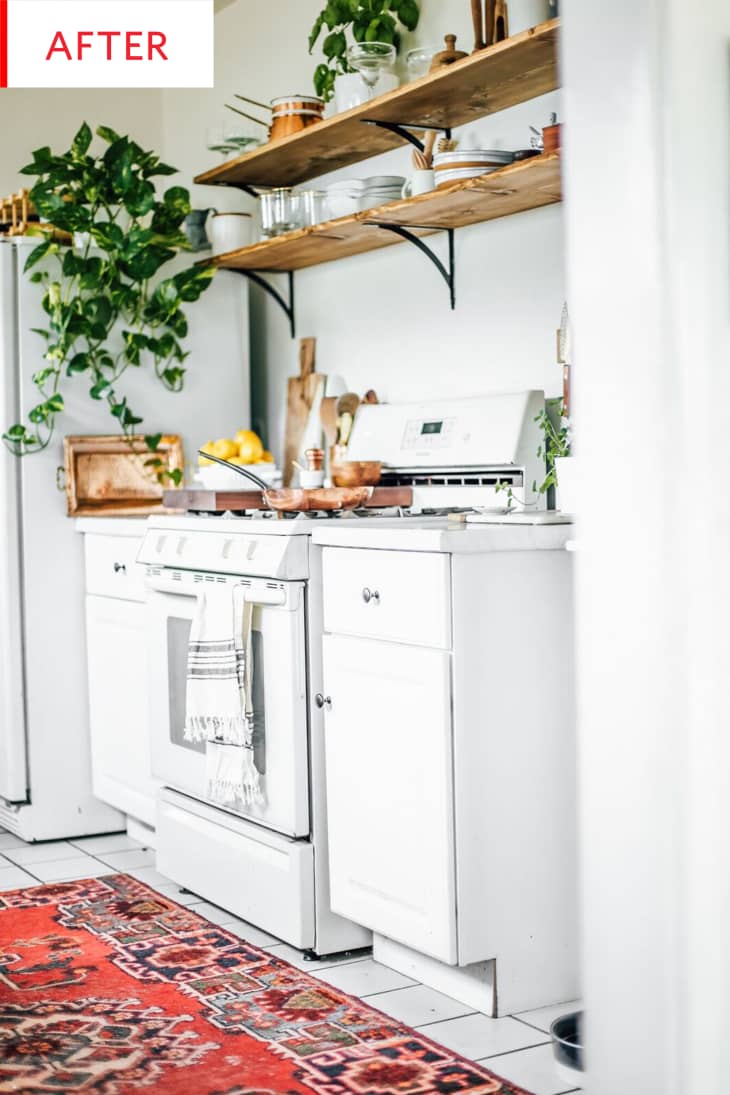
This is lovely. The wood is stunning, and the continuation of the copper and plants theme unites this portion of the kitchen with the sink area. The white canvas rightly focuses all attention on the wood, green, and copper.
I have a ton of vintage and ornate kitchen items/props collected from my grandparents and flea markets over the years. I’ve never had the chance to display them untilThe shelves are very well-styled yet practical: in addition to the beloved kitchen ephemera, everyday dishes are also on display.
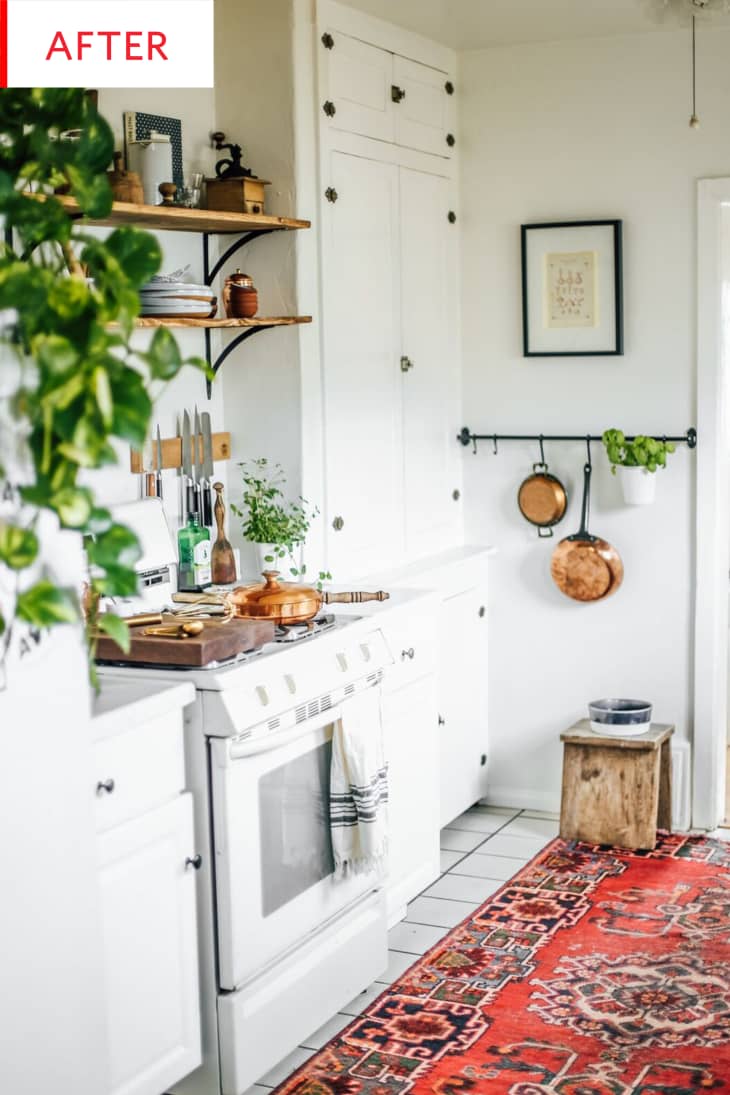
Well done, Elizabeth, on making the most of that little wall; the art and the pot/plant rack are just perfect there. Once again, clever storage allows pieces that need a home to also act as decoration.
The last ‘fix’ we put into the kitchen was covering the counter tops with some marble contact paper. If you have smooth counter tops this is a $30 fix that makes your counters pop! The wear and tear has been great on them thus far! Everything else was just a large dose of personalization. This means things like plants, linens, dishware, rugs, etc!
Working as a full-time food blogger and stylist means I spend an abnormal amount of time in the kitchen. Every morning that I walk into my kitchen to ‘work’ I couldn’t be more thrilled with the space that we created without actually ‘renovating’.
That is an amazing goal for all of us, whether we do paid or unpaid work in our kitchens. Congratulations!
Thank you, Elizabeth and College Housewife!