
Before and After: The Best Part of This Stunning Living Room Redo Is a $5 DIY
Vancouver-based Kristina Steinmetz knows her way around a good DIY. Her site, Ich Designer, is filled with clever and sophisticated home projects and IKEA hacks that have surprisingly humble origins and price tags. We recently featured her re-done mudroom, and her latest living room makeover might be even better.
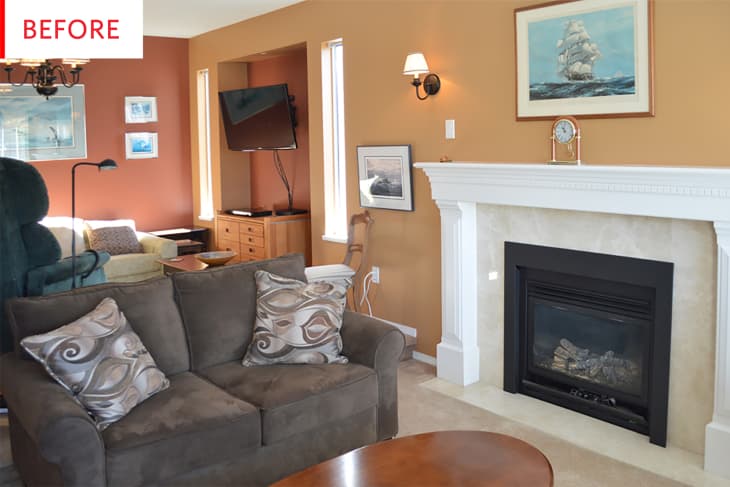
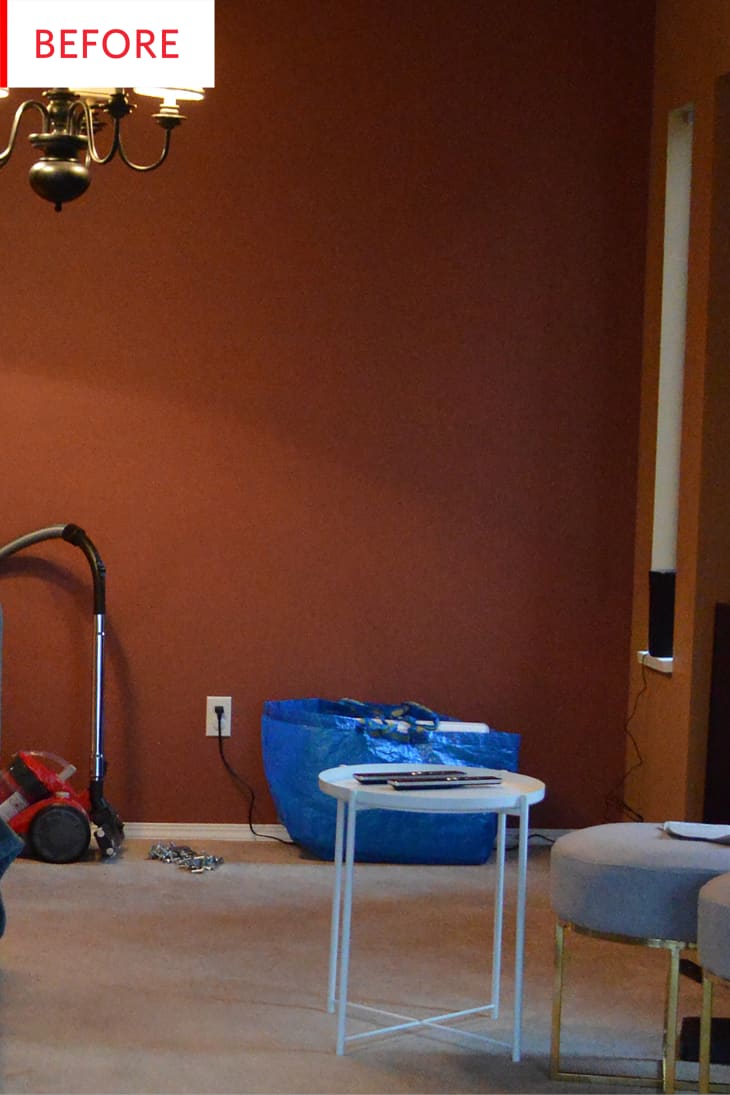
Here’s a wider shot, so you can get more of a sense of the whole room. It was in good shape but definitely needed an update. The painted earth-toned walls weren’t doing it any favors in the excitement department, and carpet just brought more beige into the mix. But, see what it looks like now!
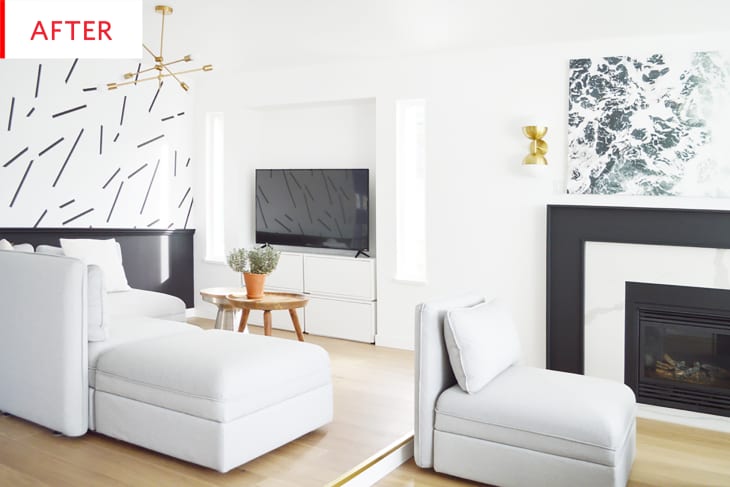
To get a more modern look, Kristina swapped out the old molding for a sleeker fireplace surround, installed hardwood floors, and added in some furniture with clean lines. The black and white color palette is dramatic and minimalist, while the brass light fixtures add a little shine and glamour.
What looks like a wallpapered accent wall is actually a clever DIY using black tape:
The best thing about this DIY is that it is super easy to make, removable (perfect if you live in a rental apartment) and it only cost me five bucks. My inspiration was a super cool designer wallpaper that had this pattern. Unfortunately, it was so expensive that I decided to make my very first DIY “wallpaper.”
Instead of jumping right in, Kristen tested out a repeating pattern with painter’s tape first, experimenting with different line lengths. When she was ready for the final install, she also cut the tape ends at different angles to add a little extra dimension and interest to the design. The final graphic adds a ton of movement to the room.
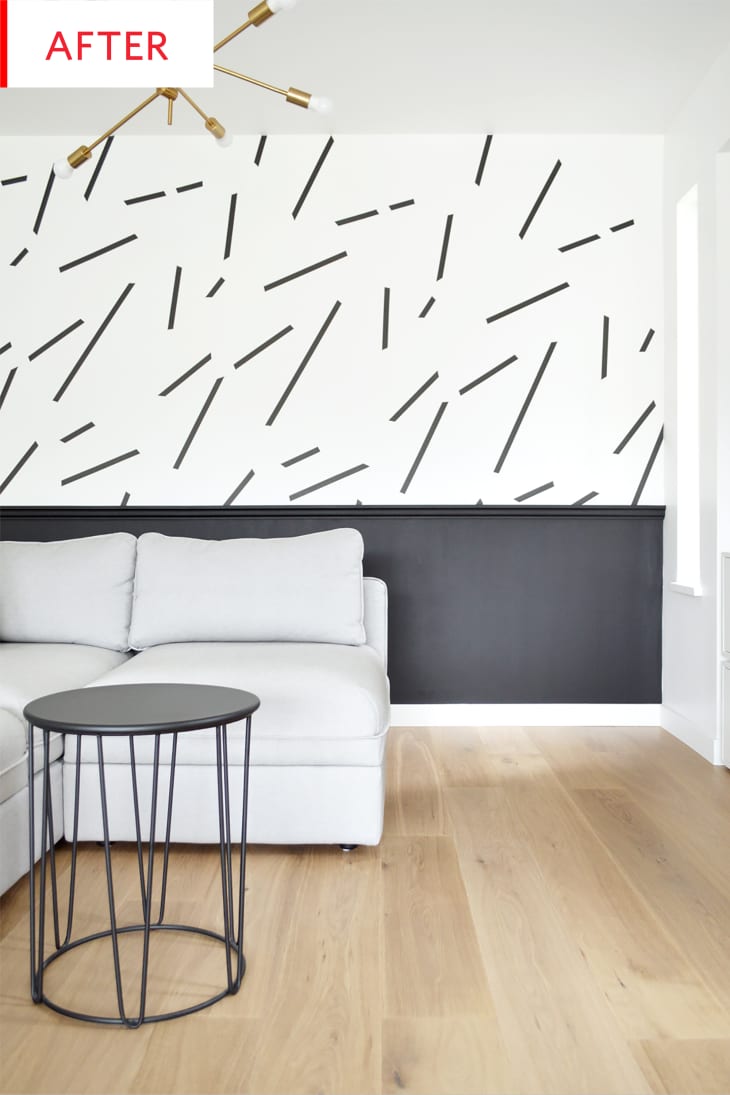
In another smart move, Kristina faked the look of wainscoting by painting the bottom part of the wall black, and capping it with a length of chair rail.
Thanks so much Kristina!