
A “Crowded and Dark” 1990s Kitchen Gets a Cheery $1,500 Makeover
Sometimes, dated features (especially dated color choices for walls, tiles, and countertops) can make a kitchen feel even smaller than it actually is. That was the case for the vacation home that Coco Love Sheils (@nofomoatadventurebay) and her family own on Bruny Island.
“My husband, Mike, and I wanted to open up the space to make it more inviting,” Coco says. “We live permanently in a home with high ceilings, so this kitchen looked quite crowded and dark. Our intention was to lift the space with light timber benches and colorful tiles … it’s a holiday house so we wanted to inject some fun.”
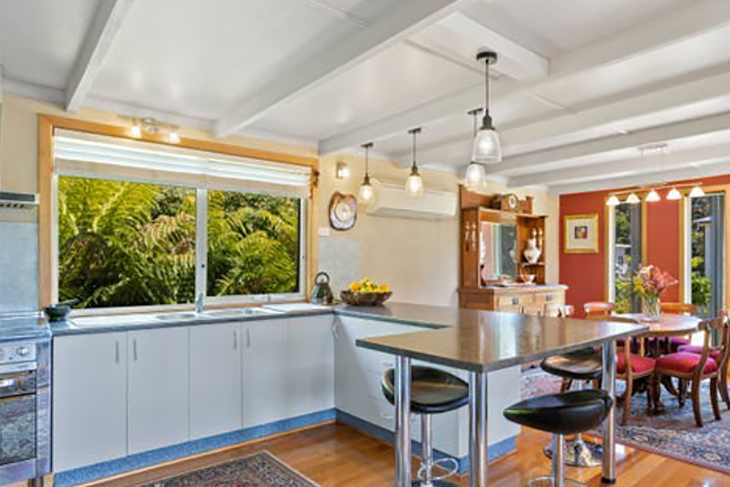
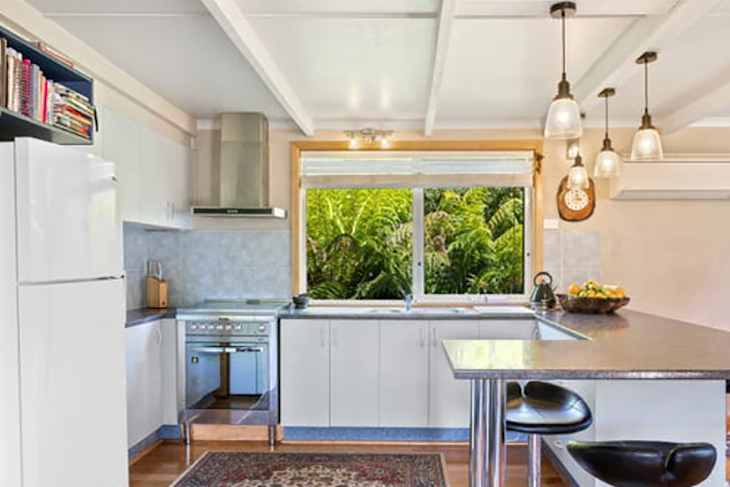
The U-shaped countertop was making the space feel small.
One of the biggest upgrades to the space was changing the countertop. The old one “didn’t need to cut the room in half,” Coco says. “It was so ug. The new bench is still huge to sit … if guests wish to.” Plus, the lighter timber countertop brightens the space.
“The first process was to measure the existing bench top and sink area,” Coco explains. “Mike had to make a template for the sink cut-out and be very accurate so that it could be done in one go.”
And the old materials got put to good use: The old countertops were re-used by a neighbor for their shed workshop, and the chrome poles under the island were kept for reuse in our garage laundry for shelving supports.” Plus, Coco says, they used excess pieces of the wood countertop as cutting boards!
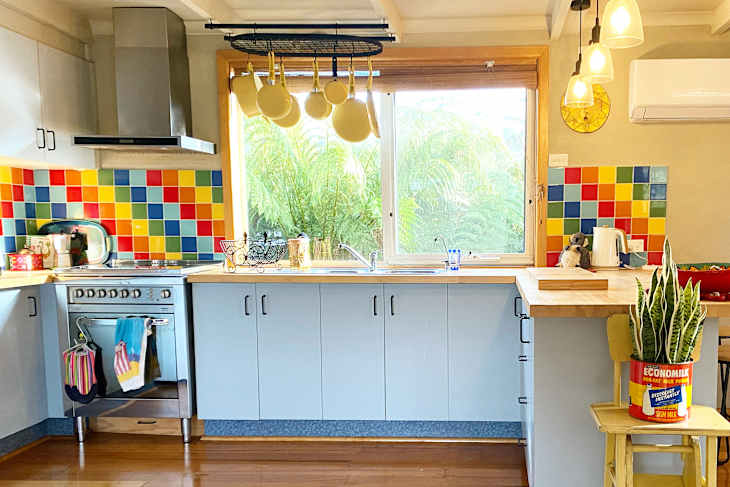
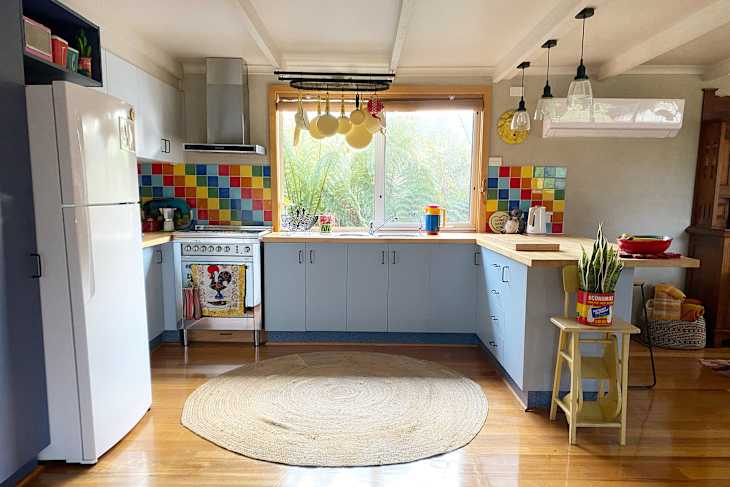
The new wall tiles make the kitchen feel like “a permanent rainbow.”
After the countertop, Coco, Mike, and Fallon (Coco and Mike’s daughter) worked on the new tile backsplash; they carefully removed and prepped the wall for new tiling.
“We slid a long knife behind the old tiles to saw through any glue so as not to damage the substrate behind them,” Coco recalls — and she’s thrilled with her multicolor design choice. “It’s like a permanent rainbow,” she says, adding that she (and guests) feel way less afraid to make messes in the kitchen because it’s not white all-over. “The original tiles gave off no energetic charge,” she adds
Coco bought her tile on sale, and her best tiling advice is to prep well, start at the bottom, and buy extra grout and glue. The latter is something she and Mike had to be especially mindful of when working on an island where they couldn’t make convenient trips to the hardware store.
Other small changes complete the kitchen.
Although Coco and Mike didn’t have it in the budget to paint, they did want to upgrade the cabinets slightly, so they changed out the hardware. It was slightly challenging to find handles that fit the pre-existing drilled holes, Coco remembers.
Coco says she originally wanted to remove a set of upper cabinets and add open shelving, but Mike didn’t want to sacrifice storage. “Probably lucky that he’s a sensible grown-up, as we didn’t know what condition the wall behind the cupboards would be like post-removal,” she adds. Although she still might do the project someday, for now she displays cheery yellow cookware on a new pot hanger.
In total, the project cost $1,500, and “it’s such a happy, open space now,” Coco says.
Inspired? Submit your own project here.