
4 DIYers Show How Big an Impact One Square Foot Can Make
There’s no doubt that a large-scale renovation makes a big impact. Seeing dramatic before and afters with walls knocked down, tile torn out, floors refinished, colors re-painted — yeah, that’s pretty darn satisfying. But there’s a lot to be said for little transformations, too. In honor of this year’s Small/Cool contest, we wanted to re-think makeovers to make them as tiny as possible (but without sacrificing any of the “wow” factor).
That’s how we came up with the One Square Foot Challenge, which asks DIYers to make over one square foot in their home with a budget of $50. One square foot can apply to wall space, to floor space, to furniture, to decor… the options are literally endless. And everyone has one square foot in their home that they can improve. Maybe it’s a messy spot on the counter, or a bit of blank wall that needs some oomph; maybe it’s a piece of decor that’s no longer quite your style but in too good of shape to throw out. One square foot is easy to find.
One square foot is also easy to do. A one-square-foot project does not require a whole week or even a whole weekend. It’s something you can take on in an afternoon so that the fruits of your labor are ready to be enjoyed before happy hour even starts. It’s small and achievable, but it still makes a big enough impact that every time you see it you think, I’m glad I did that.
Need more proof of the power of one square foot? Take a gander at the teeny projects from these four intrepid DIYers: Camille Lai (@houseof.lais), Melanie Gnau (@asmalllife), Meg Baker (@baker.blooms, no relation), and Rachel Valente (@rachlvalente). Each conquered one square foot of their home in a different way, but all achieved stunning results.
Read on to see what they did and how they pulled it off — or if you want to jump ahead to see, click one of the project names:

A Kid-Sized Chair Gets a Colorful Upgrade
Camille Lai (@houseof.lais) has plenty of experience in big makeovers, having taken on an extensive bathroom redo in her home, among other mammoth projects. But this time, when challenged to go small, she reached for a tiny piece of furniture for the tiniest member of her family: her new baby boy, only a few months old.
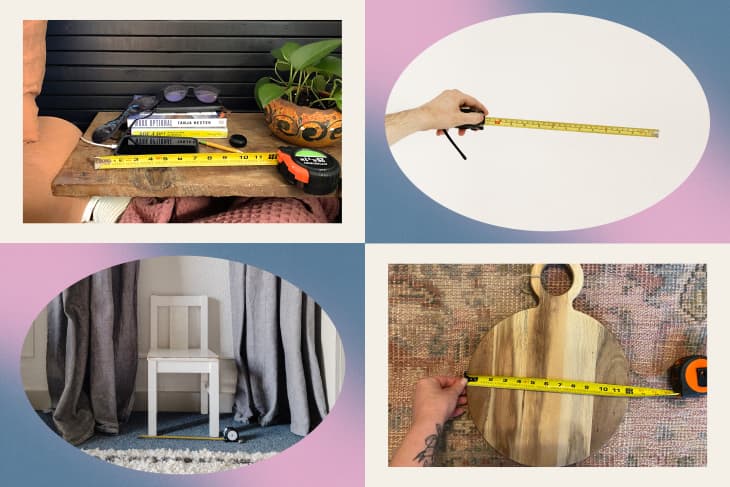
The before: A chair Camille scored for free that measured less than a foot wide by less than a foot deep. “I actually spotted this chair on the side of the road a few weeks ago and grabbed it just when it was starting to rain!” she says. “I always intended to fix it up, and was excited when I discovered it would fit in one square foot!”
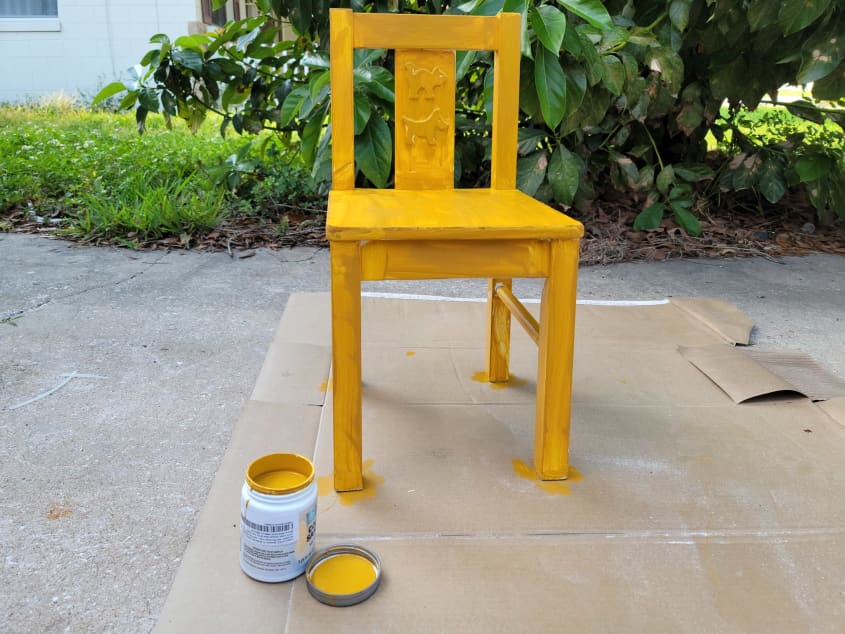
The plan: Cute it up, and make it more functional. “My favorite lullaby to sing to my sons is “You are My Sunshine” and I wanted to bring some yellow sunshine into the baby’s room,” Camille says.
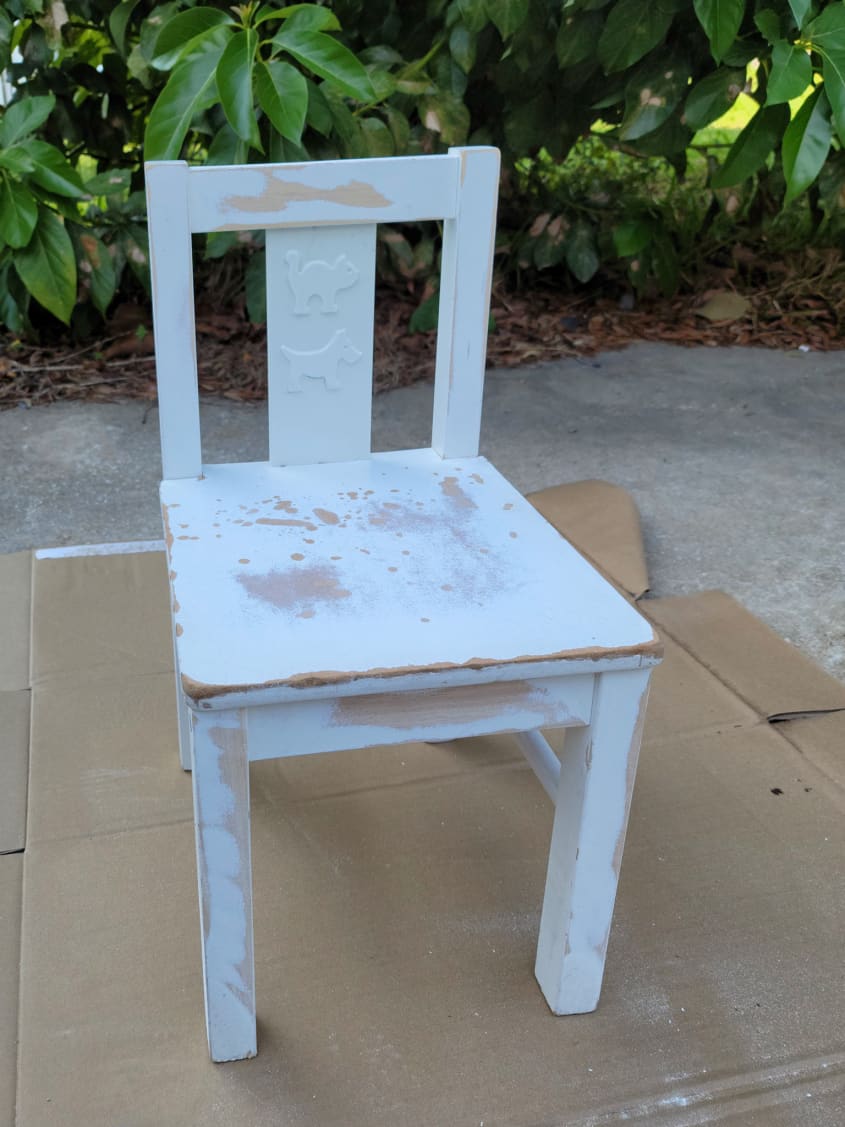

The process: Camille started by sanding the chair to prep it for fresh paint, which she already had on hand, left over from another project.
It took a few coats for Camille to get a smooth, even finish. She didn’t want to stop with paint, though: Camille also wanted to add a seat cushion to make the chair more comfortable for her kids to sit on.
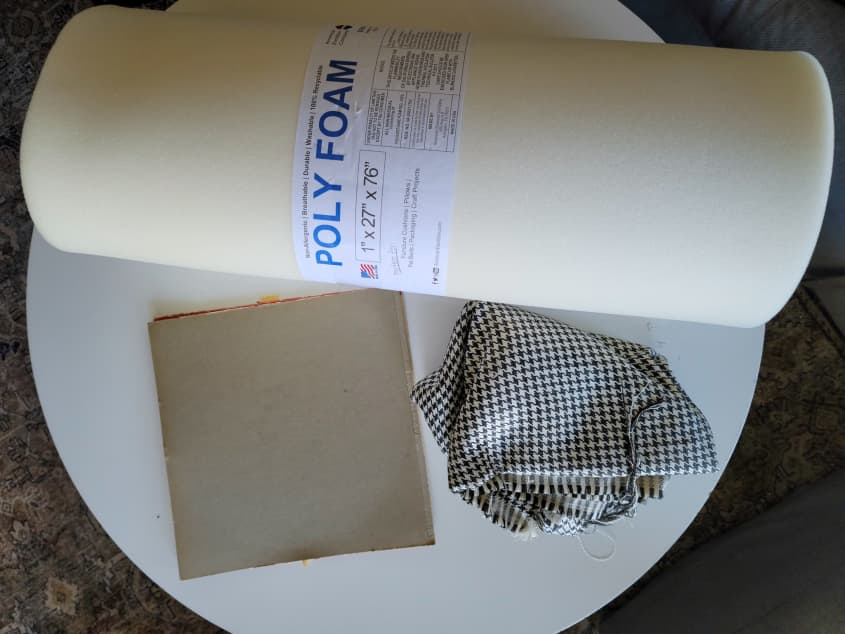
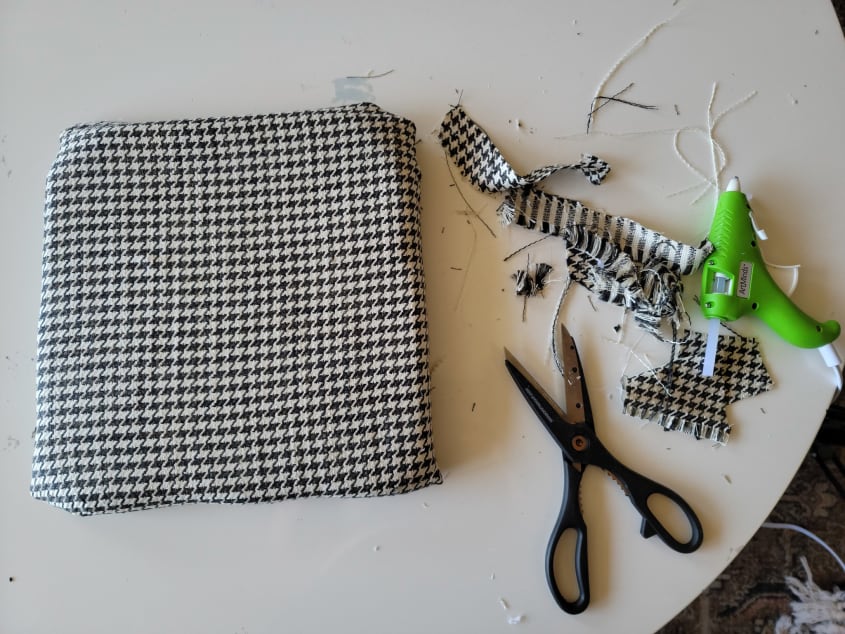
Fortunately, she also had some other materials on hand that could help: a roll of polyfoam, a square of heavy-duty cardboard, and some fabric scraps in a black-and-white houndstooth pattern.
After cutting her cardboard and foam to fit the seat of the chair, Camille set the foam on the board and prepared to wrap both with the fabric. “The hardest part for me was folding the fabric over the sponge,” Camille says. “I’ve never made a seat cushion before and my husband usually wraps all the gifts!”
Once she was satisfied with the tucked corners of her seat cushion, she used hot glue to secure them. While it’s not as durable as sewing the cushions would be, it works great for a chair that won’t be getting as much traffic as, say, a living room couch would.
Camille used the excess fabric to create two sets of straps for the back of the cushion, to be used to secure it to the chair back.

The after: Camille ended up finding a basket in her home that fit exactly under the chair! Now, the yellow chair with its black-and-white herringbone cushion sits to the right of the baby’s crib. “It definitely brightened up the whole room!” Camille says. “I can’t wait to see him climb up and take a seat one day.” Not a bad result for just one square foot of work!
And the best part? Camille spent exactly zero dollars. “I’m very proud of using only products and pieces I already had on hand,” Camille says.

A Plain Serving Board Gets a Green New Life
Meg Baker (@baker.blooms) has been redoing her whole home with boho-modern touches, from a dramatic black fireplace to a fun and funky staircase landing. But one spot in her home evaded her: a small spot on a downstairs wall that she says was “awkward” but gets great light.
The before: A blank spot on the wall and a charcuterie board that measures in at under 12 inches in diameter.
The plan: Turn it from a cheese platter into a mid-century-inspired propagation station. “I’m always looking for cute areas to propagate some plant life off of the counters and this seemed like the perfect idea,” Meg says.

The process: Meg started with the cheese board ($25 brand-new), plus copper bell pipe hangers (about $5 at the hardware store). She also assembled glass test tubes and a few colors of paint, which she had on hand.
“The hardest part was deciding on a design for the board,” Meg says. “I like to upload a picture to my stories in Instagram and use the marker tools to draw on it. It helps a ton!”
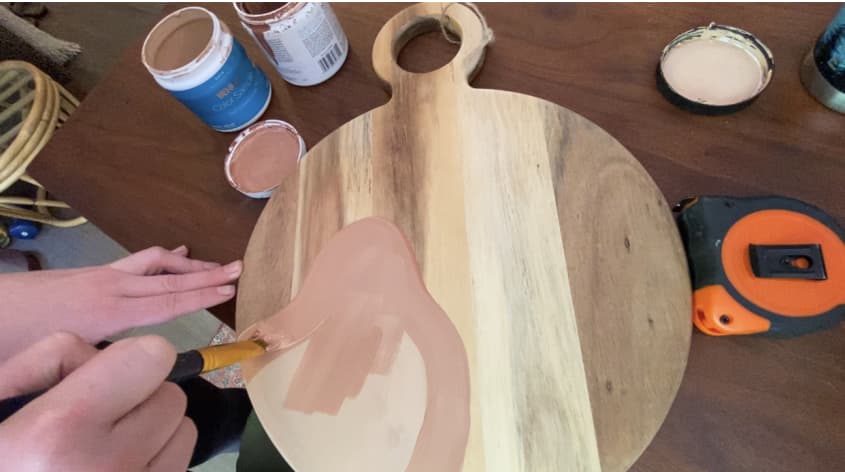
Once she settled on a design, Meg used her paint — a trendy light terracotta color — to paint an amorphous shape on one side of the cheese board. Because it didn’t require straight lines, she freehanded it.
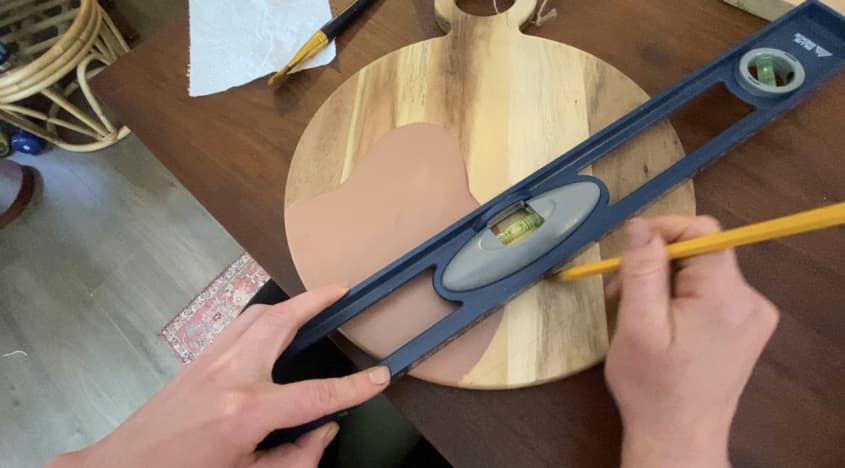
When the paint dried, Meg used a level to trace a few rows of diagonal lines onto the board with pencil. The level helped ensure that all the lines were parallel.
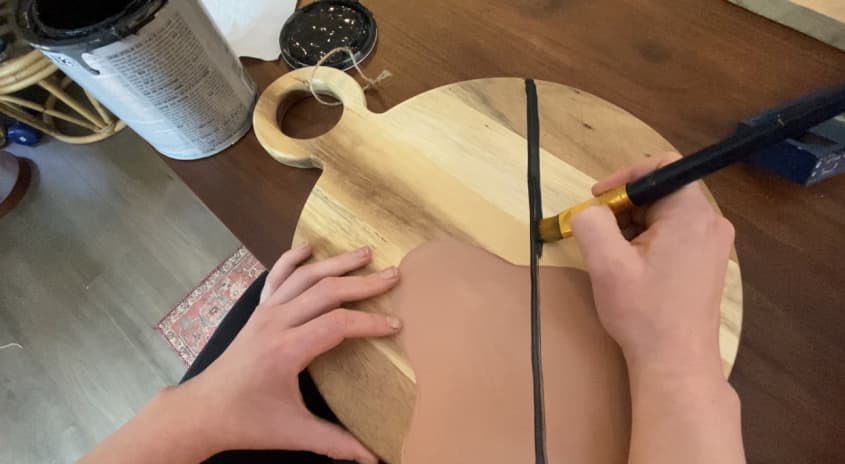
Meg used those pencil lines to guide her brush lines, which she did with black paint. Once her lines were done, she used the same black paint to create a dotted accent on the left side of the board. Then, she screwed in her two bell hangers to hold her glass tubes.

The after: “I’m super proud of this piece because it turned out exactly how I wanted it to, which is a rare thing in the DIY world,” Meg says. The painted pattern gives the plain wood some personality, and makes this once awkward wall space both beautiful and functional. “It’s simple, but such a fun update,” Meg says. I love decor that also serves a purpose.”
Her favorite part, though, are the holders for the test tubes. “I spent probably 15 minutes in the plumbing aisle trying to figure out exactly what to use,” Meg says. “I think these are just so cute holding the glass tubes.”
This is one DIY you can also modify to fit the materials you have on hand, Meg notes. “If you have any random boards laying around, this would be an easy project for a beginner,” she says.

A New Pendant Light for Vacant Ceiling Space
Rachel Valente (@rachlvalente) has spent a lot of time on updates to make her small rental apartment feel like home (think: a wall-mount cane headboard and darling washi tape wall). For this challenge, she already had an idea in mind — and it involved overhead space.
The before: An empty ceiling corner in the living room. “Since our apartment is small, we like to keep things on the “boho minimalist” side, while still staying inspired by southwestern colors and textures,” Rachel says. But this one section of the living room felt a little too minimal.
The process: Rachel was inspired by jute pendant lamp projects from two DIYers: Fashion Attack and Katia Nikolajew. She knew she wanted to get a similar natural-but-still-minimalist pendant in her home, but wanted to give it a little more of a basket structure.

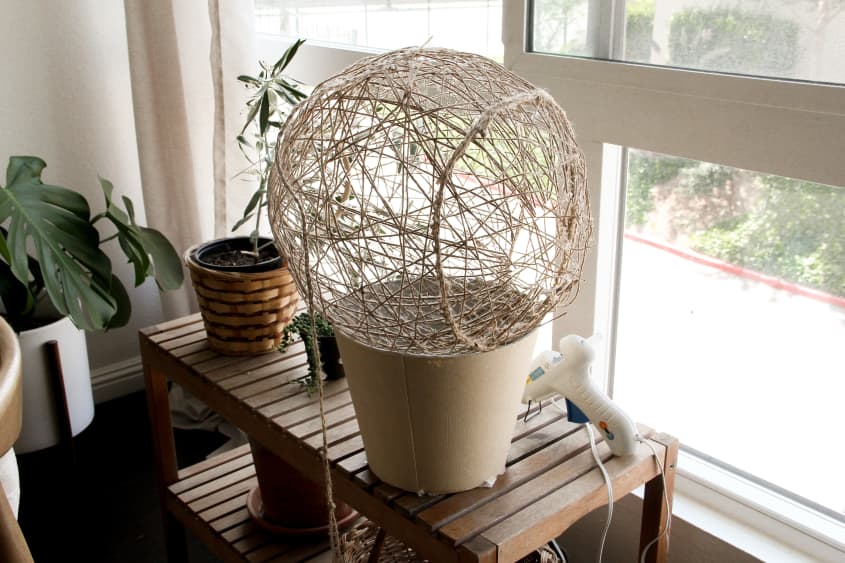
For the project, Rachel blew a balloon up to the size she wanted, then dampened her jute with Mod Podge before wrapping it around the balloon. For extra stability in the finished pendant, she used a small embroidery hoop on one end of the balloon.
Rachel let the jute dry out a full two days before proceeding — the result of a couple failed attempts before. “I had issues with the whole thing collapsing when popping the balloon, the balloon sticking to the shade, and a few other issues that took some troubleshooting,” Rachel says. Allowing the extra dry time — then carefully un-sticking the balloon from the jute before popping it — turned out to be the key.
After popping the balloon, Rachel went in with her extra basket-like detail. She braided jute before hot gluing it horizontally around the shade to give it the look of a basket.
When she was done, Rachel cut a hole for her plain plug-in pendant to slip through the shade and screwed a hook into the ceiling to hang it.

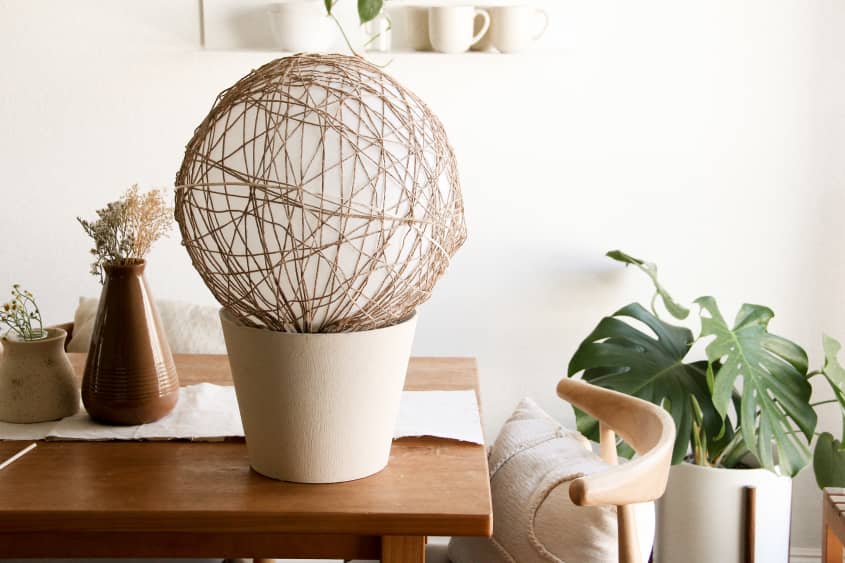
The after: The basket pendant light blends seamlessly with the rest of the decor in Rachel’s living room, and the natural material helps add some texture and warmth to the space. “One thing I really love about this is how our living room is still very much in progress, but this simple pendant light — though small! — made such a difference,” Rachel says.

A Stylish Nightstand Organizer
Melanie Gnau (@asmalllife) is a small living expert, showing off DIYs and decorating ideas from her 800 square foot house. Melanie’s projects run the full range of sizes, from a cute garden water feature to a front porch redo. But this time, she was challenged to go really small, so she turned her eyes toward her bedside table.
The before: A very full nightstand. “It was a jumble of random things to help me sleep, like my eye mask, earplugs, and blue-light-blocking glasses,” Melanie says. The final straw came from an accident: “Super early one morning I was reaching for my earplugs and in my blurry-eyed daze, I knocked over everything on my bedside table — including a giant glass of water!” she says “It took me hours to get back to sleep after that and as I was trying to doze back off, I brainstormed ideas for a bedside organizer.”
The process: Melanie wanted something functional and attractive that was also easy to make. So she headed to the hardware store to pick up some wood for her project, which came out to a little less than $15.
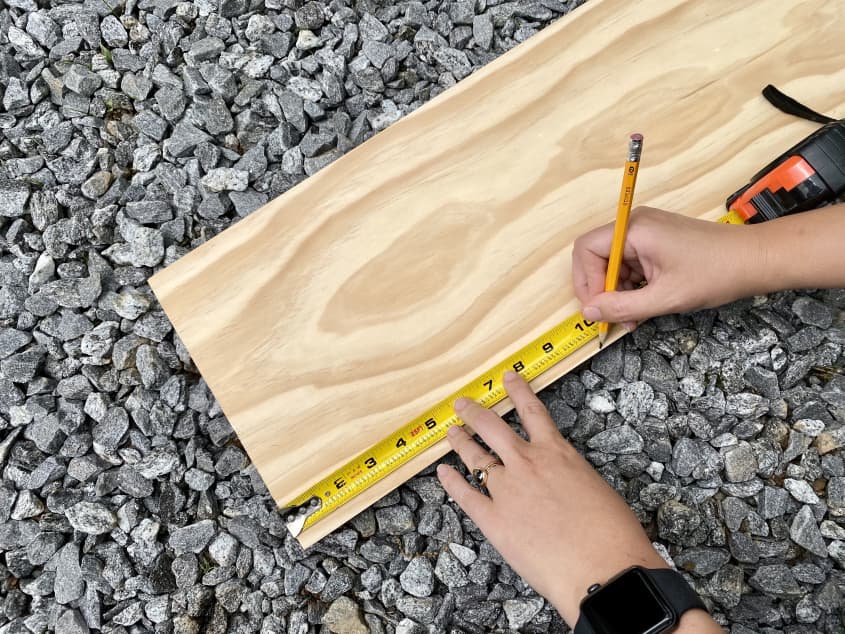

After drawing up her plans, Melanie marked her board for cutting. “Wood is very expensive right now and I hate waste,” Melanie says. “I didn’t want to have to buy another piece!” That meant her cuts would have to be ultra precise so everything would fit together perfectly.
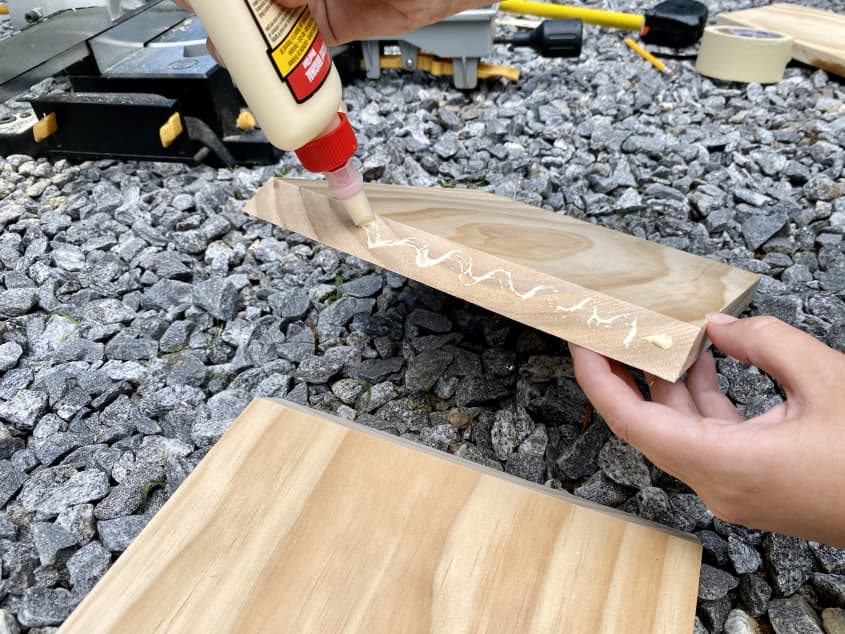
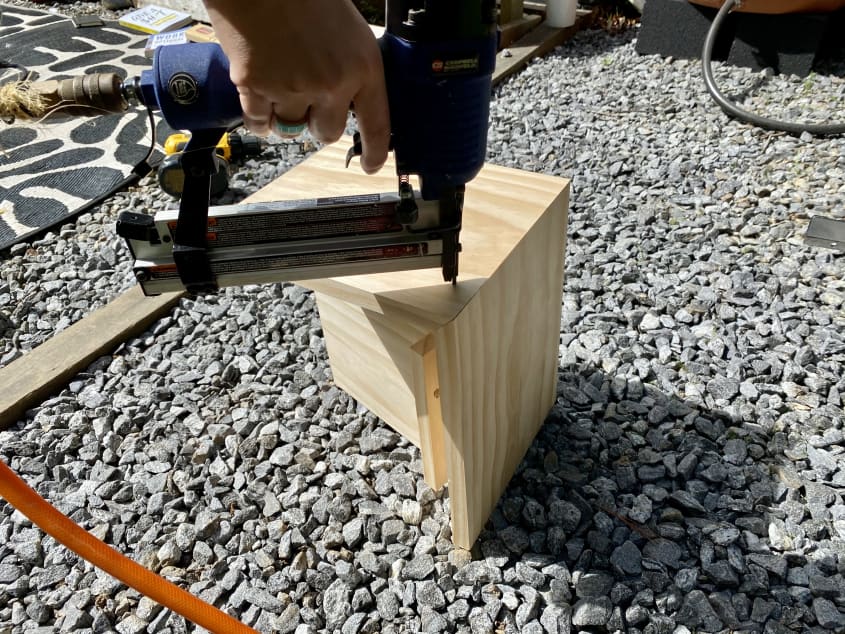
Once all the pieces were cut out, Melanie needed to put them together with a combination of glue and nails.
Melanie started with glue, to help hold the pieces together before she went in with her nail gun to completely secure them.
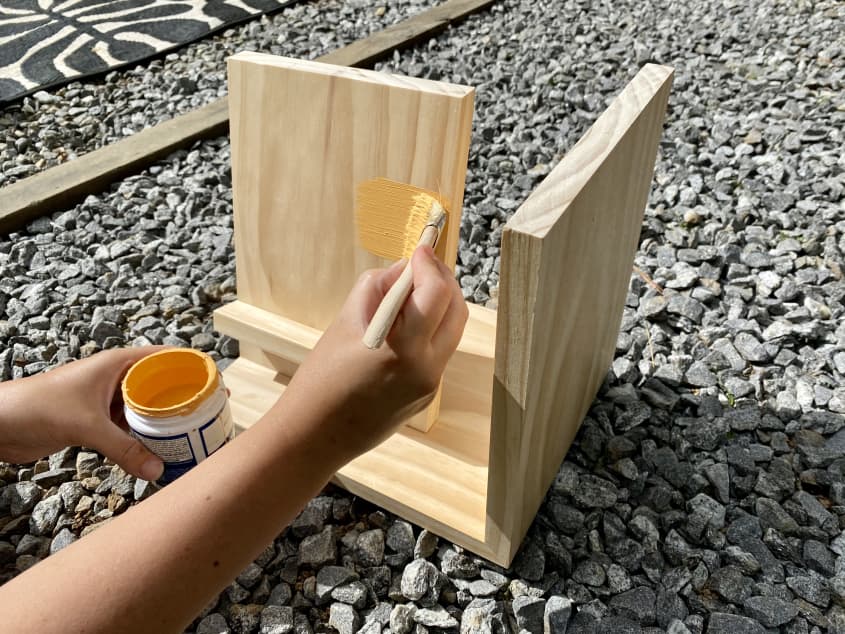
Once her organizer was nailed together, Melanie sanded it smooth before giving it a coat of leftover paint.
That’s where she hit a hiccup: “As I was painting it, I remembered why I had the paint leftover. I hated the color!” Melanie says. “It was the color of boxed macaroni and cheese.” Thankfully, it was easy (and affordable) to run to the store for a new shade.
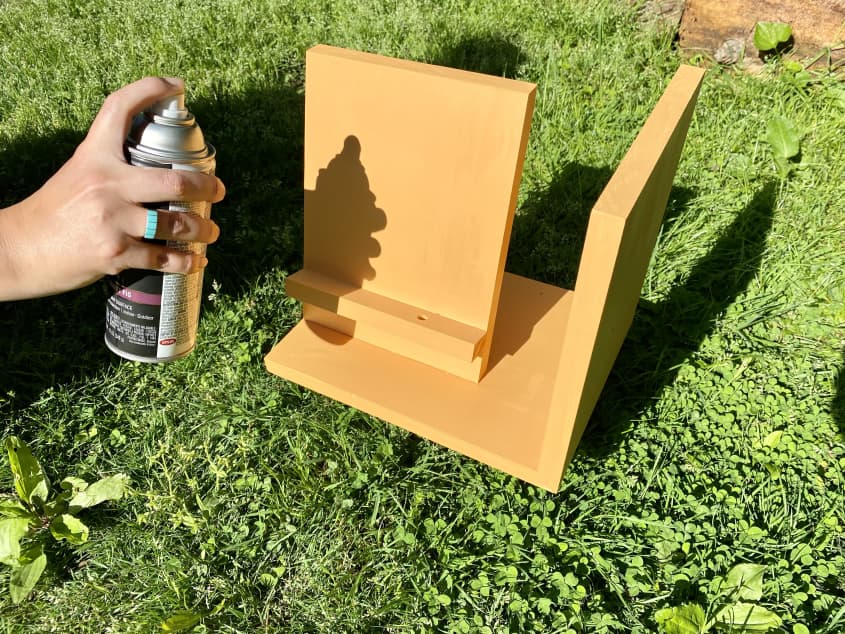
This time, Melanie chose spray paint in a purple shade (about $5). “It was much easier to get a smooth finish,” she says. Once dry, Melanie set it on her nightstand and filled it with her things.

The after: The new purple organizer looks stylish and modern, but is also mega functional. There’s a place for everything: books, glasses, phone (with a hole for charging cable) and sleeping mask.
“My bedside is the first thing I see in the morning and the last thing I see at night,” Melanie says. “By having a clean organized space, it sets the tone for my day and it helps calm my mind before I doze off.” Talk about a big impact in a small space!