Before and After: A Rental’s $100 Bathroom Makeover

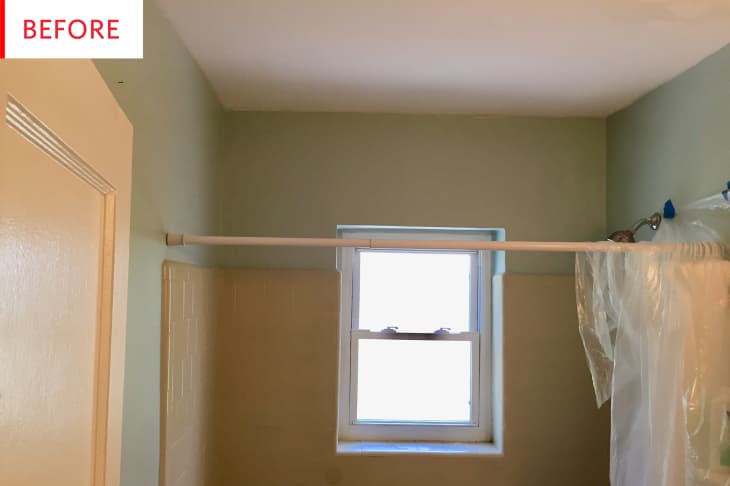
This vintage bathroom had a color scheme its renters described as “lentil yellow and seafoam green,” which Pantone probably isn’t going to be announce as the 2019 Color Combo of the Year. But in a rental, what can be done? It turns out that paint is the problem, but it’s also the solution.
The tenants liked the rest of their apartment but could no longer deal with the bathroom:
The bathroom was the only room that had such a drab funk to it we decided to change it up with a minimal outlay of cash since it is a rental. Painting was needed to really give this cute bathroom a pop.
Let’s behold the power of paint…
Readers Megan McCarthy and Michael Meyer are responsible for this makeover, and it looks so fresh! The charm of the vintage tiles has been preserved, but the drab funk has been eliminated. Everything looks brand new, yet right at home. And before anyone gets upset about original tile being painted, please read on:
This bathroom was in desperate need of a facelift! With a micro budget of $100, we decided that the paint on the tile and walls were the best option to get the most bang for our buck! The bathroom before had some indescribable color of lentil yellow paint on the vintage tile and a “seafoam” light blue/green on the walls that was better suited for a bedroom wall. The tile paint was obviously a color that the hired painter had picked up in the “oops” section of the paint store. Seeing that the tile was already painted, we considered either stripping it or painting it and decided to paint as it acted as a primer already. After deciding on our updated color scheme, we had to choose shades, which probably took longer than the paint job itself!
It was the best transformation this vintage bath could have ever seen!
Faced with the same decision in a rental, I think I would choose to paint rather than strip too, provided the first coat of paint was in decent shape.
This closer shot shows that the original coat of paint looks to be completely smooth and well done, making it an ideal base coat. In fact, I would never have guessed this tile was painted, as it looks so perfect.
The process took about a week as we were still using it during the process. We painted it ourselves and did not use any outside help. We used Behr Alkyd paint in Silver Bullet for the tile that was around the bathtub so it need a few extra days of dry time. We used a white eggshell for the ceiling and upper walls. Cost was just about $100 for two gallons of paint, tape, rollers, and a couple of grout pens for the floor tile. The best surprise was no surprise… it looks amazing! Clean and fresh results, and a new shower curtain was all it needed!
At just $100, this is one of the biggest bang-for-your-buck Before & After projects that we’ve seen! The new gray paint is subtle, but the overall transformation is dramatic.
I love this little nook, and Megan and Michael have made good use of it. The accessories on the shelf are a nice combination of practical and beautiful, and the colors really stand out against the delicately hued background.
But best of all is the couple’s enthusiasm for the way their project turned out:
The results speak for themselves with a really refreshed look! The only thing I would have done differently would be to have done it a long time ago! Why did we wait so long with the bathroom and its bad funk colors? I am so pleased with the results.
Start sooner and give it a redo with a paint job and grout refresh. I feel like I am in a whole new place! We were even inspired to display better artwork!
Thank you, Megan McCarthy and Michael Meyer!
