
I Sent a Pro Organizer a Photo of My Disorganized Kitchen Cabinet

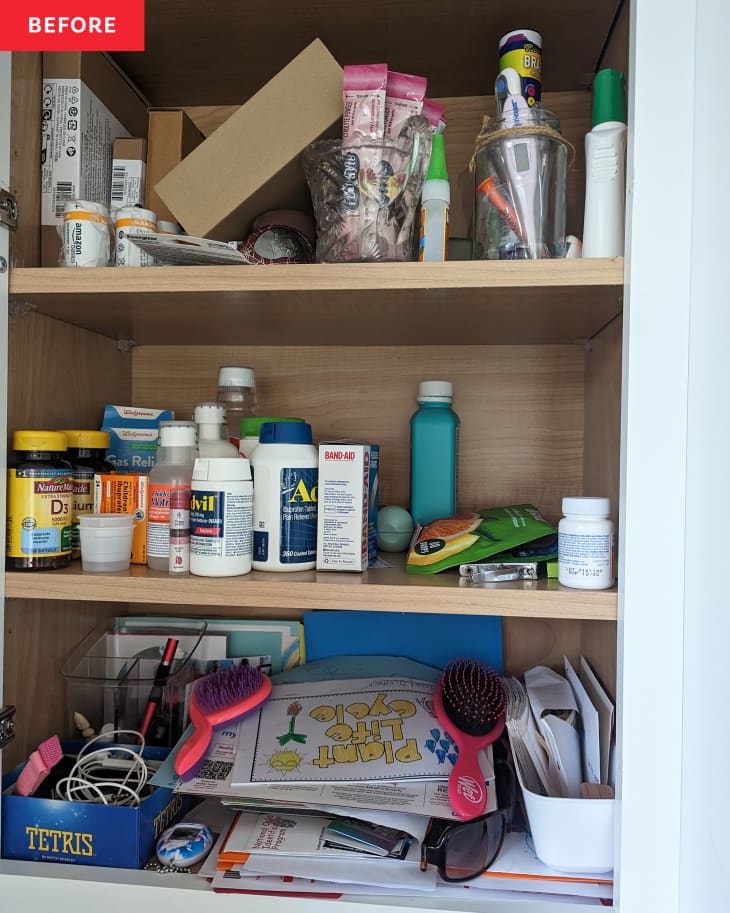
The kitchen cabinet to the left of my refrigerator has always been a mix of items I can’t quite keep organized. In it, you will find a variety of batteries in all different sizes, OTC pain medicines and thermometers, as well as a mix of my kids’ school papers and smaller items like a broken watch, headphones, and small keepsakes. It’s not the organized space I want it to be, and it tends to be the catch-all spot.
But lucky for me, I reached out to Jean Prominski, certified professional organizer and founder of Seattle Sparkle, who helped me on another home organization project. Here are the steps she talked me through to get to a much more organized (and less catch-all) space.
Step 1: Do a shelf audit.
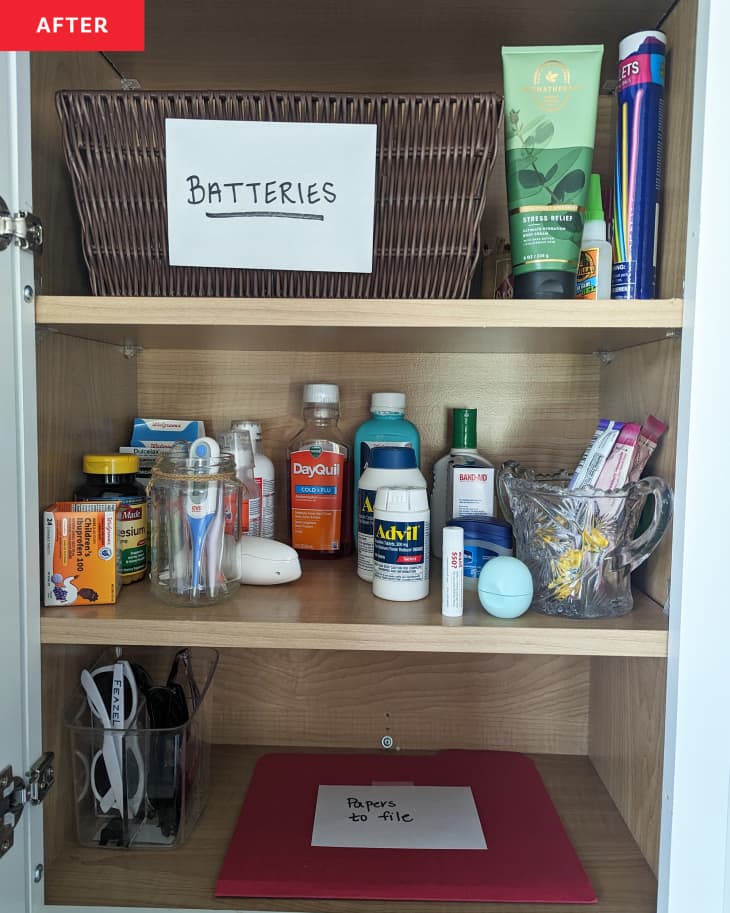
For my first task, Prominski instructed me to go through every part of the shelves to determine if I wanted what was there. Were there medications that expired and needed to be thrown away? Was that Gorilla glue still good or did it need a toss? It turns out I had a few expired vitamins and medicines I needed to ditch. And as for all those papers? Most of them got thrown away or filed appropriately.
Step 2: Align on the best location for the remaining items.
After my shelf audit, Prominski asked an important question: Were these leftover items really in the best possible place based on how and when we used them? I need a consistent spot for the batteries and the cabinet is a central location in our home to store them, so they stayed. As for the medicines and vitamins, I felt most comfortable leaving them where they were instead of in the bathrooms. My kids are still young and I like to have medicines in one central (and out-of-reach) spot. Evaluating whether the items made sense where they were helped me with my next task as well.
Step 3: Sort like items on each shelf.
Once I did my audit and returned certain items to their original homes or disposed of things, it made it much easier to sort and organize. I grabbed a basket from the basement I wasn’t using for anything else to hold all the batteries. Items for health prevention and care have their own shelf now, and the bottom shelf is surprisingly clear. After tossing a lot of the papers and refiling items, all that’s left is a container for extra sunglasses and a single folder for relevant documents I can get to easily.
What’s helpful is I didn’t have to buy anything fancy to organize this space. All it required was carving out dedicated time to go through items shelf by shelf, adhering to Prominski’s advice. Once I did that, a neater and more functional space emerged pretty easily with no impact on my budget.