
Before and After: A Tired Side Table Got a Vibrant, Retro-Inspired Makeover

In our DIY Makeover Issue, we offer project inspiration, instruction, and helpful tips and hacks for every DIYer, no matter your skill level or budget. We can’t wait to see what you create with your new skill set — find it all here. This content was created independently by our editorial team and generously underwritten by the new Ford Maverick™.
Sometimes it just takes a little bit of upgrading for a furniture piece to be functional and presentable in your home.
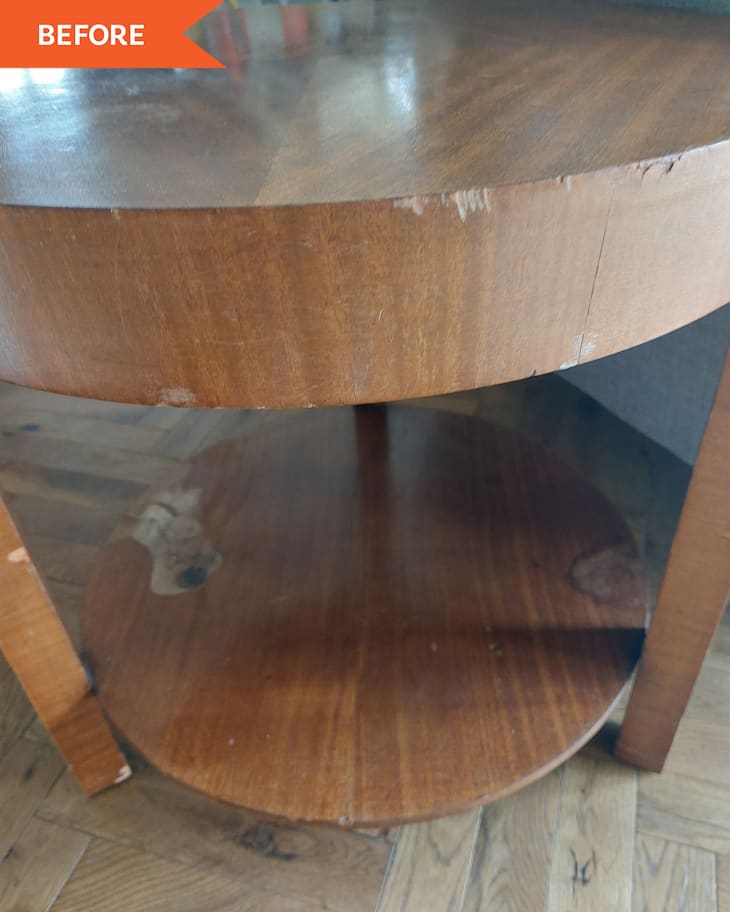
After her friends gave her a wooden side table that had seen better days, furniture refurbisher Nicole Murphy got to work on repairing it. There were several chips in the wood and water damage to the bottom shelf. “I knew I could make the side table pretty and fix the damage,” Nicole says.
To restore it, Nicole first sanded down the entire table. She used Ronseal wood filler in Medium to fill in the holes and cracks to create a smooth surface.
She left the top a natural wood color but lightened it by using bleach. “Bleaching the top with household bleach was a game-changer. Very easily done but with a big gain,” Nicole says. And she painted the sides and legs a bright white.

The bottom shelf of the side table provided a perfect canvas for a retro geometric design and an unexpected pop of color. After painting the shelf white, Nicole used a card template to create the triangle shape design and outlined it in pencil. Then, as she explained on Instagram, she applied Frenchic Paint in the shades Dusky Blush, After Midnight, and Velvet Crush, and mixed together Hot as Mustard and Mermaid for the last color to bring the art to life. (One piece of advice she has is if you’re thinking of trying this yourself: “I’d try to do the design more efficiently with painter’s tape all the way around and not just on the straight bits,” Nicole suggests.)
To protect her newly refurbished side table from daily wear and tear, she applied a layer of Frenchic Paint Tuff Top Coat to the table. All in, Nicole says she spent 15 pounds, and the project took her a few days to complete.
She’s super happy with the finished product: “I love the overall finish. The grain on the top is gorgeous,” Nicole says. Her newly designed side table is not only a great place to display home decorations, but a decoration itself with its eye-catching design.
Inspired? Submit your own project here.