
How to Plump Up an Old, Saggy Sofa for Around $40
Around here, we love coming across ways to get a little more mileage out of our well-loved basics. So when I came across a genius idea about how to revitalize a 6-year-old saggy sofa with a quick trip to the craft store, I just had to try it for myself. And guess what? All it took to plump these coach pillows up was a couple of inexpensive materials!
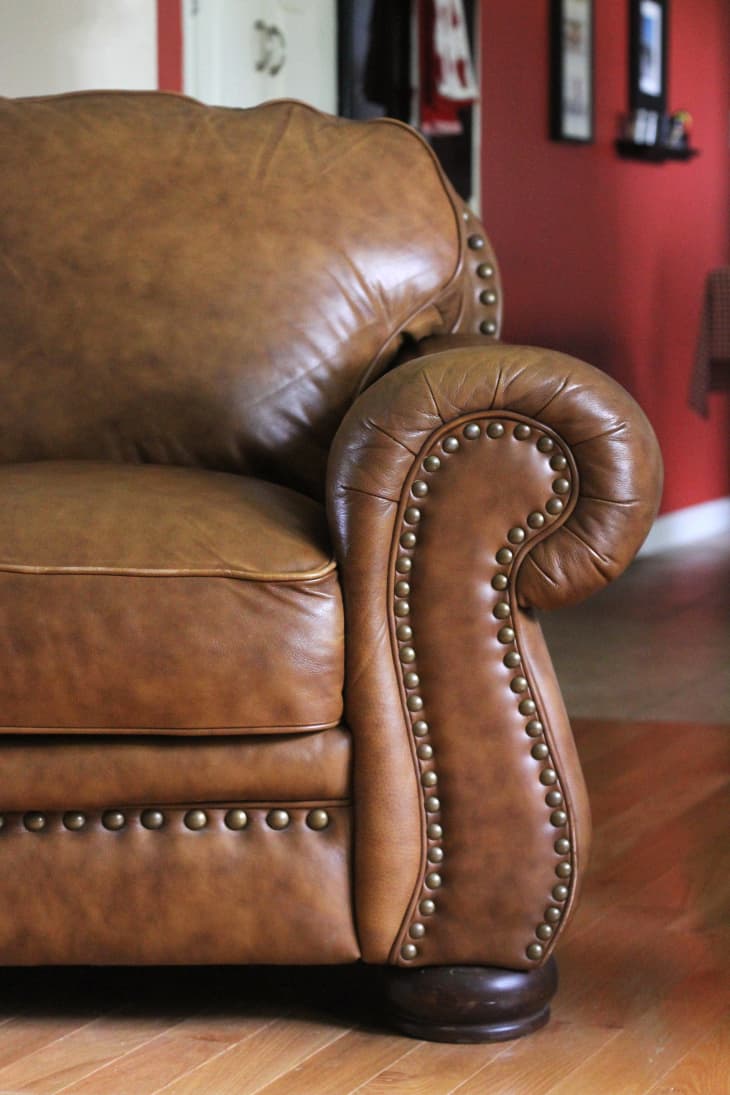
My parents’ poor 15+-year-old overstuffed leather sofa was years past being “overstuffed” and was starting to look really grumpy- like. However sad and grumpy, it’s a much-loved, quality piece of furniture so I was excited to add a few more miles to its already long and generous life.
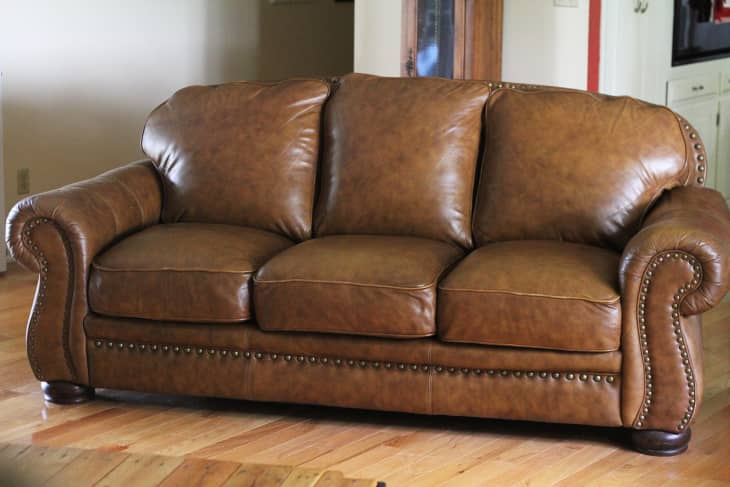
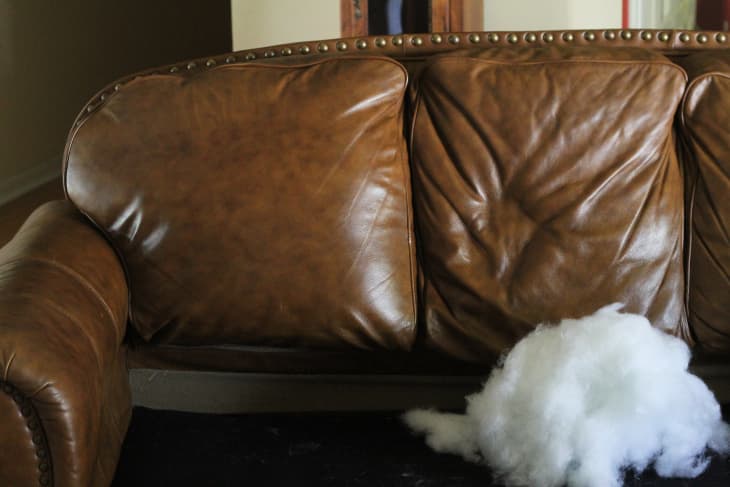
This is what it looked like when I arrived. As you can see, it actually had frown lines and wrinkles.
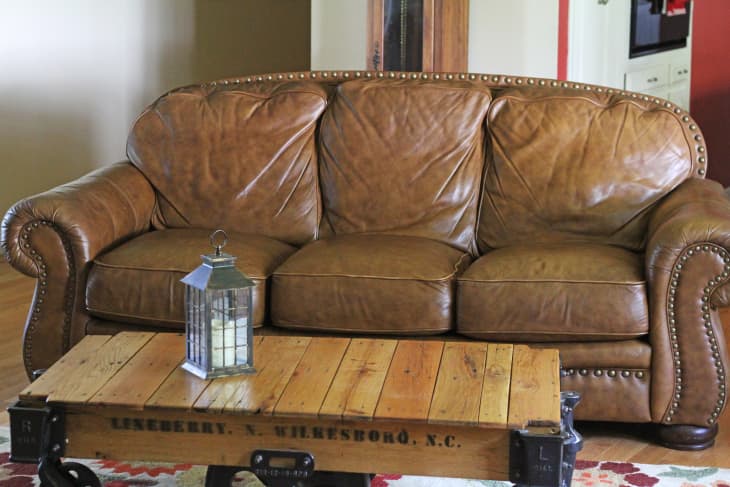
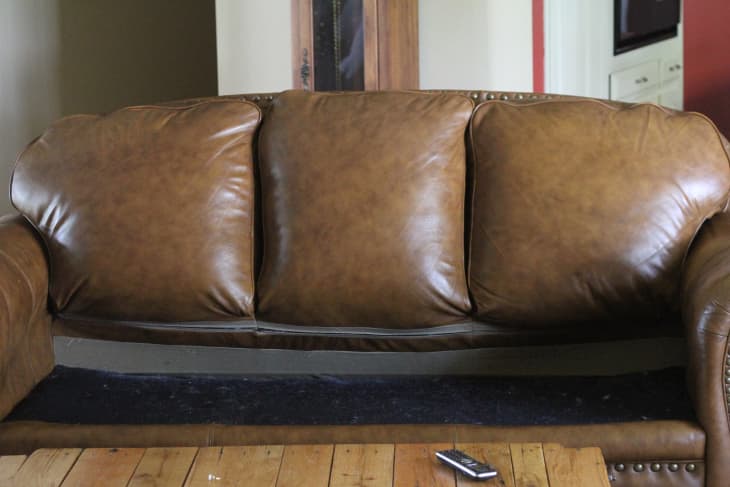
And this is what it looked like when I left!
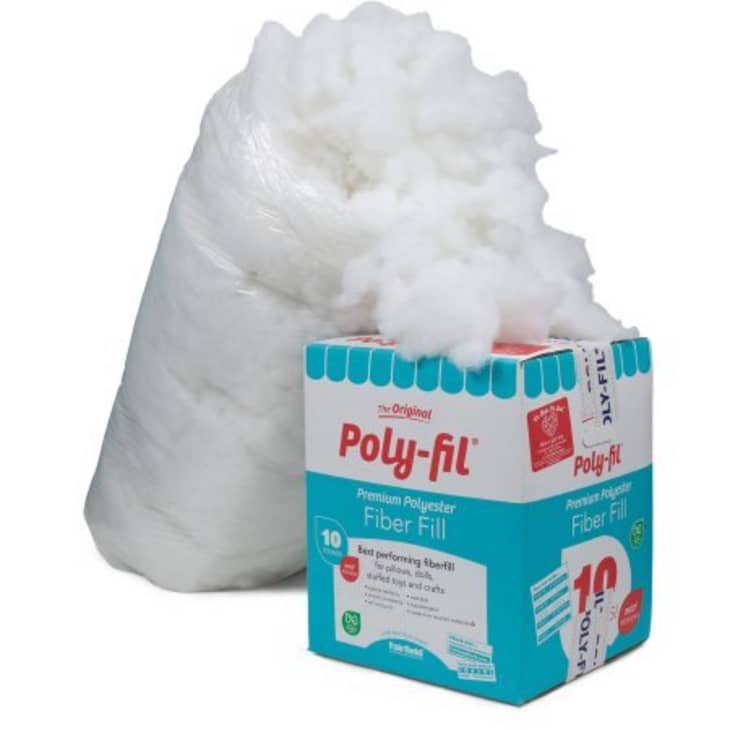
What kind of witchy sorcery did I use to create this magical transformation, you ask? A super top-secret, rare fiber found only in… every craft store ever. I used Poly-fil, an easy-to-find, cheap (a 10lb box will run you about $30) blend of polyester with a high tolerance for wear and tear. For the seat cushions, I simply wrapped quilt batting around the entire seat and stuffed it back into the covers.
There were many “oohs” and “aahs” from my parents, along with accounts of how much comfier it felt and how happy they were that they wouldn’t have to think about getting rid of it anytime soon. There was much rejoicing.
How to Plump Up Your Sofa Cushions
The two things you need to determine before rushing out to purchase your poly-fil are:
- Whether or not the foam in your seat cushions is able to be removed
- If there is an access point to the inside of your seat back cushions
My mom was pretty positive there were no zippers to access the seat backs on her sofa, but after a little spelunking, she was surprised to find that there were hidden zippers along the bottom back sides. If you can only get to the seat cushion, skip the Poly-fil and just pick up batting. For seat back access only: just Poly-fil.
Materials
Instructions
Before you start, remove your jewelry, especially rings. I almost lost mine in the process!
1. To give yourself room to work on the pillow backs, remove all the seat cushions and set them in a clean workspace.
2. Grab a large amount of Poly-fil and begin to shove it up inside the cushion, making sure to position it behind any foam or pillow that may already be in the cushion. Placing the fill behind the existing cushion will help to keep everything looking smooth. Pack the Poly-fil in like you’re stuffing a turkey.
If you cannot reach up into the corners, a tool or something like a ruler wrapped with a soft towel will help send the fill up to round out any sunken edges. I used a cordless telephone. True story.
3. Add filling until you can’t add any more, and then add more. Continue to add fill as you back your hand out of the cushion, making sure there is a decent amount down by the zipper -you don’t want what you stuffed up in the top of your cushion to all settle to the bottom.
Your final product will end up looking really puffy and overstuffed, but the fill will start to settle after a few weeks, so you want to pack it as full as you can. Vacuum stray Poly-fil before putting the seat cushions back in place.
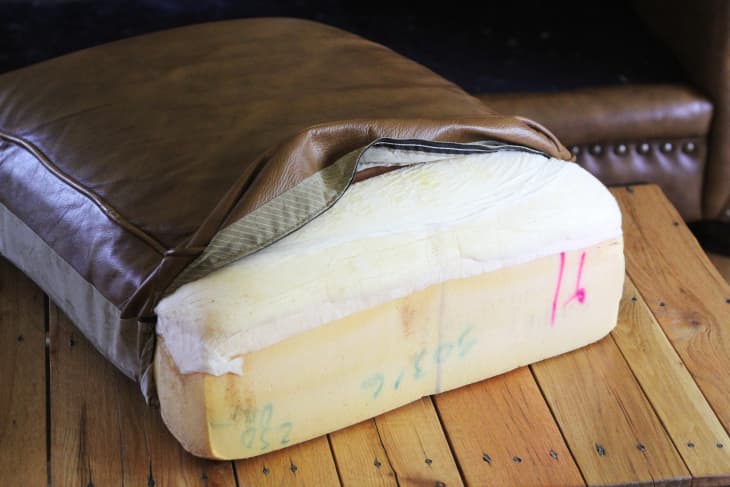
4. Next, move on to the seat cushions. Remove the cover and set it to the side, and vacuum the cushions to get rid of any deteriorating foam.
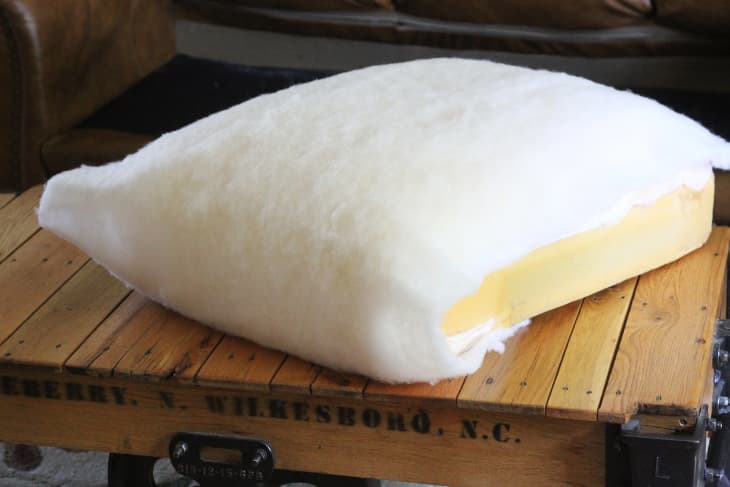
5. Wrap the foam with multiple layers of batting. A small amount of spray adhesive applied to the foam can help the batting stick to it, so it stays in place once you put the covers back on.
If possible, have someone help you put the covers back on the cushions. All those layers of batting make it a tight fit- but that is what you’re looking for, so ask someone to lend a hand to make your job less painful.

6. Repeat this step with the remaining seat cushions.
Total cost for the Poly-fil and batting? Under $40. Not too shabby!
Edited from an original post published on March 29, 2015 by Jennifer Hunter