
Before and After: A Boring Builder-Grade Bathroom Goes Bespoke with a $2,000 DIY Redo
New construction is nice because, well, it’s new — meaning hopefully no repairs will be necessary for a long time. But in a condo or apartment, new construction often equals beige or greige bare-bones construction (think: sheet mirrors, chrome hardware, and gray-meets-off-white walls).
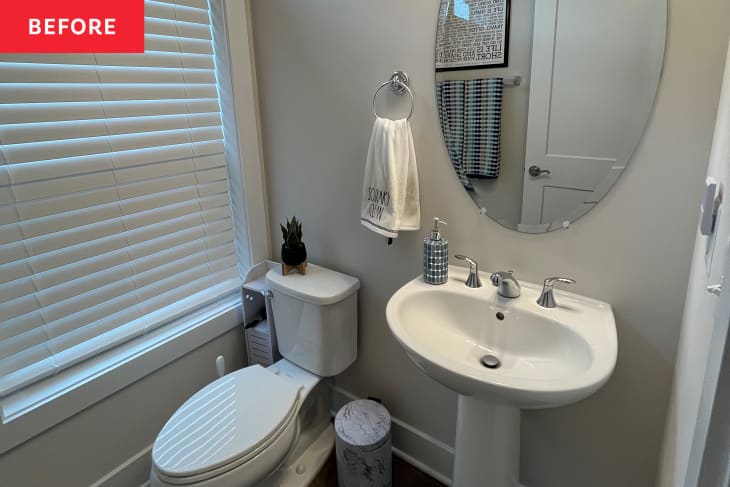
This is pretty much exactly what Allie Dear’s (@dearityourself) condo looked like when she moved in. “Everything in here was new, but it was builder-grade and looked pretty average,” Allie says. “It was just a bit boring. Nothing in it would have made anyone think it necessarily needed updating, but nothing would ever stand out about it either.”

As part of the One Room Challenge, Allie decided to give it a more finished, bespoke look while still keeping things neutral and versatile. Enter: handhewn beige tile, a multi-tone wood vanity, wooden beams across the ceiling, and brass finishes.

“I was inspired by other DIYers who were doing tile walls,” Allie says of her vertical elongated subway tile choice, which, due to its layout, makes the room feel taller. “I felt like that would look perfect in this powder room.”
Allie also was inspired by a wood vanity she’d seen online. “I just could not get [it] out of my head,” she says. “I knew I really wanted to try to recreate it.” She pulled it off by building a basic framework out of ash, and drawers (including cutouts for the plumbing) out of birch plywood. Then Allie added half-dowels stained in multiple wood tones for added texture and color on the door fronts, complete with handmade leather pulls for easy drawer opening.

“I am SO proud of the fact that I built a floating vanity with drawers all by myself, without plans, just using wood,” Allie says. One of the scariest parts was mounting the beautiful vanity to the newly tiled wall for a floating look. “Drilling into my freshly laid tile was so scary, and when I realized that where I had planned to hang my vanity there were pipes blocking the studs, it really set me back,” Allie says. “Then the drawers that I installed in the vanity actually hit the door trim of the bathroom, and I hadn’t accounted for that.”
“That led to a lot of random holes in the tile …. and just a less nice way of hanging the vanity,” she says. But the good news is that the door trim could be replaced, and the holes in the tile are still hidden behind the vanity.

The wood detail that was actually easier to install than anticipated, Allie recalls, was the wood beam detail on the ceiling. The “beams” she built out of beveled wood pieces are hollow, but “they turned out to look like solid wood beams, which is exactly what I had hoped for!” Allie says.
Allie’s final step was accessorizing. She replaced the existing builder-grade furnishings with brass accents, like the mirror from Wayfair and the light fixture, towel bars, and faucet from Amazon. She also used Rub’n Buff to match the exhaust fan to the new brass accessories — a quick DIY that made a big difference.

In total, the project took Allie about six weeks. “Take it one step at a time,” Allie advises anyone else looking to take on a similar reno. “Break the room into several projects, and lay out an order you would like to follow so you don’t feel overwhelmed. For me, before I started each component, I would watch several tutorials online to make sure I got different points of view on how to do that specific thing, and then I would combine all that knowledge to form my own plan.”
Allie is proud that this powder room, for her, represents an “ability to design not just one piece of furniture or one single design feature, but an entire cohesive room that transforms something ordinary into something magical and spa-like.” (Magical and spa-like — not bad for $2,000!)
“My powder room feels like an oasis at this point,” Allie says. “So many of the elements tie into other elements, and it just creates this feeling that everything belongs!”
This project was completed for the Fall 2022 One Room Challenge, in partnership with Apartment Therapy. See even more of the One Room Challenge before and afters here.
Inspired? Submit your own project here.