
Before and After: A $10 Redo Turns a Gloomy Brick Fireplace into a Cheery Focal Point
Brick fireplaces are beautiful both with their original brick and with paint over top. It ultimately depends on the rest of the room and your personal design preferences!
If you have a brick fireplace, count yourself lucky — you’ve got a great, historic focal point on your hands. You can consider yourself doubly lucky if that brick beauty still functions. But even if you live in an older apartment or home where the fireplace is no longer operational, don’t discount its design potential. Apartment Therapy has seen several redos that breathe new life (and a new sense of purpose) into non-functioning fireplaces, like Rachel E. Wilson’s fireplace redo that’ll especially appeal to all the plant parents and bibliophiles out there.
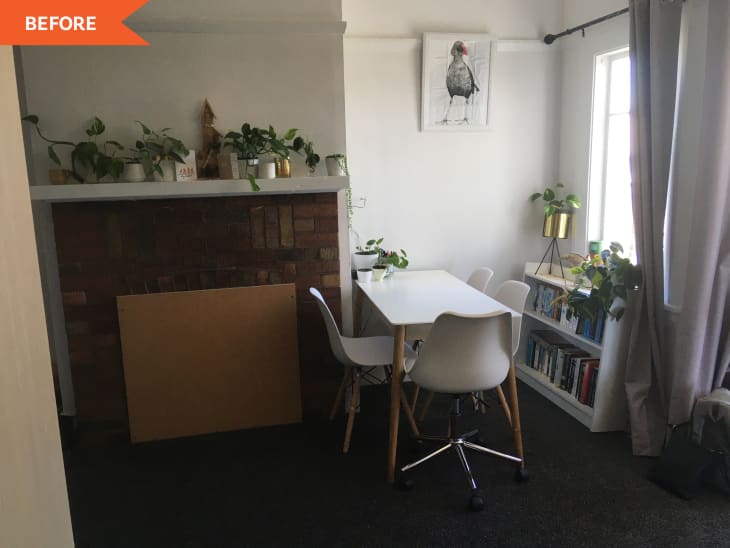
“I moved into my one-bedrooom flat a year ago, after the landlords spent four months gutting the five-unit building and doing the whole place up. Our building had new carpet! New bathrooms and kitchens! Fresh white paint!” Rachel explains. “And in the middle of my snug living-dining-kitchen space, there was… this.”
The orange-y brick fireplace was untouched — in a bad way: “No two bricks were the same,” Rachel says. “They lay vertical, horizontal, even arched, in all shades of brown and orange. This squat, hulking monster didn’t just glower; it gloomed.”
Rachel says that her newly renovated apartment had white paint, high ceilings, and north-facing windows that all created light. “But these bricks? They swallowed the light whole and demanded more,” she says.
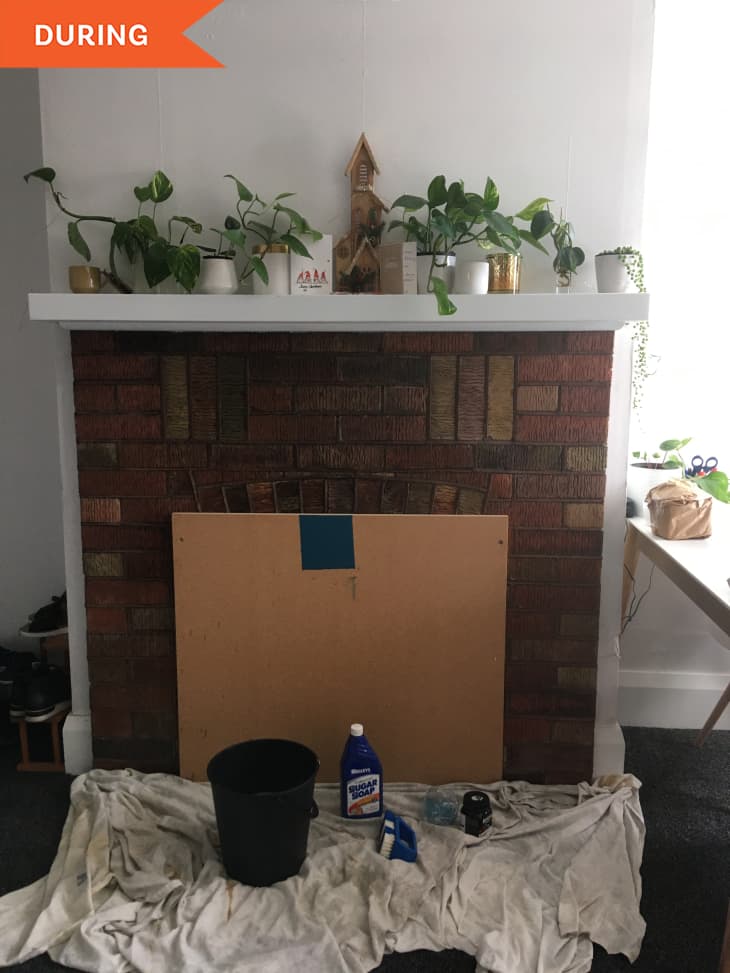
Rachel lived with the bulky, burnt-orange brick for about nine months, but during a week-long vacation from work, she finally tackled her fireplace project. Her dad loaned her some supplies and some DIY advice, and she got to work.
“The project took about a day, with the heat of midsummer shortening the drying time between coats of paint,” Rachel says. She bought one can of a teal shade called Arapawa for $10, but before that, she laid down a drop cloth to protect her new carpet, cleared her other furniture out of the way, and cleaned the bricks — a process she describes as “loathed” but necessary.
“The sugar soap and an old scrubbing brush did a great job of getting into the bricks, although I have to admit those wavy lines were a menace,” Rachel recalls.
Next, it was time for paint. Two coats did the trick. Rachel says if she looks closely at the fireplace now, she “can still see tiny blotches of orange-brown where a brushstroke didn’t make it fully into all the nooks and crannies,” but she is overall so pleased with her final result.
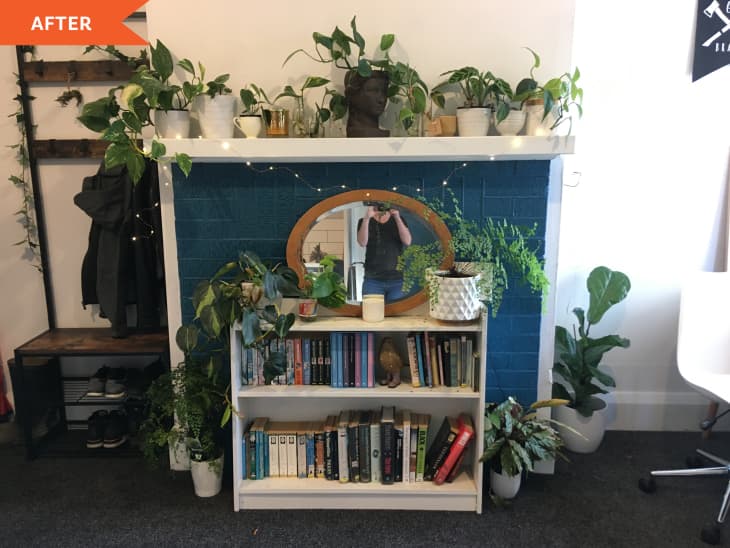
“The color came out the perfect shade of stormy teal-blue to complement my (also blue) velvet sofa,” she says. “It refreshes the whole space, unifies the chaotic lines of the bricks, and provides the perfect backdrop to my books and plants.”
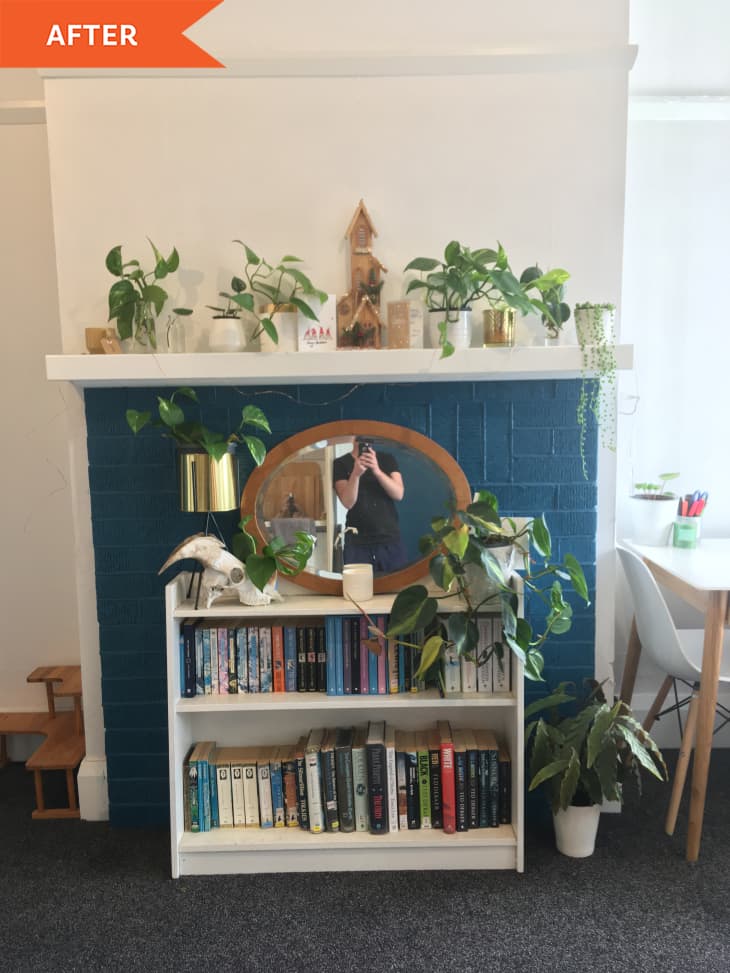
Rachel moved the bookshelf that was once in the corner of the room to the center of the fireplace where the firebox once was, freeing up more room for her dining table and creating a cool, literary fireplace focal point.
“It’s such a dramatic change for so little money,” Rachel says. “Honestly, I never expected that $10 of paint could make as much difference as it did!”
Inspired? Submit your own project here.