
A “Dark, Ugly, and Uninviting” Kitchen Transforms with Rental-Friendly Color (for $127!)
Vinyl wrap can come in clutch during a kitchen makeover, whether you’re transforming cabinets, changing the color of your appliances, or both. It can take a kitchen from builder-grade to bursting with color.
Apartment dweller Lynne Reeves (@number7treereview) wanted to transform her “dark, ugly, and uninviting” kitchen, so she turned to vinyl wrap and other stick-on solutions.
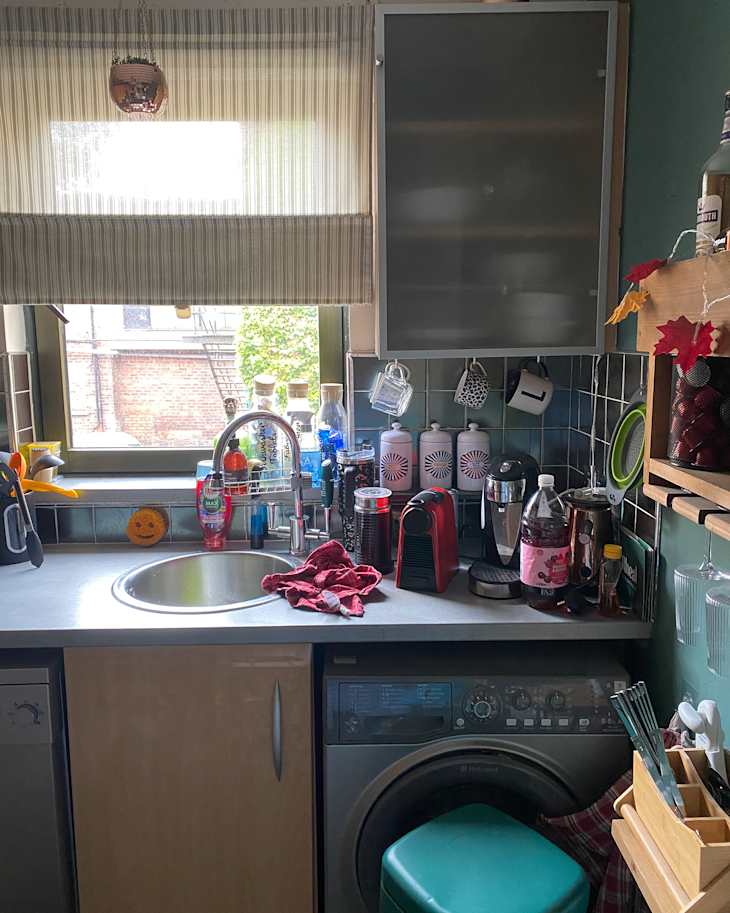
The cabinets were last updated in the ’80s, Lynne says, and the black tiles made the already-small kitchen feel even smaller. “It needed color,” Lynne says. “I am a lover of color. I detest bland spaces. The brighter the better. Color lifts my mood.”

Vibrant paint on the walls adds an immediate color boost.
Lynne painted the kitchen walls yellow (Johnstones Warming Rays) with pink (Farrow & Ball’s Sulking Room Pink) trim, and she did the painting herself.
“It’s best to try doing things for yourself rather than paying for tradespeople,” Lynne says, and she says doing so saved her lots of money, as her entire kitchen revamp cost under £100, or under $127.

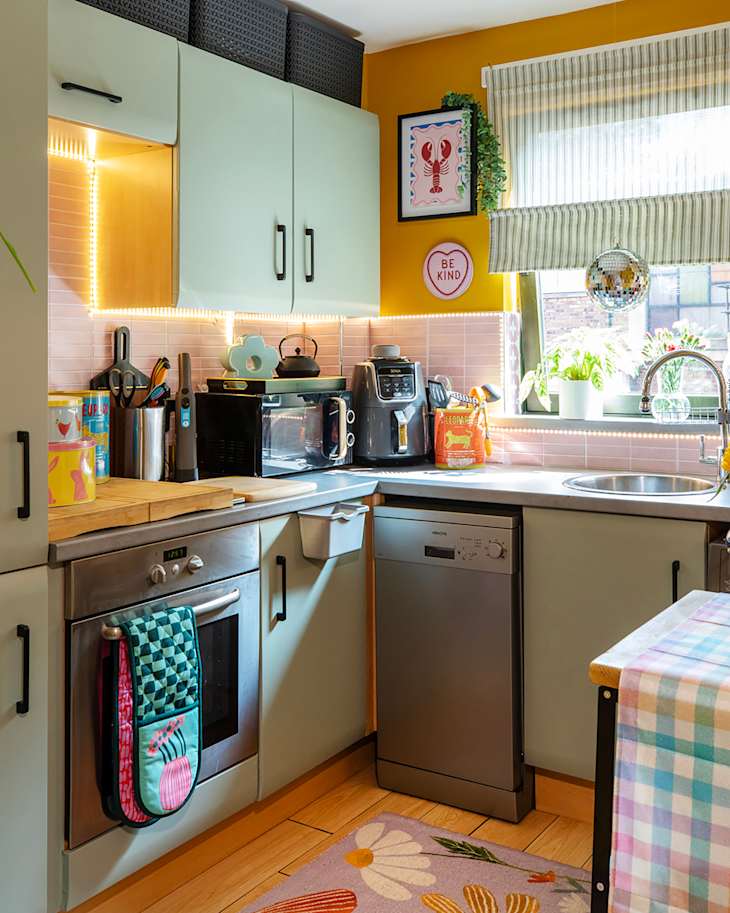
Vinyl wrapping the existing cabinetry modernized the kitchen.
“As soon as I wrapped the cupboards, I could see how groovy the space would look,” Lynne says. She selected a gray-meets-mint vinyl that brightens the whole kitchen, and she also swapped out the hardware on the old ’80s cabinets. “The wrapping got easier the more I did it,” she says.
Another DIY “first” for Lynne in this project was adding a peel-and-stick tile backsplash. “The tiles were difficult at corners, so that took some extra time,” she says. “However, slow and steady wins the race.”
Lastly, Lynne added a folding seat and created a little dining nook from the butcher-block trolley in the kitchen. “I spend a lot of time in this room,” she says.
Her best design advice? “Use color, pattern, and texture,” she says. “Go with what makes you happy.”
Inspired? Submit your own project here.