
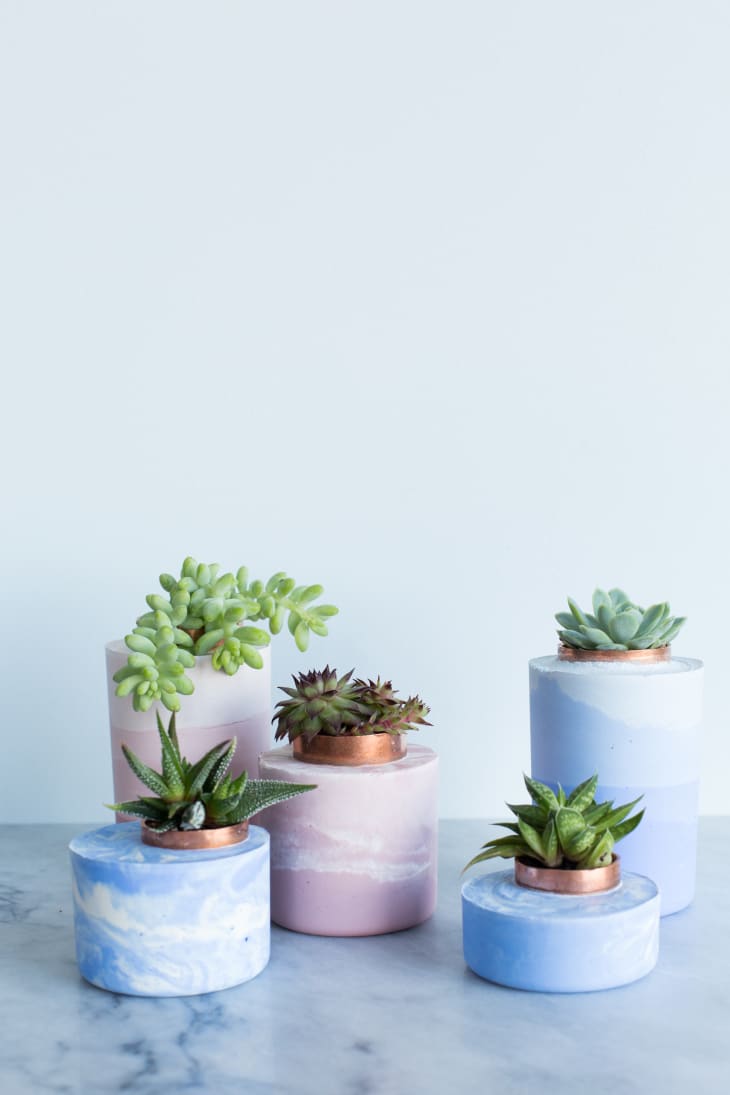
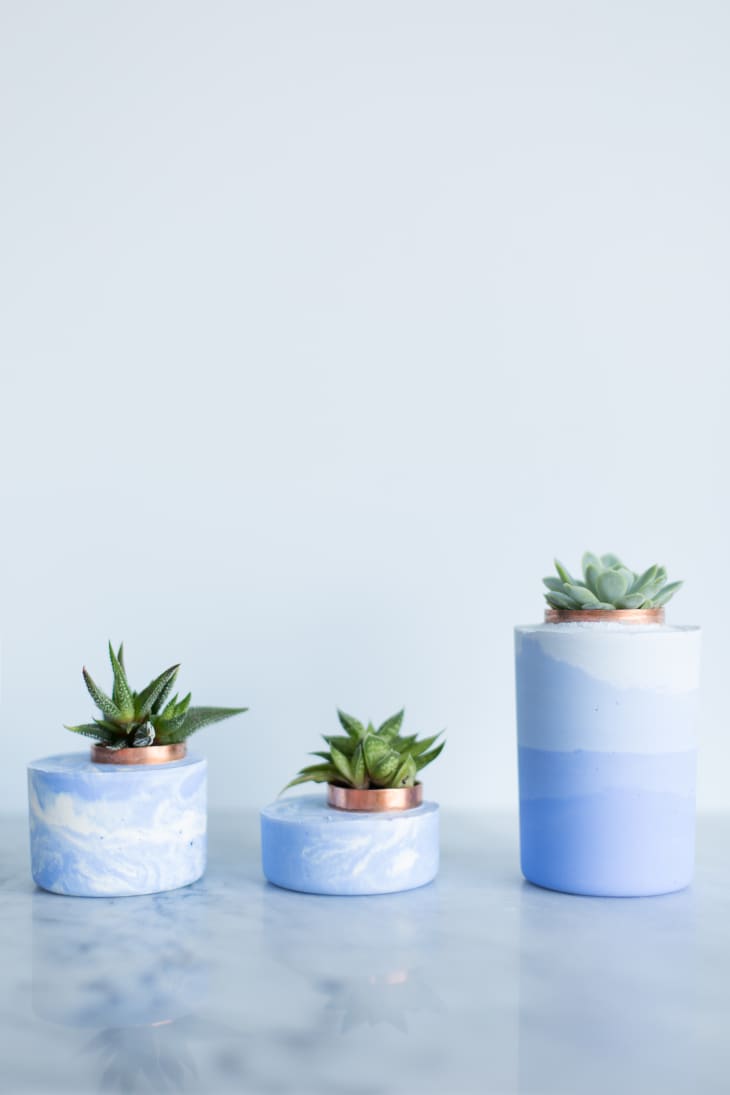
Try This Super-Simple DIY: Marbled and Ombre Concrete Planters
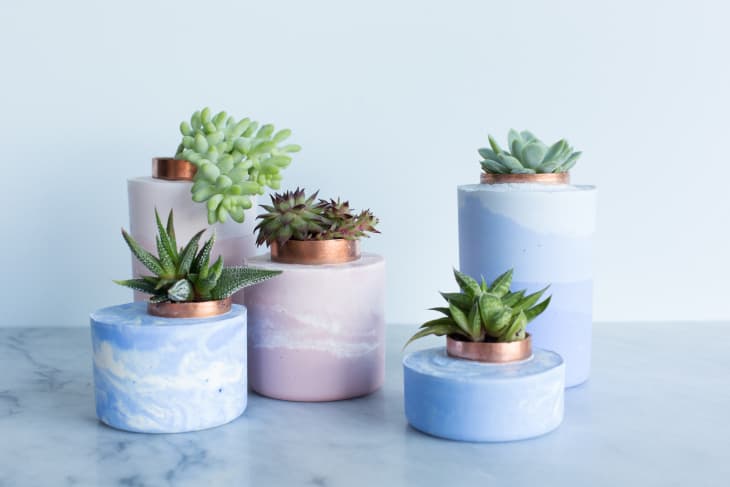
I’m a huge fan of the concrete and cement planter trend that’s been popping up on DIY blogs for a while now—but while painting the dull gray surface of standard concrete works, I knew there had to be a cooler way of coloring these little plant homes. After some research and hands-on testing, it turns out that the trick is starting with white concrete and stirring in powdered pigments. From there, the sky’s the limit. Marble them, create an ombre stack, go two-tone. You really can’t go wrong with this foolproof project, and they’re ridiculously fun to make.
Okay, I’m going to admit it: When I set out to make my first-ever batch of concrete planters, I was a little intimidated. And there was a moment when I was staring down a 100-pound bag of dry mix at the hardware store, wondering how I was going to lug it back to my apartment, when I thought I might just give up. But instead, I called the brilliant folks at Buddy Rhodes (they’re kind of a big deal in the world of concrete), and concrete expert Jeremy talked me through the whole process (thanks, Jeremy!). Basically, you only need three ingredients, it’s not nearly as hard as it seems, and unless you’re planning to make giant tree planters, you can put down that 100-pound bag. Instead, I ordered Buddy’s Rhodes’ 10-pound Artisan Concrete Mix, which is formulated for craft projects and is bone white, so adding pigments produces really beautiful colors. Let me say, I’m obsessed with this mix. The instructions pamphlet isn’t lying when it says that if you add water to this mix, “it is going to get hard and be awesome.” But just in case, here are some tricks I learned along the way to make sure your planters turn out extra-awesome.
What You’ll Need
Materials
- Artisan Concrete Mix (from Buddy Rhodes, $19 for 10 pounds), plus the little packet of Water Reducer that comes with it
- Powdered concrete pigments (I used Ultra Blue from Buddy Rhodes and this rose color)
- Containers to use as molds (I used Round Food Keepers from the Container Store in the 4-, 8-, and 16-ounce sizes)
- Optional: Copper tube caps, 1 1/2-inch diameter, from Home Depot, $5.55 each
- Tiny succulents
Tools
- Plastic bucket
- Spoon
- Gloves
Instructions
1. Wearing gloves, mix the concrete with water in a bucket. Start with a guess at how much concrete you’ll need, but don’t worry, you can always mix up some more. Because adding too much water can weaken the structure of the concrete, begin by pouring in less than you think you’ll need. Also, Water Reducer (that little packet that comes with the mix) makes the concrete more liquid without compromising its strength. Stir in a small spoonful until the mix really starts to flow. If you’re aiming for a marbled effect, you want the concrete to slowly sink down into itself rather than leave bumps on the surface.

2. Separate out however much concrete you’d like to dye. Slowly stir in the pigment until you’re happy with the color. The hue of the mix when wet is pretty close to what it will look like when dry. For a marbled planter, you’ll need two parts: one white, and one dyed. For an ombre planter, separate the concrete into several bowls and add varying amounts of colorant to each.
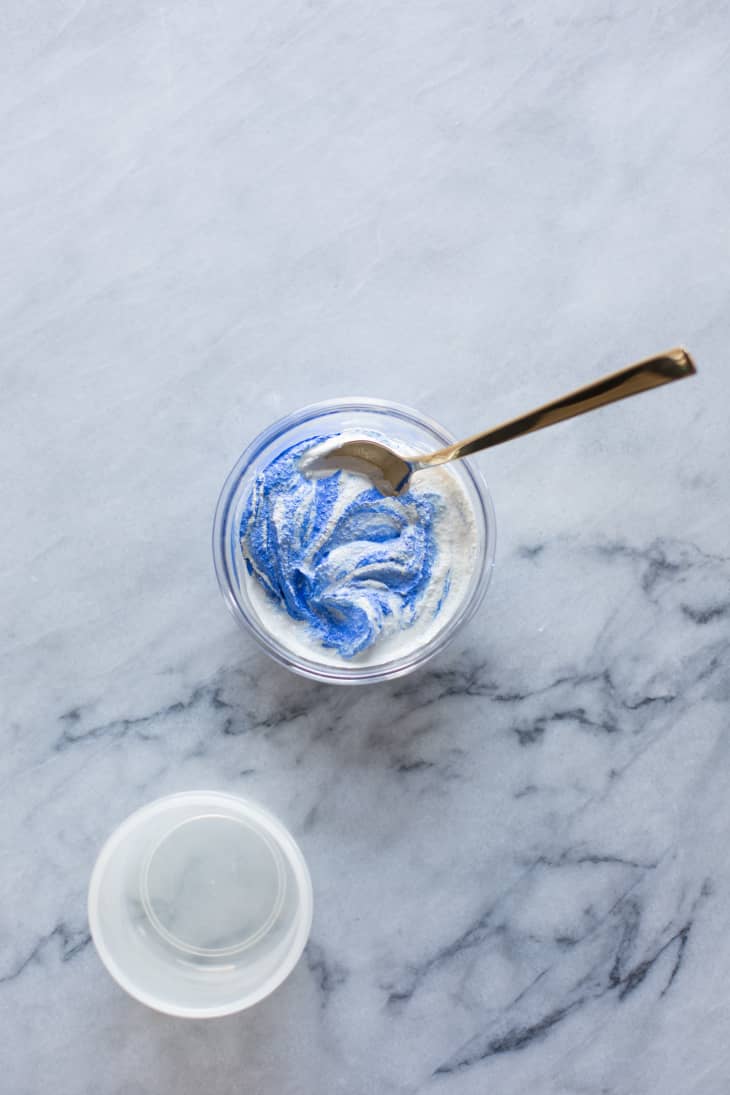
3. To make a marbled planter: Pour the white mix into the dyed mix. Stir them together just a few times until the mix starts to look marbled (like in the photo above), then pour it into the container, stopping about a half inch from the rim. To make an ombre planter: Pour in each shade of concrete, starting with the deepest and ending with the palest, again stopping about a half inch from the top. Tap the container against your work surface a few times to release any air bubbles.
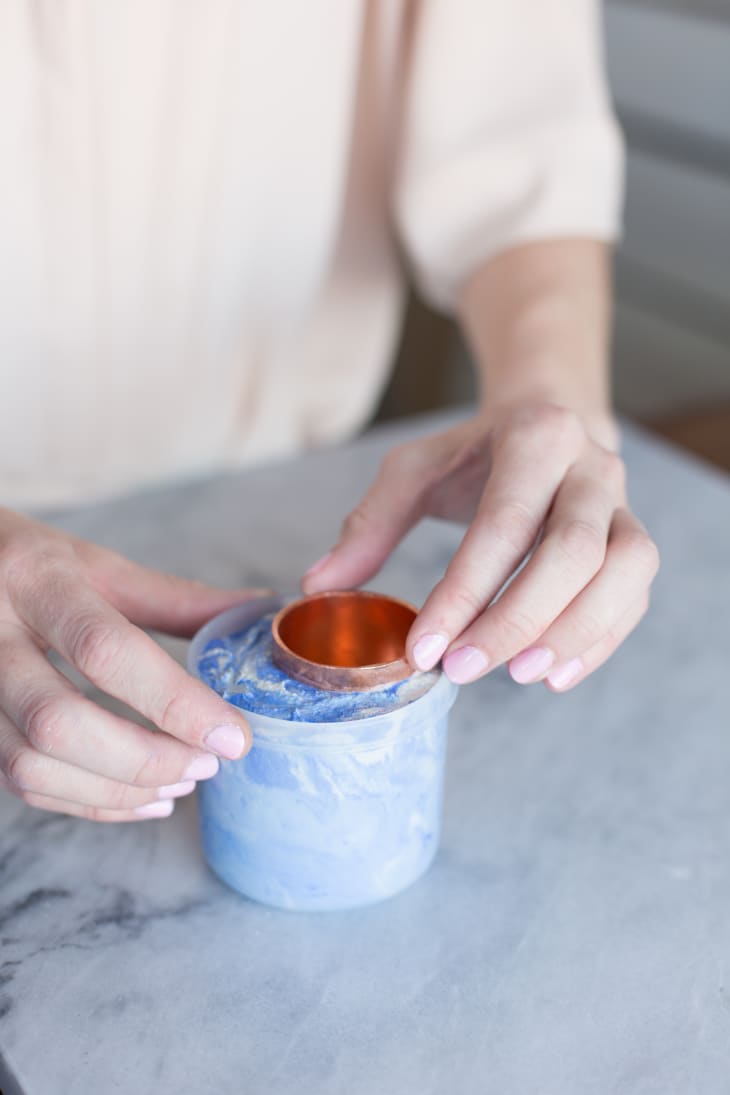
4. If you’re adding a copper cap, carefully push it down into the concrete until only about a quarter inch is exposed. The cap will act as a barrier between the plant and the concrete, so the concrete won’t get soggy every time you water your succulent.
5. Let the planters cure in a warm, moist spot where they won’t get knocked. After 48 hours, turn the containers over to pop out the planter. You may need to tap the biggest ones against a table a few times to get the concrete to release.
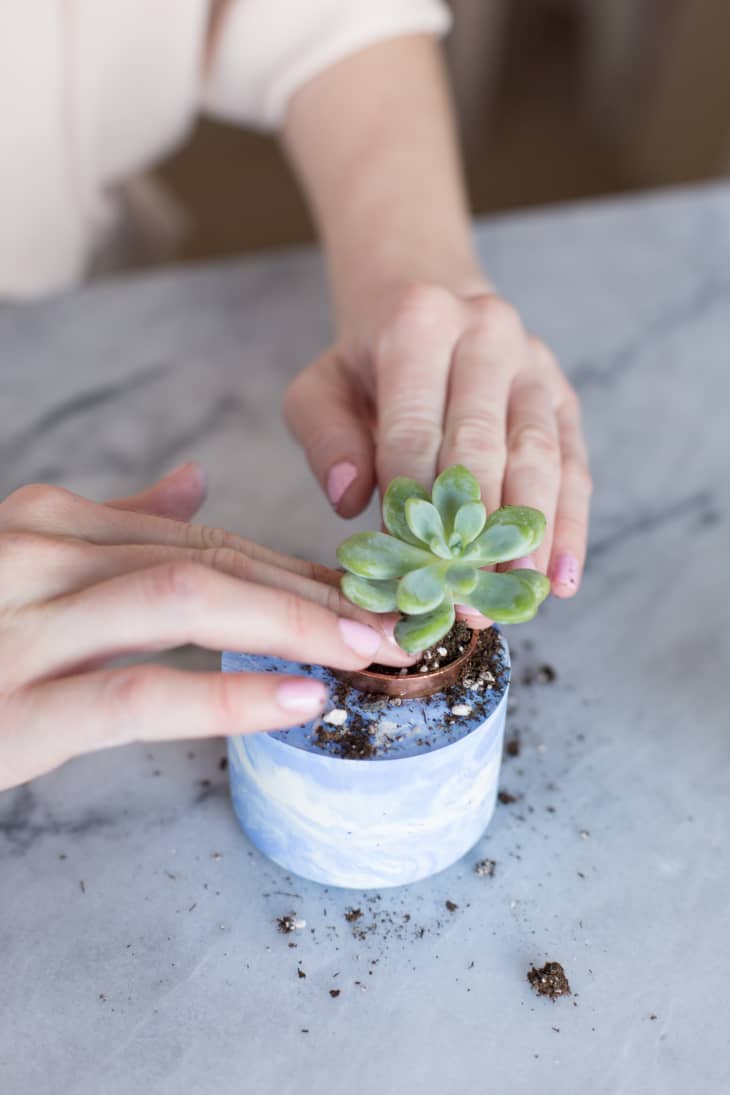
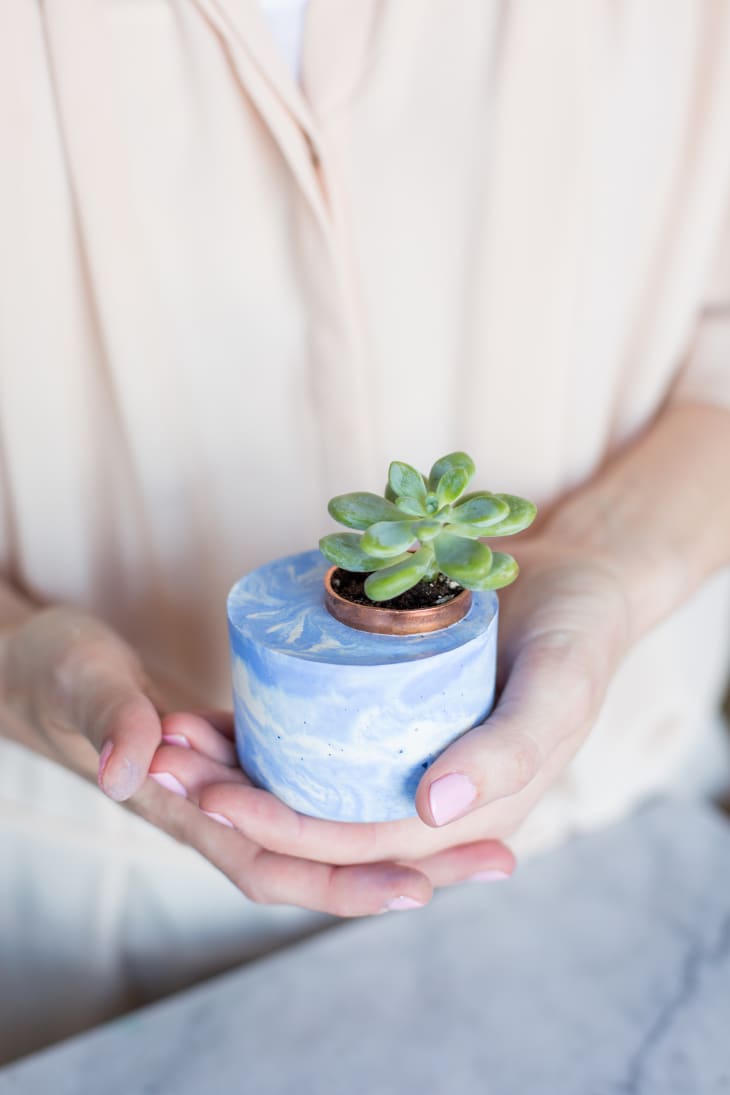
6. Give your succulents a good home: Transplant them from their plastic nursery containers to the copper cap, gently pressing down the soil and giving them some water once they’re settled in their new spot. Note: These planters don’t have drainage holes, so be careful not to over water them.
Okay, your turn! If you make some pretty new planters, we want to see! Share them on Instagram and tag them #atinspired.