
This IKEA Hack Looks Custom — and Saved Her Up to $10,000
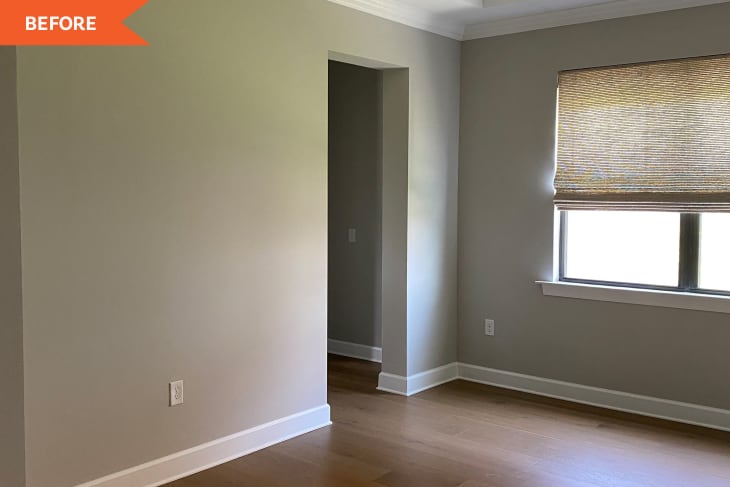
Kristin Purcell spent this past year working from her Florida home and needed a designated space for an office. The creative lead — and chief candle pourer — behind the popular online decor shop, Henro Company, Kristin originally thought she’d use a spare bedroom.
But decided against that once she realized her formal dining room was actually the perfect spot for what she needed: an underused, quiet first-floor room where she’d also be able to easily keep tabs on her young son.
She Was Quoted for $12,000 but It Didn’t Fit Her Budget or Timeline
“The space is a great size — 13 feet by 13 feet, has a nice big window, a tray ceiling, and wood floors,” Kristin says. What it didn’t have, though, was statement-making storage. Kristin felt the room needed it for practical and aesthetic reasons, particularly with its location right near her home’s entry. “I couldn’t just add a desk and some floating shelves,” she says. “I wanted it to wow people when they walked in.”
To set off the space, Kristin’s mind immediately went to a wall of library-like built-in shelves with closed base cabinetry, and she wanted to go the custom route — that is, until she priced the work out. Quoted anywhere from $8,000 to $12,000 (and six to 12 weeks before construction would even start!), Kristin decided to take matters into her own hands.

IKEA HAVSTA Allowed Her to DIY Her Office Storage
“The design was pretty simple, in my opinion, and don’t get me wrong, I know that custom woodworking is a skill, and carpenters deserve every penny,” Kristin says. “It just wasn’t in the budget, and I’m not patient enough to wait several weeks when I wanted to start utilizing the space immediately.”
A big fan of IKEA hacks, Kristin decided to try one herself here with the HAVSTA series, a lesser-known IKEA product she’d never even seen in person. She ordered four units in total, honing in on a mix of shelf configurations for a more bespoke look.
“Two of them had open upper shelves, and the other two had closed upper shelves,” Kristin says. “My thought was I’d simply line them up in a row, attach them to each other, and add some trim pieces around them to give them that built-in look.”
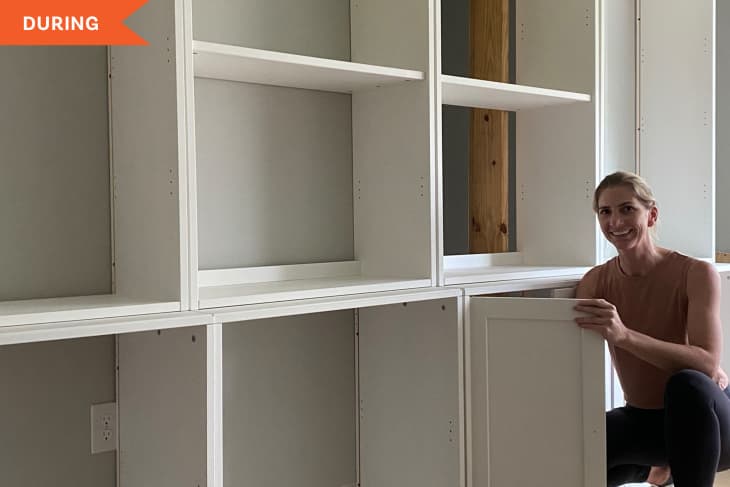
Pleasantly surprised by the fact that the shelves were solid wood (and unfazed by the particle board backs… since she’d be building the units into the wall anyway… and covering an existing door opening in the process), Kristin got to work assembling all four units.
“I’m not an expert carpenter by any means, but this wasn’t my first time using power tools, so I had enough experience to know how I wanted to execute this project,” Kristin says. “I lined up the cabinets across my wall and started playing with their spacing, figuring out how I wanted to make my connections and literally just started building.”
She Added a Base, Ledge, and Beadboard for a Custom Look
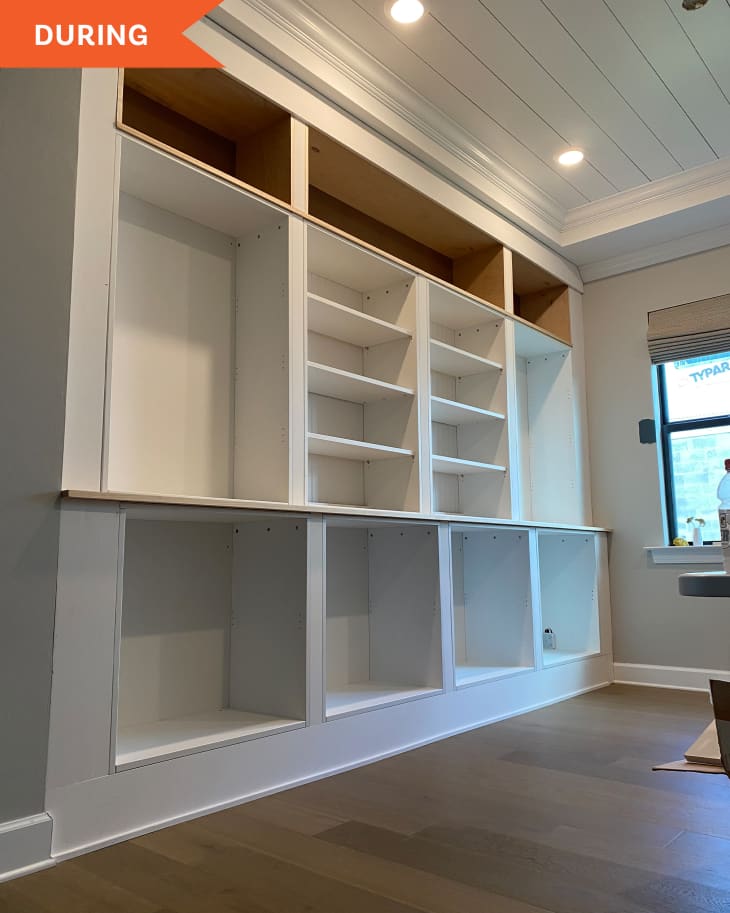
The HAVSTA cabinets come with lower units and upper units, so Kristin focused on the lowers first and built a base for all of them to sit on. “That raised them up just a bit and allowed me to run one long piece of wood across the front, which really gives the illusion that this’s one custom built-in,” she says.
From there, she secured the cabinets to the base and connected the cabinets together using primed pine vertically aligned between each lower base unit, again to mimic the look of something more bespoke.
With the lower units in place, Kristin then added a ledge — two pieces of pine that ran the length of the entire wall. “The HAVSTA lower units are deeper than the top units, which creates a really nice look,” she says.
After installing the ledge, she turned her attention to the uppers. For the uppers with open shelves, she wanted to create a little visual interest, so she attached a simple beadboard backing.
“Swapping out [the particle board backing] for some time with a pattern significantly upgraded the look,” Kristin says. “Once my upper units were prepped with their backings attached, I attached the upper units to the lower base and ledge.” She then used primed pine vertically again between the units to connect them.
With the cabinetry all in place, Kristin focused on finishing off the top of the piece. Since her ceilings are tall, she decided to build out another shelf to crown the unit. “I used pine and made some simple boxes using my Kreg jig,” she says. “Don’t let this step scare you. It’s easy, and there are a ton of videos that will show you how to use a Kreg jig and build beautiful boxes for the upper portion.”
With the upper shelves in place, she started working on trimming out their outer sides and the top. “I used MDF boards cut to size, so they fit from my cabinet to the wall, and secured them,” Kristin says.
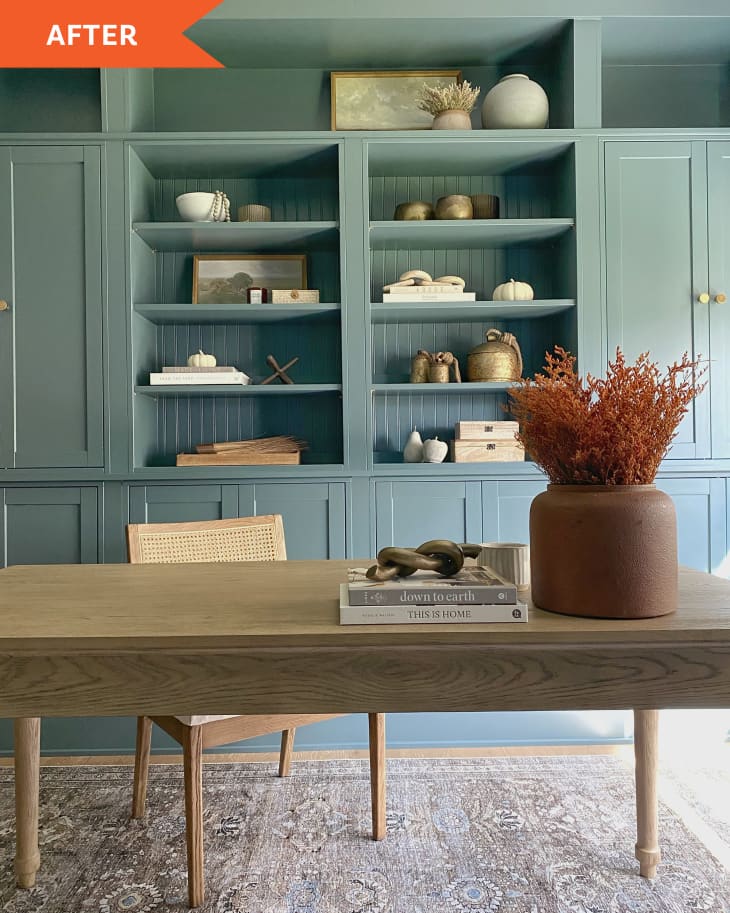
She Only Spent $2,000 and Everyone Is So Impressed
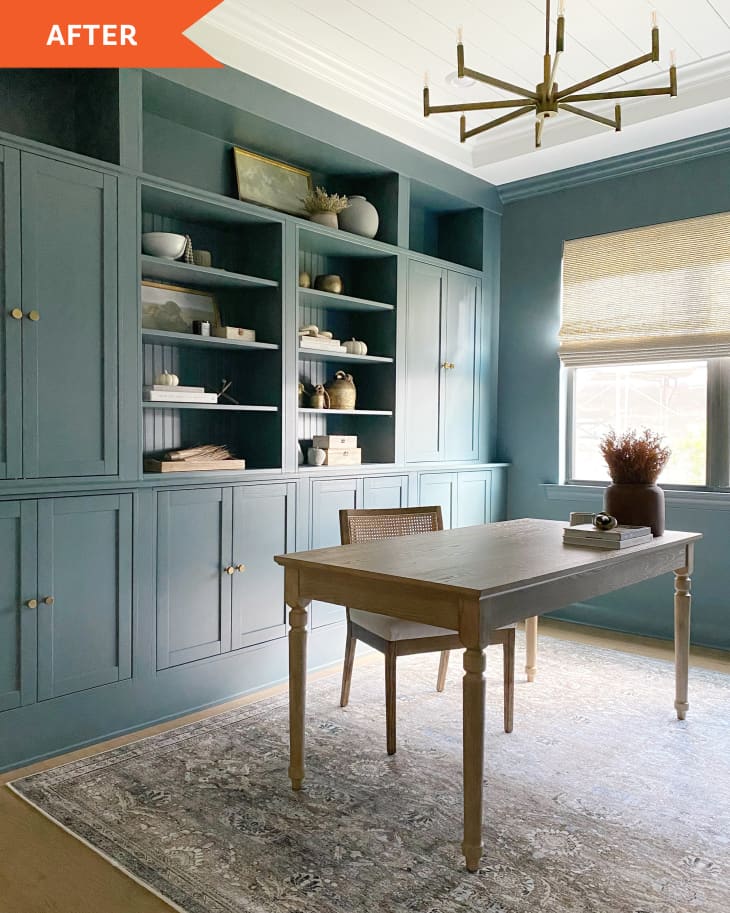
To finish off the built-ins, Kristin sanded everything down, caulked it, primed it, and then used a paint sprayer to coat the whole thing in the perfect moody blue shade, Valspar’s “Relaxed Navy.” For a finishing touch, she swapped out the hardware that came with the units for antique brass knurled knobs.
The project took about 40 hours from start to finish, but the cost — only $2,000 total! — shaved so much off the estimate from pro contractors. Kristin was surprised by the fact that she didn’t need to shim and level the units when connecting them, which she attributes to their solid wood construction.
In hindsight, the only thing Kristin really would have done differently is practiced a little more with the paint sprayer before going all in on the cabinets. Watch for drips, she says, and avoid applying too much paint in a single coat, which prevents the need to back-roll areas for evenness.
Kristin’s second coat hid any problem areas, though, and any time she needed a little bit of reassurance with any of her tools for a step along the way, she’d pull up a YouTube tutorial and work through it.
In the end, Kristin was in awe of what she created — again, for both its form and function. “There’s so much concealed storage and just enough open shelving to display all my favorite decor pieces,” Kristin says. “It is definitely a stunner. Everyone who walks through my front door looks into my office and says, ‘WOW!’ When I say, ‘I built that’, they are in disbelief.”
Inspired? Submit your own project here.
Shop This Before & After
Get all the IKEA UPDATES
Sign up for The IKEA Edit, our twice-weekly newsletter with the latest IKEA finds, deals, and hacks.