
Before and After: A Gut Reno Helps This Plain Bathroom Recover Its Original 1958 Charm
There’s a lot of benefit in renovating a space slowly. It can give you more time to source materials that suit your budget, allows you to DIY with a little less pressure, and can even be less disruptive to your life overall if you manage to divide your project into stages that can be completed individually. But sometimes there’s a pressing issue that forces you to take immediate action without the luxury of time.
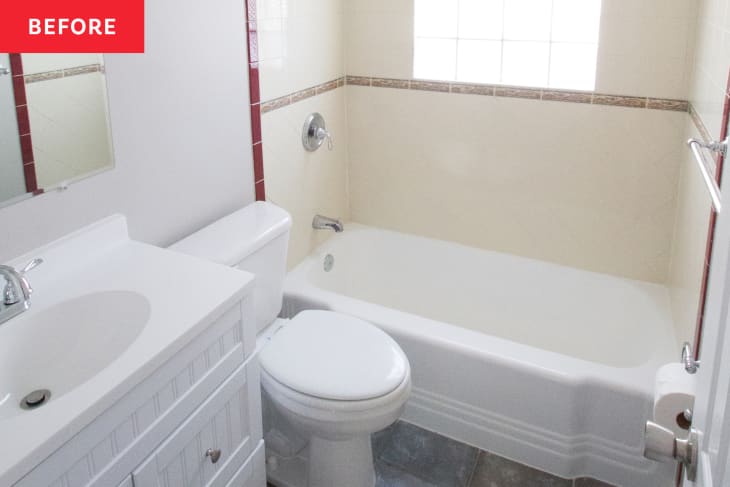
That was what DIYer Angela Nickerson (@midmodernmama) faced in her 1958 home’s guest bathroom. While the bathroom had been nothing much to look at, renovating it hadn’t been a high priority. It did its job as a bathroom just fine, and the tub worked well enough for hand-washing clothing that couldn’t be cleaned in the nearby laundry room.
But one day in April 2022, Angela walked into her home to hear water running. The toilet in the bathroom above this one had overflowed, and the shutoff valve had broken. “A mixture of sewage and water had been running for hours, saturating the upstairs bath and flowing through the ceiling into the downstairs bath,” Angela says. “Everything was soaked — ceiling, walls, floor. It was a huge mess.”
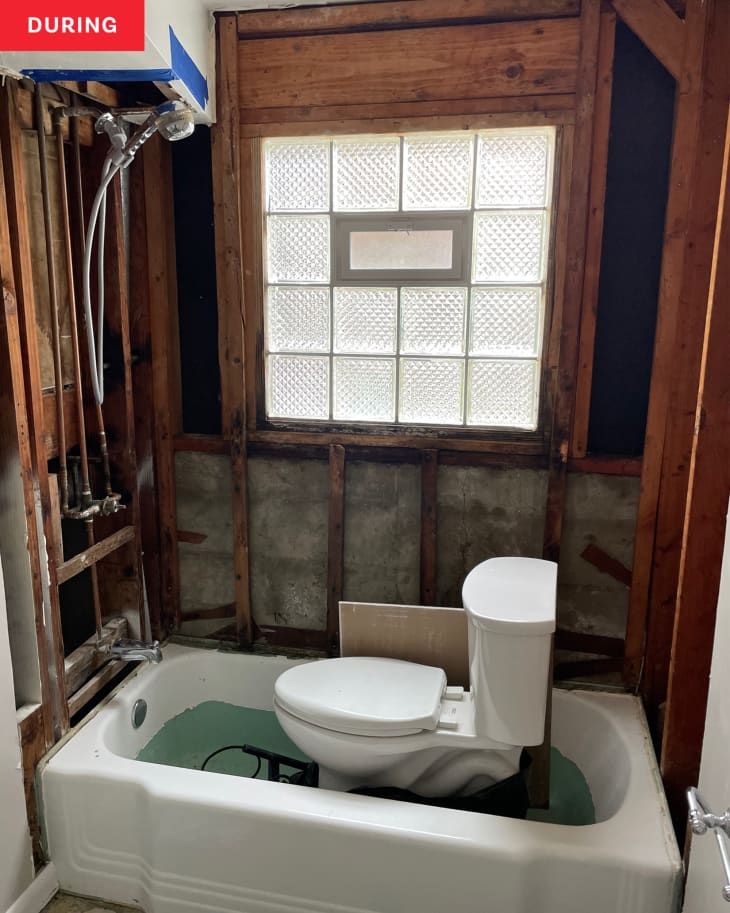
Thankfully, insurance covered necessary remodeling costs, and the restoration company took this guest bathroom down to the studs. Angela designed a totally new bathroom — DIYing anything not explicitly covered by her insurance — that was completed over eight weeks as part of the Spring 2022 One Room Challenge.
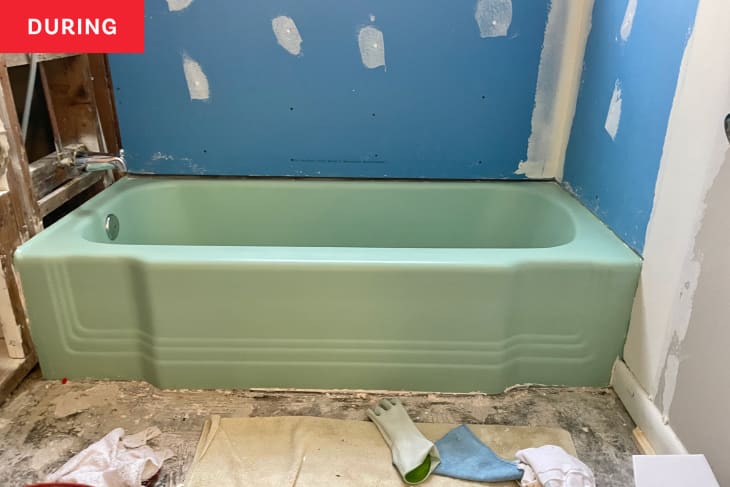
Prior to the bathroom’s flooding, Angela had noticed that the bathtub’s white finish was peeling off to reveal a beautiful jade green color. She incorporated that green tone into a bathroom design that reflects her home’s mid-century roots. But removing all the white finish was a tedious job, taking about two weeks to complete. She first filled the tub with water and let it soak for a few days, which helped loosen the finish at any of the already peeling areas. Next, Angela used Citristrip and a scraper (then a toothbrush) to go at the remaining finish. Finally, she added a clear protective coat. “The end result is worth every minute of effort!” she says. “Stripping down the bathtub was much easier and a lot cheaper than replacing it.”
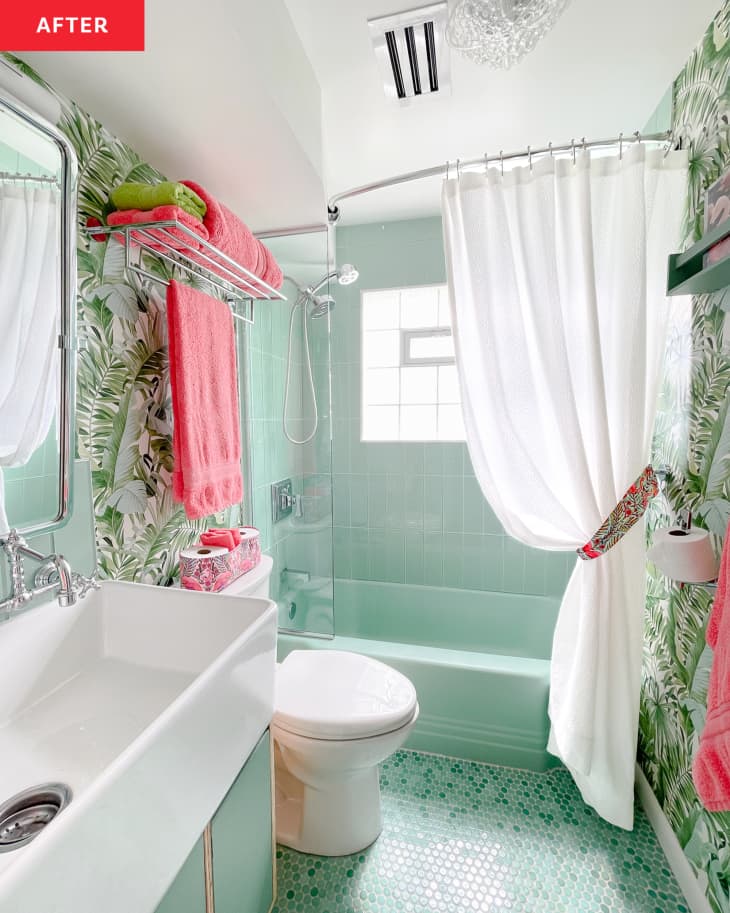
As for the rest of the bathroom, most of the layout stayed the same. One change Angela did ask for was to have the sink’s faucet on the wall rather than the vanity to help make room for a larger kitchen-sized sink. “That large kitchen sink is a game-changer,” she says. “I love it! I can wash my delicates, soak vintage linens for sewing projects, and guests can still brush their teeth, too. It’s so functional!” Her husband handmade the vanity beneath to get the custom size they needed, and painted it a soft green to match the beautifully restored tub.
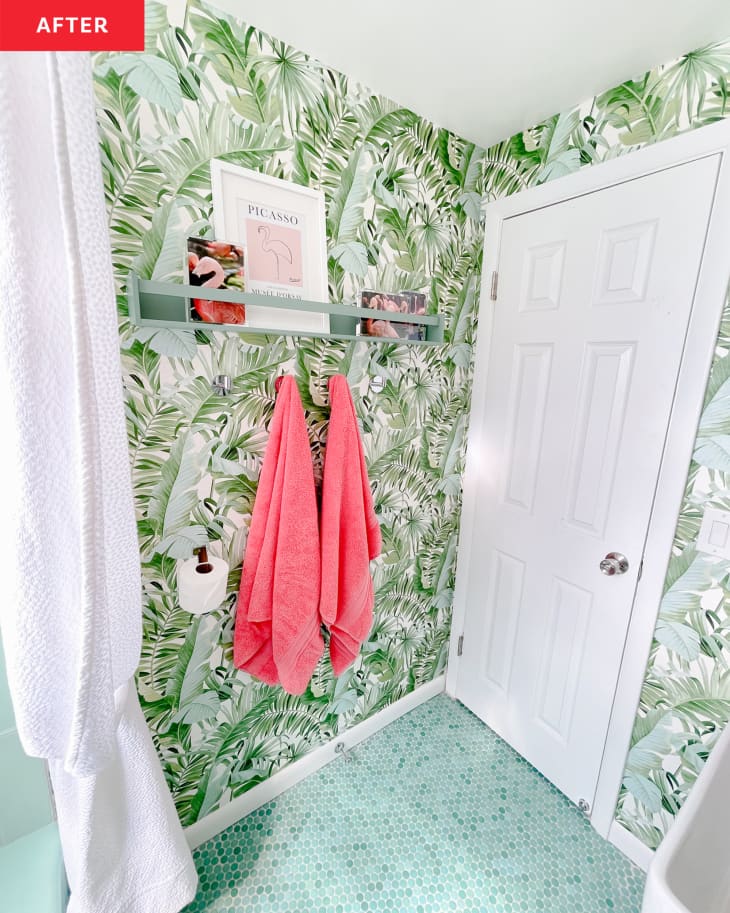
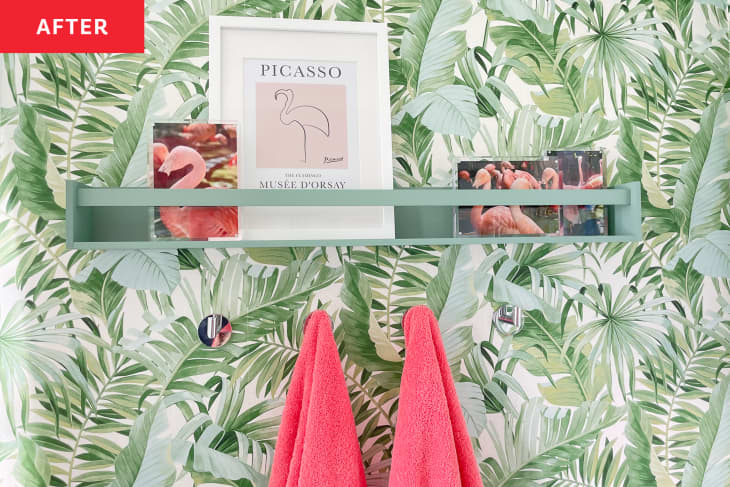
The vanity isn’t the only thing chosen to match the tub: Angela also selected green penny tile for the floors and green subway tile for the shower area. Outside of the bathing zone, the walls are decorated with a vintage-inspired leaf print wallpaper that makes the whole space feel a little like a tropical vacation.
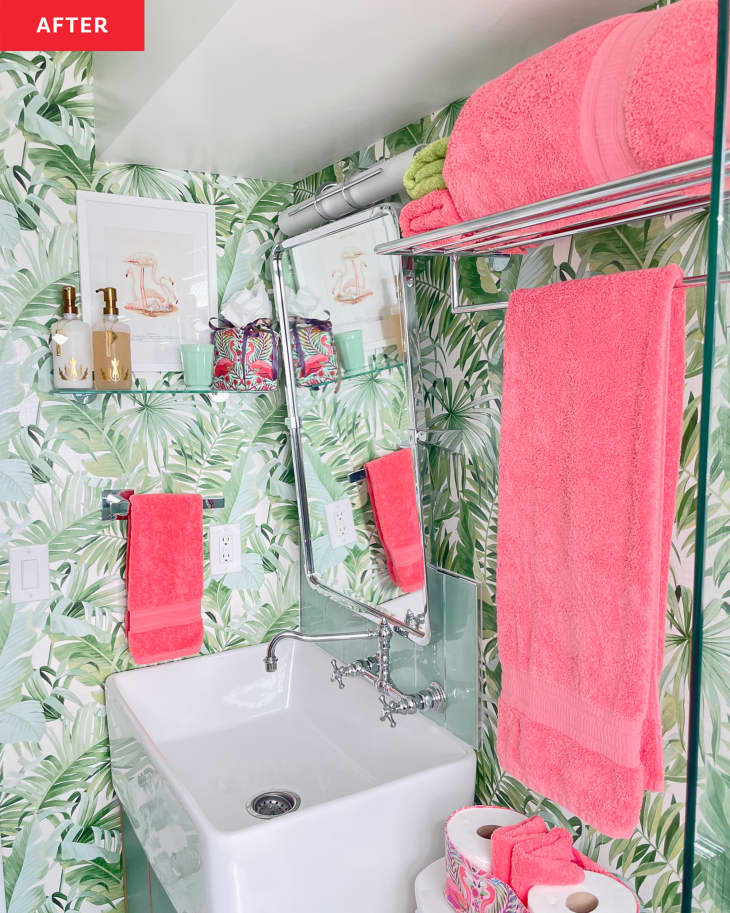
A vintage light fixture Angela rewired herself, a new tilting mirror, fresh artwork, polished nickel hardware, and some extra shelving help pull everything together. Out of everything, though, the new larger sink is still a highlight for her.
“I absolutely love the large sink,” Angela says. “It is so functional! And it’s astonishing how often I use it now in completely different ways. Since we don’t have a utility sink, it’s the perfect solution. Kid has wet clothes? Put them in the big sink. Need to rinse a paint brush? The big sink. Need to wash delicates? The big sink has it covered. I am only half kidding when I say I might put one in the upstairs bathroom, too.”
This project was completed for the Spring 2022 One Room Challenge, in partnership with Apartment Therapy. See even more of the One Room Challenge before and afters here.
Inspired? Submit your own project here.