
Before and After: A $70 Paint and Stencil Redo Totally Revives a Tired Dresser
There are tons of ways to spruce up old furniture, whether you’re polishing it up and letting the wood tones shine, adding architectural detail, painting it a totally new color, or even adding pattern.
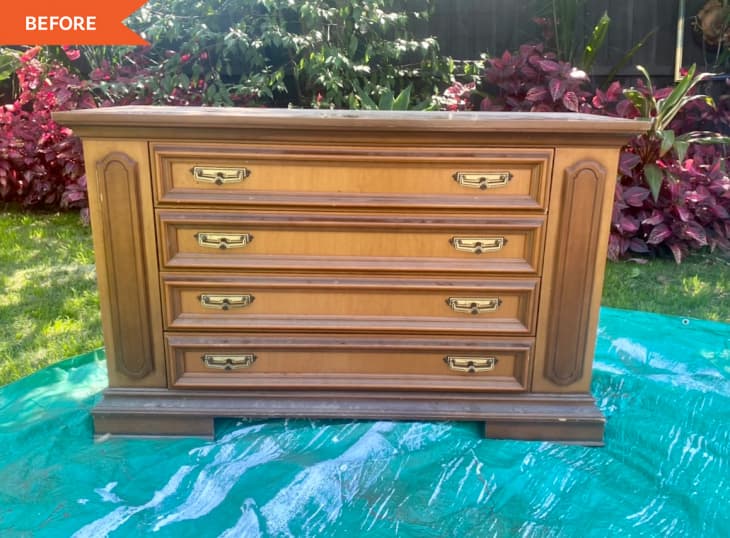
This dresser — a basic brown four-drawer piece that Chantelle Clarke found for free — got a pattern-filled redo for about $70.
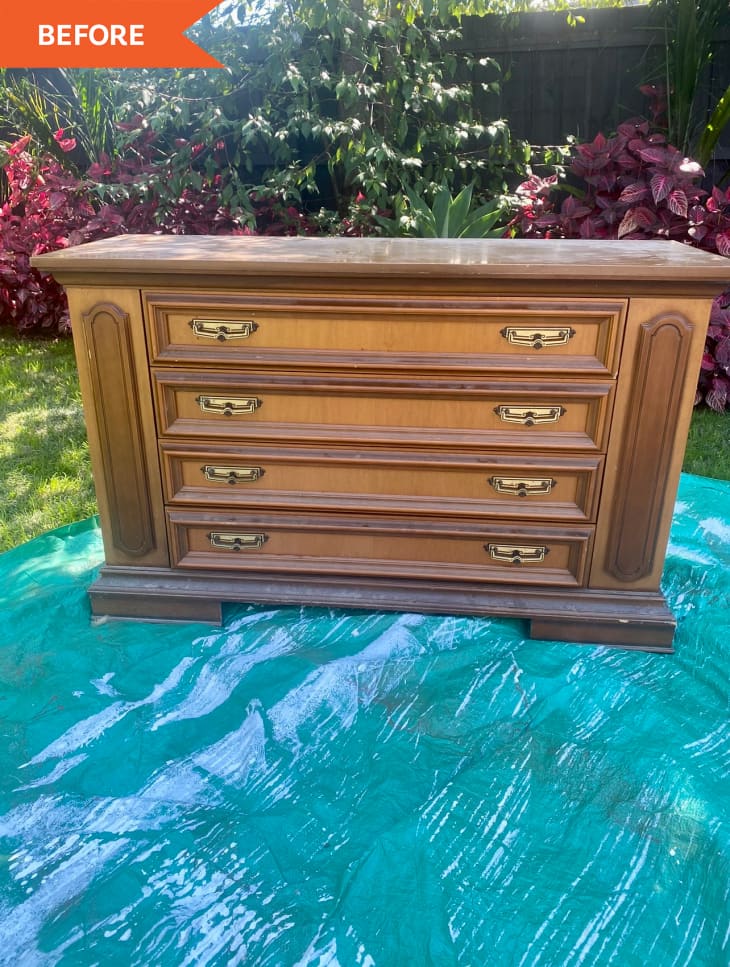
Chantelle got the dresser for free, as someone was throwing it out. “It had great bones, [and] was in great condition but [was] old and dated, and I knew it wouldn’t take much effort to update it,” Chantelle says. “I had been looking for the right piece for a while. I liked the size and shape of the drawers, but the style was too dated to fit in with my kitchen.”
Chantelle wanted to give the dresser a new color, and she also wanted to remove the trims around the drawers and add timber details to the front of the drawers to create a more streamlined look. Her project took one weekend.
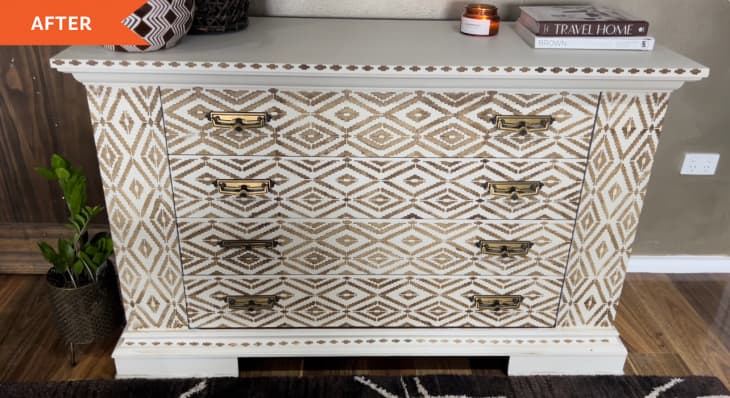
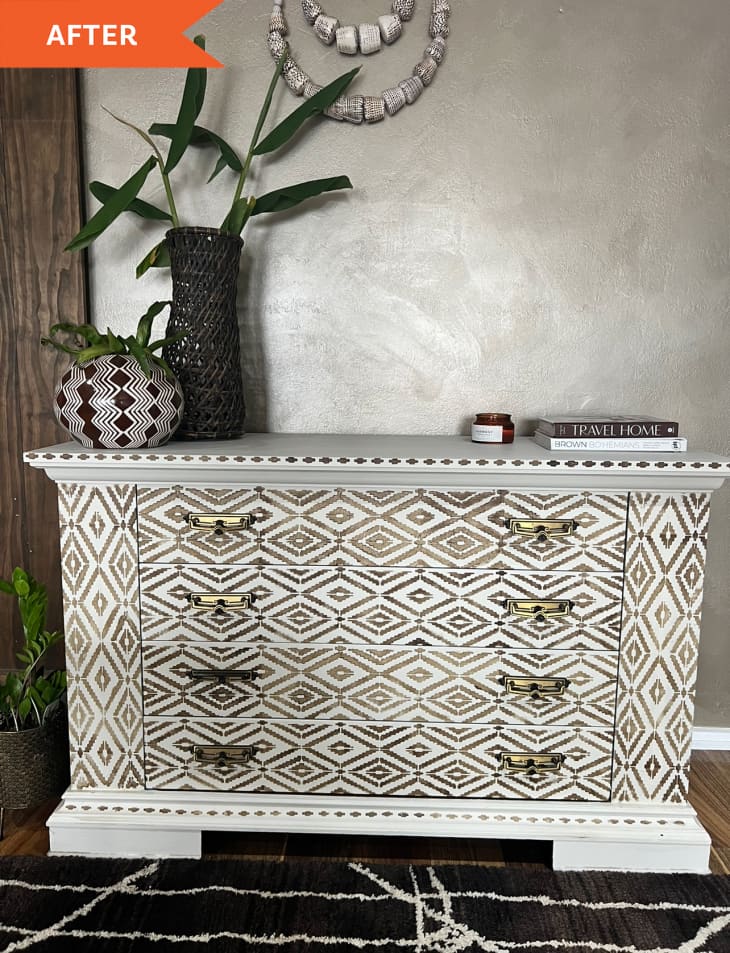
“I’m proud that I took the risk in removing the trims,” Chantelle says. “I would not have been able to use the stencil on the drawers if I had not removed them.”
Chantelle says she did damage one of the drawers while removing the trim, but she was able to piece it back together with wood glue, which is unnoticeable now with the paint over top.
“I was also really pleased that I painted a piece in a light color, and I liked it,” Chantelle says. “Normally I tend to go for darker colors.” She used a warm white shade from Mineral Paints for the base and then used a bone inlay stencil and gold-ish brown paint to create the final patterned look.
Chantelle’s tips for stenciling furniture are as follows: First, don’t rush. “Bone inlay stencils require patience,” she says. Second, don’t be afraid of making mistakes. Her mantra is that “imperfections create character” in furniture. And if you make a big mistake, “you can always repaint and restart,” says.
To avoid imperfections, though, Chantelle recommends practicing with the stencil on a small surface like a piece of cardboard before using it on the final product. This will help you know how much paint to add to keep the whole look even throughout.

Her final step was reattaching the hardware after the paint dried. “I love that I was able to use the original hardware, which still really suited the piece after it had been painted,” she says.
Chantelle is pleased with the way her stenciling came out; she calls it a drastic transformation. “The stencil I used is both elegant and speaks to my cultural aesthetic,” she says. “This piece looks so good in my space.”
Inspired? Submit your own project here.