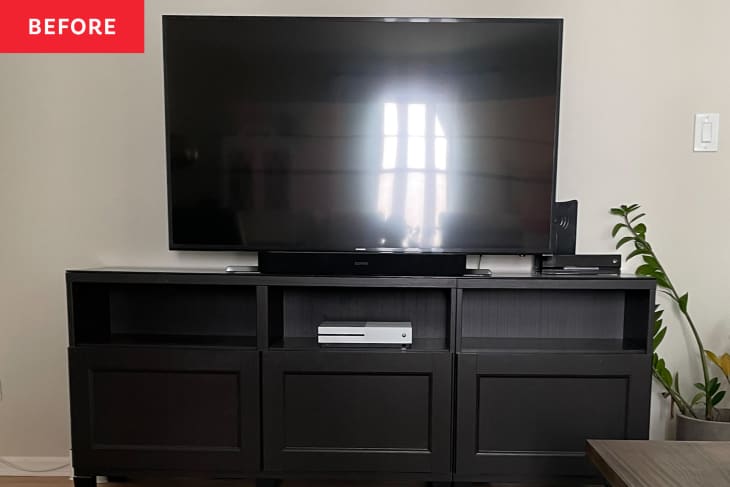
Before and After: A 10-Year-Old IKEA BESTA Looks Totally New After a $200 DIY Project

The best finds at IKEA are the pieces that are durable and neutral enough to stick with you through several moves. It shouldn’t surprise you that of the things AT editors bought for their first apartments and still own today, there’s lots of IKEA on the list. (And for more IKEA finds editors swear by, check out these five items.)
The IKEA BESTA is one of those durable, staple pieces that stands the test of time, as proven by DIYer Lena, who has used her brownish black BESTA in her living rooms for 10 years. “It has worked great for us over the years,” she says. “Its dark color made it a versatile piece that we were able to move with us from apartment to our first house. The three-doored compartments helped keep the extra storage space well organized.”
Because she liked its size and storage compartments, Lena wanted to keep it, but after 10 years, she was ready to spruce up its appearance. “I’d been wanting to get a lighter cabinet for this room, but most of the ones I liked were quite expensive,” Lena explains. (Her inspiration was this credenza from Wayfair that’s three things: gorgeous, but also $5,000, and also — perhaps most importantly — out of stock.) So she decided to give her BESTA a makeover.
Lena’s $200 makeover started with a good sanding of the BESTA using 120-grit sandpaper, to help the primer — Lena recommends Zinzzer BIN primer for IKEA products — and the paint stick. To change the silhouette to look more like her dream furniture piece, Lena added a new base, top, and sides to the cabinet, so the painted IKEA BESTA served as the inside (body) of the unit. On the top and sides, she used pine boards, which she eventually stained with a golden oak-whitewash mixture.
Because her media cabinet had entirely new dimensions at this point, Lena had to cut new doors out of plywood. She chose the cheaper wood for the doors because it would eventually be covered by linen fabric, and the edges would be trimmed with poplar and finished with wood veneer edge banding to create a finished-looking cabinet door.
“I wasn’t sure if the linen on the doors would work out, but it ended up working out so well,” Lena says. “It is a unique twist that I haven’t seen often.” One of her favorite door details is the antique brass hardware, which certainly helps to elevate this piece from IKEA level.
The only thing she’d change about the doors, she says, is choosing wider poplar trim so that she could have fit and installed a soft-close hinge system for the doors.”I’d recommend choosing your hinges before planning the door,” Lena says to those considering a similar cabinet hack.
Except for the fact that fitting hinges after measuring was a bit difficult and that her doors don’t close as quietly as she’d like them to, Lena loves her new, high-end looking cabinet and how it looks in the room. “I most proud that I made the vision in my head come to life,” she says. “The light colors helps make the room seem brighter.” And a $200 cabinet instead of a $5,000 one? Well, that’s just the BEST(A).
Inspired? Submit your own project here.
