Before & After: A Bathroom Shapes Up With Shiplap

Amanda’s cramped main bathroom was in desperate need of two things: light and space. After patiently waiting for two years, she got to work and created a bright & stylish space.
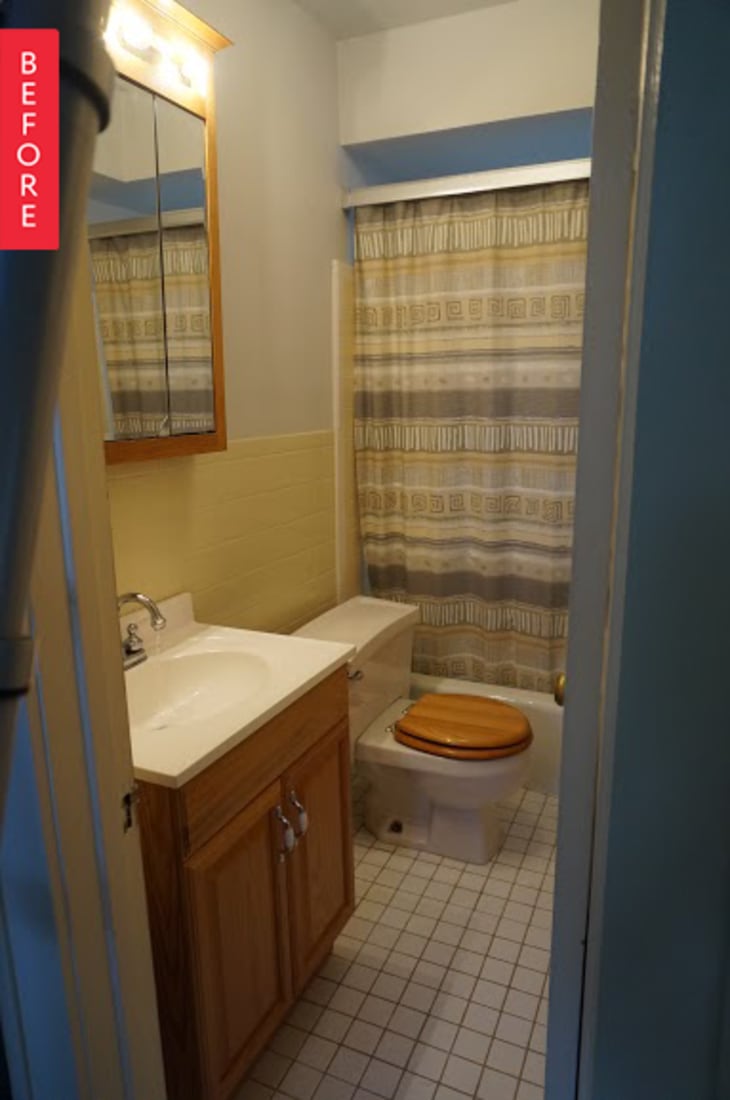
From Amanda: We bought our 1925 Sears Kit home in December of 2014 and have slowly been renovating room by room. We started with the rooms that were deemed “unlivable” by us and let the rest stay as they were. Our upstairs bathroom was one of the rooms we learned to live with for almost two years. It had pale blue walls with years of mildew built up on them, cracked tile on the floors and walls and a toilet that hiked up our water bill every month.
Our first step in the renovation was to remove the yellow tile from the wall. The tile may look good in the photo, but it was cracked in several places and there was an entire half of a wall (behind the door) that the tile was missing from. We then just gutted the bathroom from there, only leaving the shower tile.
The bathroom is really small for a main bathroom so we knew when we rebuilt we wanted it to be light and bright. Before any rebuilding, we first installed new lighting above the sink, a vent in the ceiling to prevent future mold and mildew build up, and a light in the shower. We went with a light gray porcelain tile on the floor, new toilet, discount beadboard vanity (on a budget here!), and decided to try out the “Fixer Upper” look with faux shiplap on the walls. We had Lowe’s cut down 1/4″ sheets of plywood into 8 inch strips and we love the result. It was so easy, I definitely recommend it to anyone wanting to bring some texture into a room. A gold circle mirror from Target and black fixtures finished off the look.
Hope you all like it as much as we do!
Thank you, Amanda!
