
Before & After: Bland Bi-Fold Shutters to Chic Closet Doors
We independently select these products—if you buy from one of our links, we may earn a commission. All prices were accurate at the time of publishing.
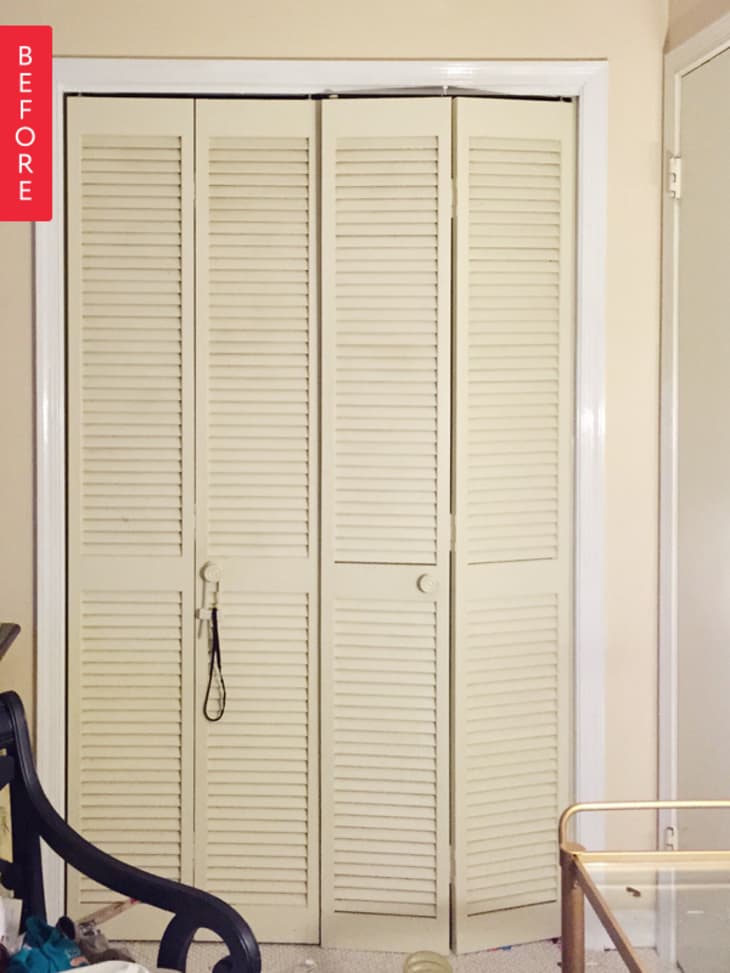
(Image credit: Jessica)
These blah shutter bi-fold doors appear in many a rental, and Jessica’s was no exception. While she decorating her daughter’s room, she had an idea to transform them into something a little more glam:
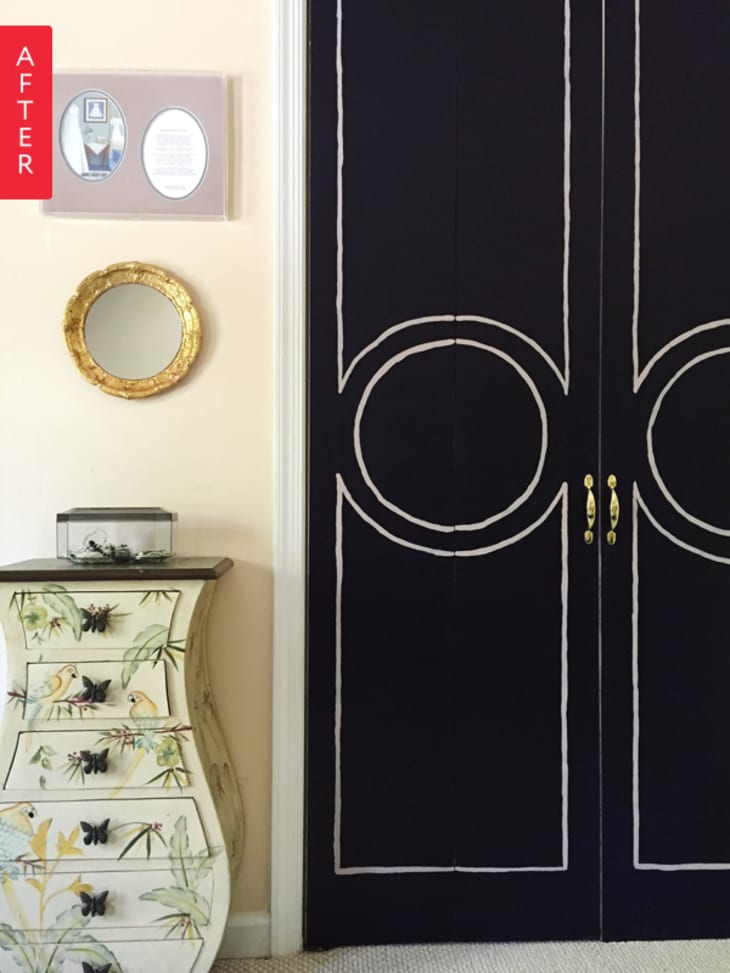
(Image credit: Jessica)
What a difference! From Jessica:
While redecorating my girl’s room, I had a big Ah-ha moment. I am unable to paint the walls in my rental, but I really really needed to make a statement, so I decided to upcycle/DIY (whatever you want to call it) the closet shutter doors in my girls room.
Since I could not accomplish the look I wanted without replacing what is already in the room, I decided to use hardboard to make my vision a reality. Hardboard is the only thing I paid for in this DIY, everything else I owned.
Materials Used:
1-4×8 Sheet of Hardboard
Primer
Paint
Painting tools
Pencil and Eraser
*Finish nails and Hammer
OR Nail Gun
Drill
Steps:
-Measure and cut hardboard to size (Home Improvement stores will cut boards for free, if you provide them with measurements)
-Remove door knobs, if needed
-Place hardboard over shutter door and make sure all edges are aligned accordingly.
-Use nail gun and attach hardboard to face of shutter door
OR use a drill with a small drill bit to drill small holes into hardboard and shutter door. Then, hammer in the finish nails.
-Prime and Paint
-I drew faux molding free handedly with a pencil and used an eraser to erase the extra pencil markings.
-After free handing the molding, I went over it with paint using a regular ol’ artist paint brush…you know the thin ones with an angle brush that artist use to paint on canvas…yeah, that one.
NOTE: I did this project singlehandedly, but I would advise you to have someone help you hold the boards up while nailing them in.
NOTE: Do not use painters tape or masking tape on hardboard…it will pull up the paint and ruin the board….trust me, I have done it before…hence, the freehanded faux molding.
More photos and details over on Domicile 37.
Thank you Jessica!