
Before & After: Sad Dresser to Restored Stunner
We independently select these products—if you buy from one of our links, we may earn a commission. All prices were accurate at the time of publishing.
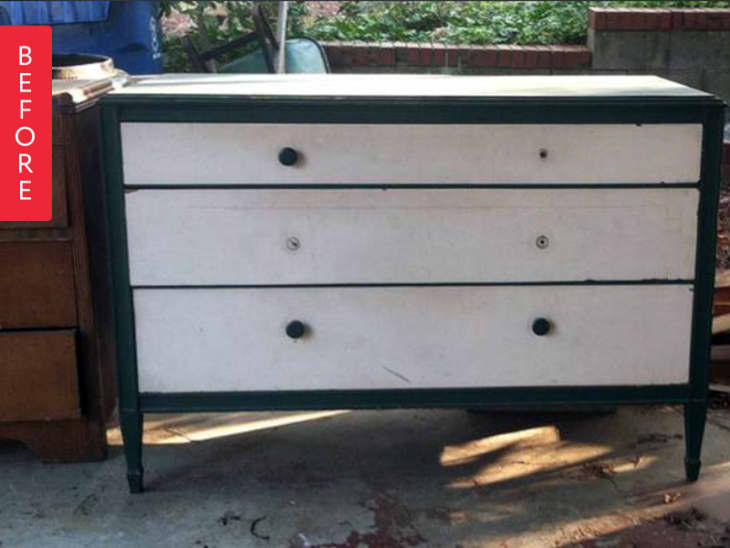
(Image credit: Submitted by Ryan Helsel)
Most of us would probably overlook the above Craigslist ad, but not Ryan. He brought this battered dresser back to life, and now it looks better than ever:
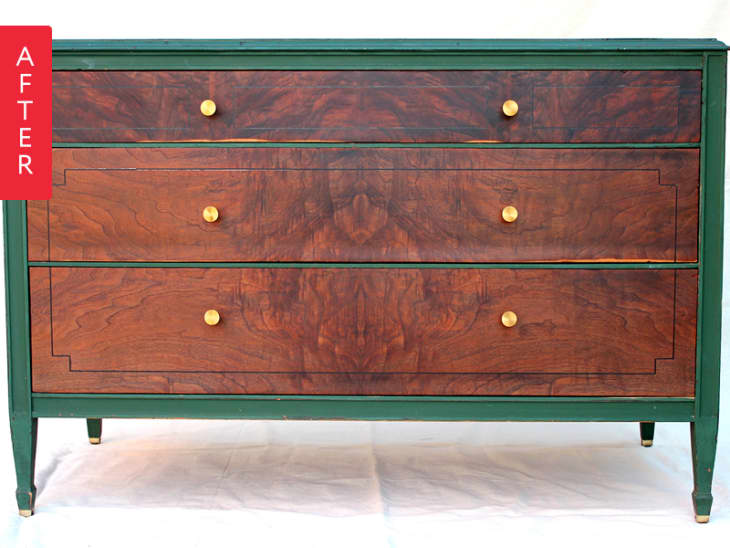
(Image credit: Ryan Helsel)
From Ryan:
This dresser caught my eye on Craigslist due to its great shape, and though there wasn’t much information in the post about the quality of the piece, I thought it was worth the risk. As you can see from the before photo (taken from the Craigslist ad) it was in somewhat rough shape, though I’ve definitely seen worse. It had been painted forest green with white drawers at some point in the past, but that was obviously many years back. I could tell when I went to pick it up that it held a lot of promise due to the quality of the construction — all the classic signs were there: dovetailed joints, all hardwood construction (in this case walnut and oak), even the drawer bottoms were attractive pieces of wood. I could also tell that the drawers had a veneered front, and though it had a bit of damage, I was hopeful the layers of paint had actually protected the veneer a bit.The first thing I did when I got it home was disassemble each drawer. After years of use and some time outside in the southern humidity most of the original glue had broken down and almost every corner was loose and wobbly. After cleaning the glue and old paint off of the dovetails I also took the opportunity to clean up some messy paint that had splattered on the inside and bottom sides of the drawers. After everything was looking in better shape I was able to re-glue and clamp the drawers, making sure to keep them square so they would fit well and slide better once put back into the dresser. While the drawers were removed I also cleaned years of dust, cobwebs, hair, etc. out of the inside of the dresser and gave the entire frame of the dresser a good cleaning and a light sanding. I also discovered that the dresser had the original brass caps on the feet that had been covered by layers of paint, so I cleaned those off as well.
Originally I had thought I would strip the entire dresser and refinish it that way, but I found myself really liking the weathered vintage green paint and instead decided to just focus on refinishing the drawer fronts and top, leaving some of the vintage green paint as an endearing part of the dresser’s history. I used Formby’s Paint & Poly remover to remove the old paint. I was very excited to see the incredible grain that appeared on the drawer fronts. After stripping I cleaned all of the wood thoroughly and then sanded everything with 80 grit, 120 grit, and then 220 grit sanding discs using a Bosch Random Orbital sander (which is a fantastic tool by the way). I then applied 4 coats of Minwax Wipe-On Polyurethane sanding with 220 and then 300 grit sandpaper in between each coat. Lastly, I wiped down all of the exposed wood inside the dresser and the drawers with Formby’s Lemon Oil Treatment, which cleans everything a bit as well as replacing the wood’s natural oils. It also helps lubricate the drawers so that they open and close super smooth.
I finished the piece off with some great looking solid brass drawer knobs I found on Amazon. The knobs were by far the most expensive part of the project, but worth it to me. All told the refinish took about 8 – 10 hours of active work – over a week – with a lot of waiting for coats of poly to dry. The total cost was less than $150 ($45 for the dresser, $75 for the knobs, $25 for the supplies). I’m really pleased with the finished look. This weekend it will be traveling up to the DC area to its new owners.
See more photos over on Lets Rebuild.
Thank you Ryan!