Before and After: Thanks to a $750 Redo, This Bathroom Feels “Like Being in the Rainforest”

You can probably easily picture a builder-grade bathroom from the mid-2010s — after all, we’ve featured a lot of them as “befores.” They usually have white or white-ish walls, chrome finishes, dark cabinetry, and sheet mirrors — and they’re essentially a blank canvas for DIYs.
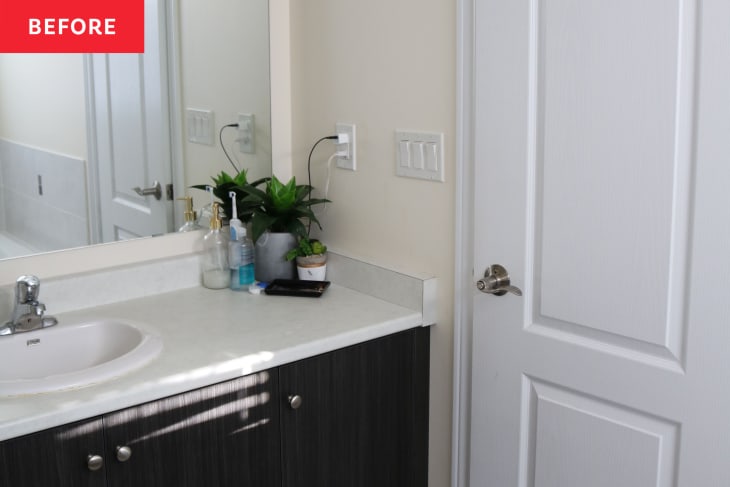
Nadia Hassan’s (@project.inprogress) bathroom in her 2016 home is a prime example. “Every day I would get in there, use it, and think to myself, ‘I wish I could change the vanity color or have less harsh lights,’” Nadia says. She also wanted the vanity in the bathroom to have drawers instead of doors, and she wanted to zhuzh up the blank back wall with its lone towel rod.
Nadia’s $750 redo involves a few quick and clever fixes for her builder-grade bathroom features: a frame around the sheet mirror, lighter grout for the tiles, black spray paint for the shower frame, and less-harsh bulbs for the light fixture, for example.
Nadia’s most ambitious step was replacing the vanity’s door (cabinet) storage with functioning drawers. Overall, she says, it was an easier-than-expected DIY, but the most difficult step was figuring out the right kind of the drawer slides to use. “Once I was able to overcome that hurdle, I created the insides of the drawers (including a two-tier drawer pull out),” Nadia says. “It has all my everyday essentials (electric toothbrush, face wash, cream, lotion etc) organized in an acrylic organizer, so that when I pull out the drawer, it’s all within easy reach, and I can see it all from a bird’s eye view. This was necessary for me as I didn’t want any clutter on the countertop.”
In addition to updating many of the fixtures, Nadia added a few out-of-the-box DIY accent walls to the space. On the back wall, she added wooden arches. “I used a jigsaw for the first time and made arches out of hard board and nailed them to the wall as well as added towel hooks which get used all the time now,” Nadia explains. “The space above the toilet was quite blank, so I decided to add a gallery wall here to give the space some character.”
And because she’s a person “who thrives in being surrounded by nature and greenery,” Nadia created a plant wall for the space, too. “I tackled that by adding greenery panels on the wall facing the tub as well as on the ceiling,” Nadia explains. “A surprise element I added here is fairy lights embedded within the greenery panels so that at night it’s like bathing under the stars.
To complete her earth-inspired vibe, Nadia did a faux lime wash in a gray concrete color on the window wall over the bath. She also added floating shelves with an IKEA brass rod to make the bath feel completely enveloped.
“I did everything myself, except swapping out the vanity lights,” Nadia says. “I haven’t done electrical yet — I hope to! — so I asked my husband to do the swap for me as I watched him and hopefully learned.” Nadia’s redo took about five months, squeezed in between her 9-to-5 and parenting duties.
“I am most proud of sticking through the process and not giving up even when I hit roadblocks (aka drawer slides),” Nadia says. “I didn’t rush through anything just for the sake of completing it. I’m thrilled that the space ended up giving me all the oasis feels while serving us in a very practical and functional manner. Taking a bath now feels like being in the rainforest.”
Inspired? Submit your own project here.
