
Before and After: 7 Smart Tricks to Steal from These Builder-Grade Kitchen Makeovers

Builder-grade kitchens can be a tad boring. They can also be inspiring when you see a ho-hum one get a smart makeover — and have we seen some seriously smart makeovers! The best ones bring both practicality and style, maximizing every square inch of storage space while also adding charming touches that make these spaces anything but one-size-fits-all. Here, seven great ideas for transforming your own cook space, builder-grade or otherwise — all taken from some of the best builder-grade kitchen makeovers we’ve ever seen.
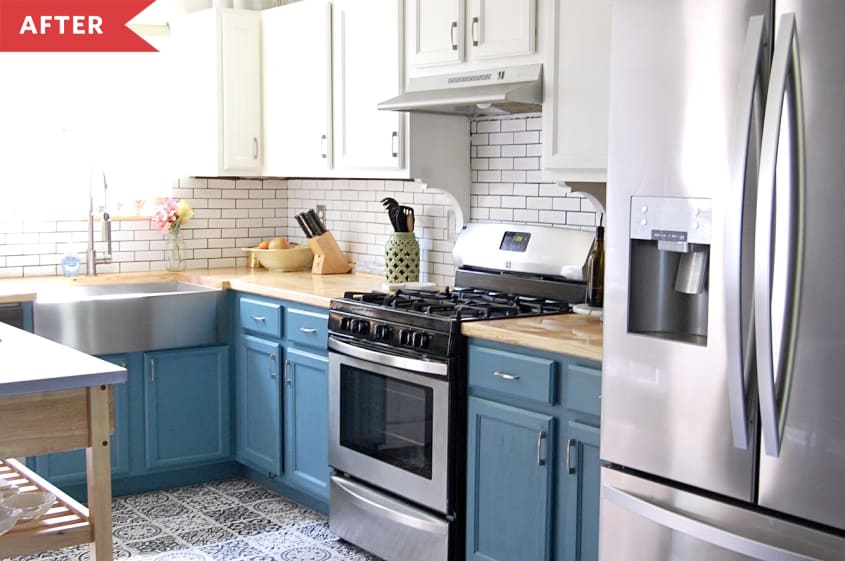
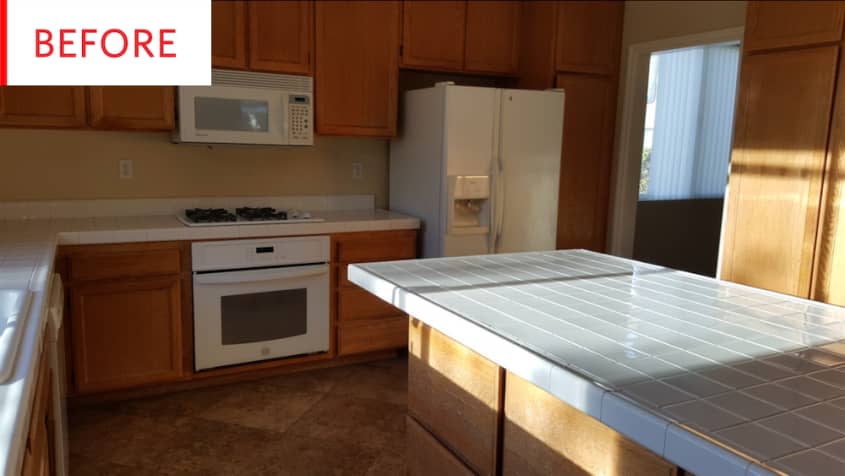
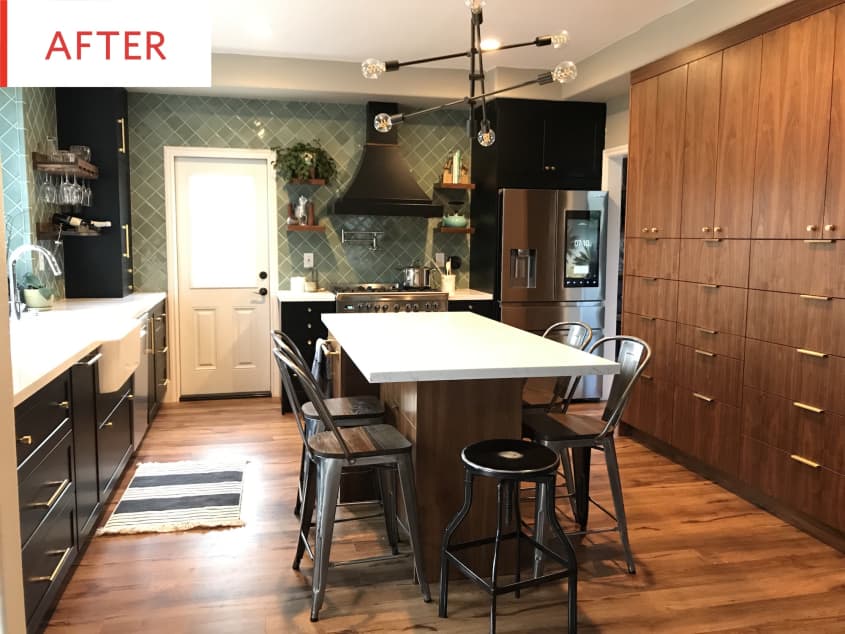
Add more counter space with a portable kitchen island.
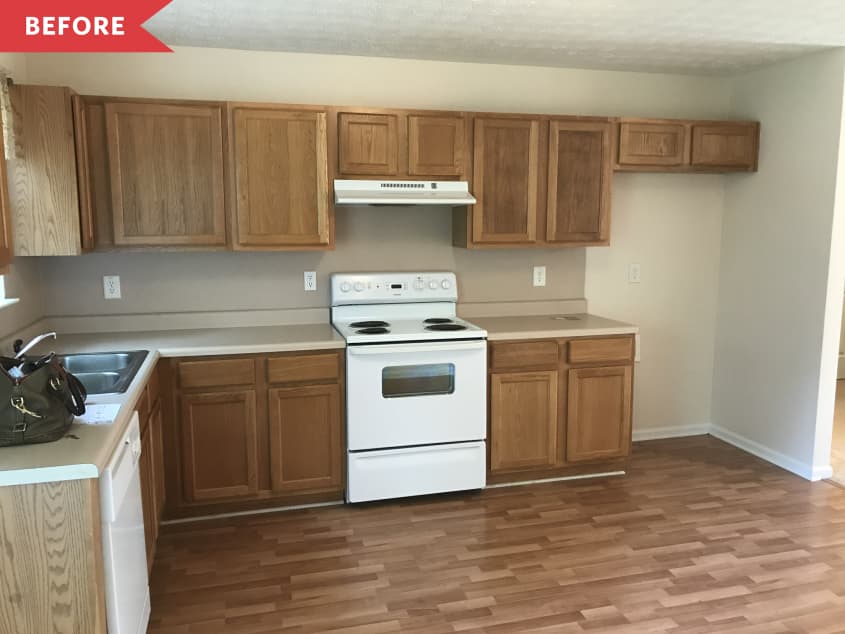
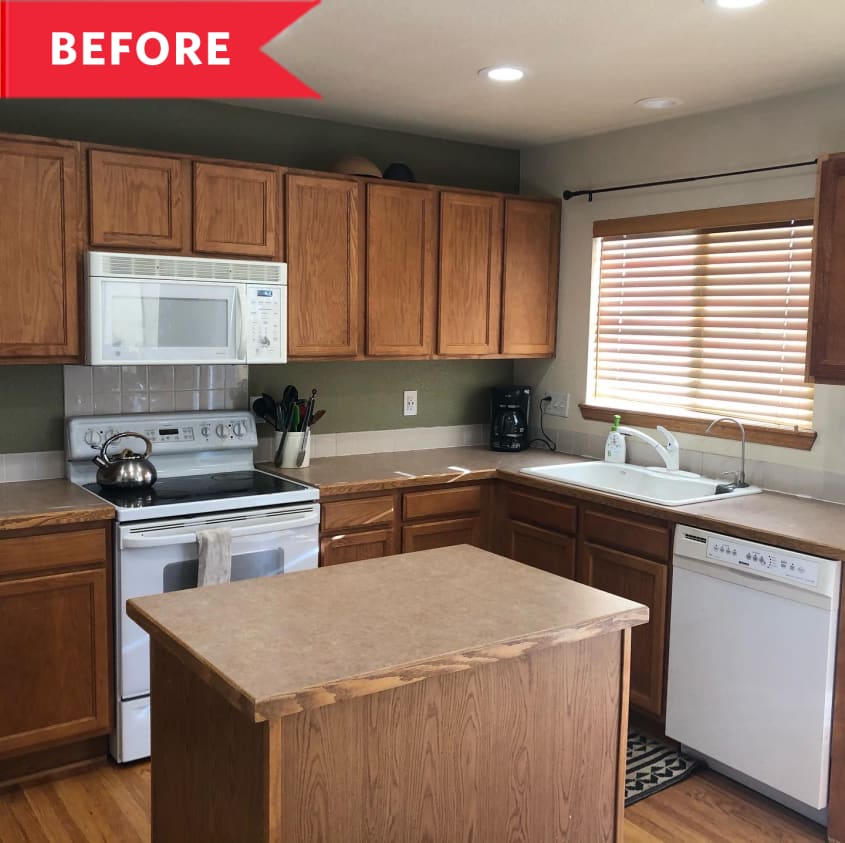
Brooke Littel had plenty of floor space in her builder-grade kitchen, but she was seriously lacking any kind of useful workspace. “The sink couldn’t fit my Crock-Pot and larger pans, so cleaning them was a big hassle,” Littel says. Plus, there wasn’t enough counter space for meal prep.
Her super-affordable solution was easy: She added a portable Before and After: $3000 Later, This Brown Builder-Grade Kitchen Is Unrecognizable
Spruce up the cabinets with a new paint job.
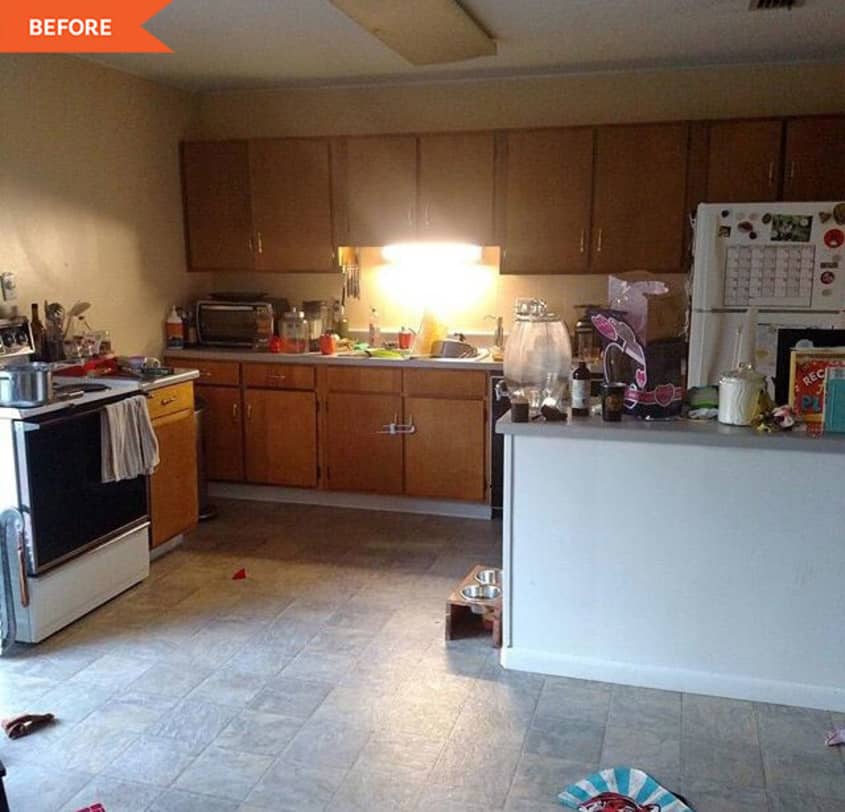
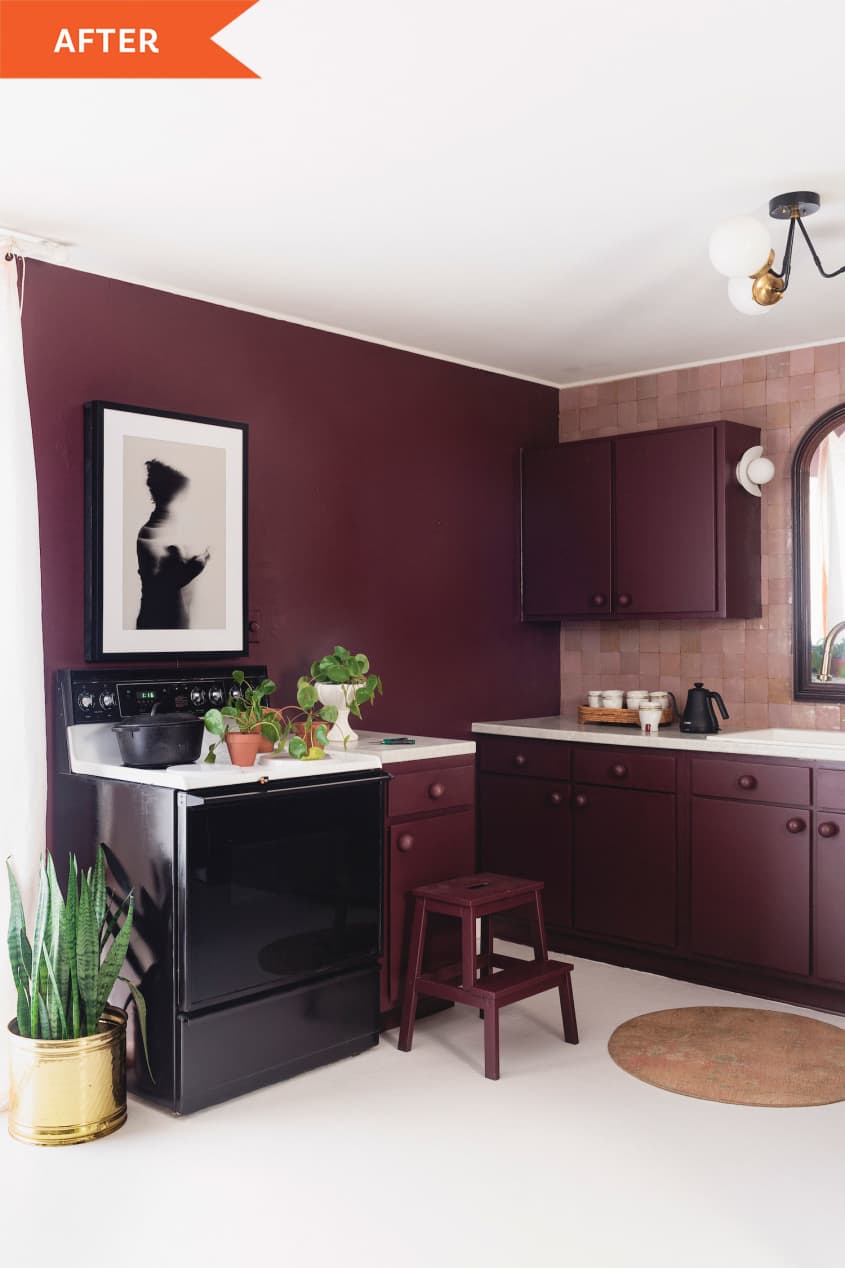
As an interior designer running her own business, Katherine Thewlis likes to try out new ideas in her own home. “I’m constantly changing things up,” she explains. One idea she wanted to experiment with in her own kitchen? Bold paint!
Previously, the kitchen was Easter egg yellow and “lacked a focal point,” Thewlis says. But the cabinets were in decent shape, so to spruce things up, Thewlis turned to painting. Now, her kitchen takes an ultra-dramatic and chic tone in a sophisticated burgundy purple!
See the transformation: Before and After: A Dated Kitchen Gets a Dramatic Purple-Toned Redo for $3,125

Create a dazzling backsplash as a focal point.
When Celine Crestin purchased her home, she quickly realized the cramped layout of her kitchen just wouldn’t do. “The stove was in the main entryway, and if you were cooking, you would be blocking the only path into the room,” says Crestin, who works in real estate.
The solution was to reimagine the layout, making the back wall a true focal point with the stove surrounded by upper and lower cabinetry. Once she got the design down for the stove area, the show-stopping, blue-and-white backsplash came into place. “I love how open and spacious the kitchen feels,” Crestin says of the changes. “It makes you want to cook!”
Mix-and-match with new materials.
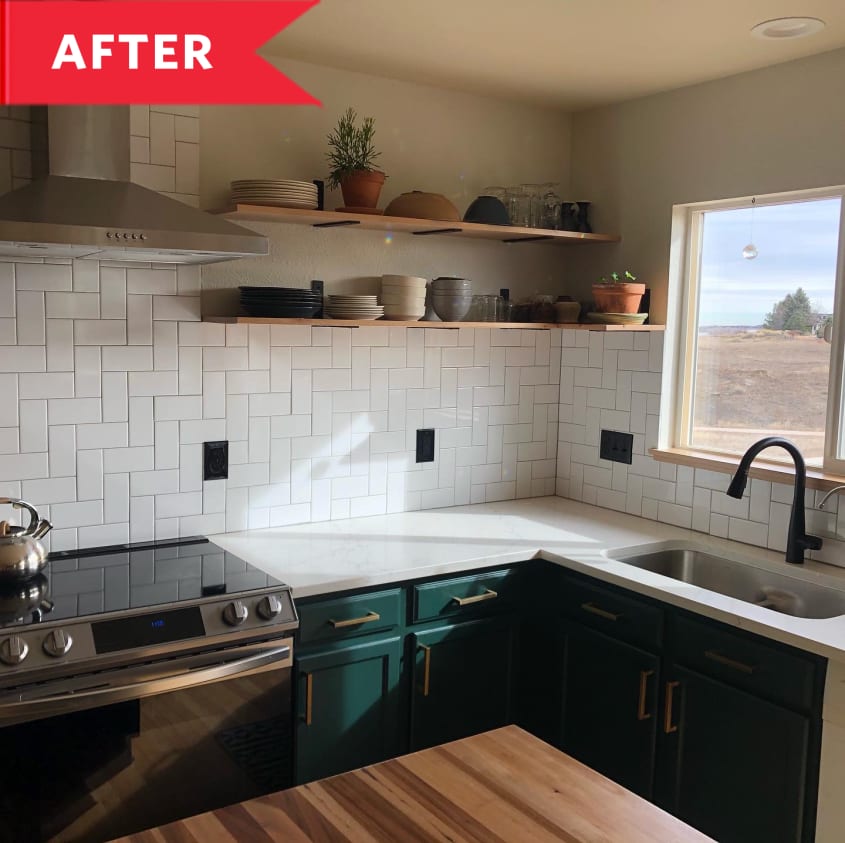
When Elise Zernis bought her home, she could clearly see the kitchen hadn’t been updated in the nearly 20 years since the house was built. “We fell in love with the house the moment we saw it, but knew right away we wanted to update the kitchen,” Zernis admits. The kitchen, she says, was still stuck in the early 2000s, with dark oak cabinets and dated laminate countertops.
Zernis decided that one way to give the kitchen a new look was to splurge on white quartz countertops. Although it totaled $4,000 alone, the sleek white looks way more modern than the laminate. Plus, in the long run, selecting quartz will resist scratches and stains through the years. For the island, Zernis chose a butcher block top from a local woodworker that added even more wow!
See the transformation: Before and After: An Early 2000s Kitchen Gets a Sophisticated Revamp for $8,500
Let your flooring take center stage.
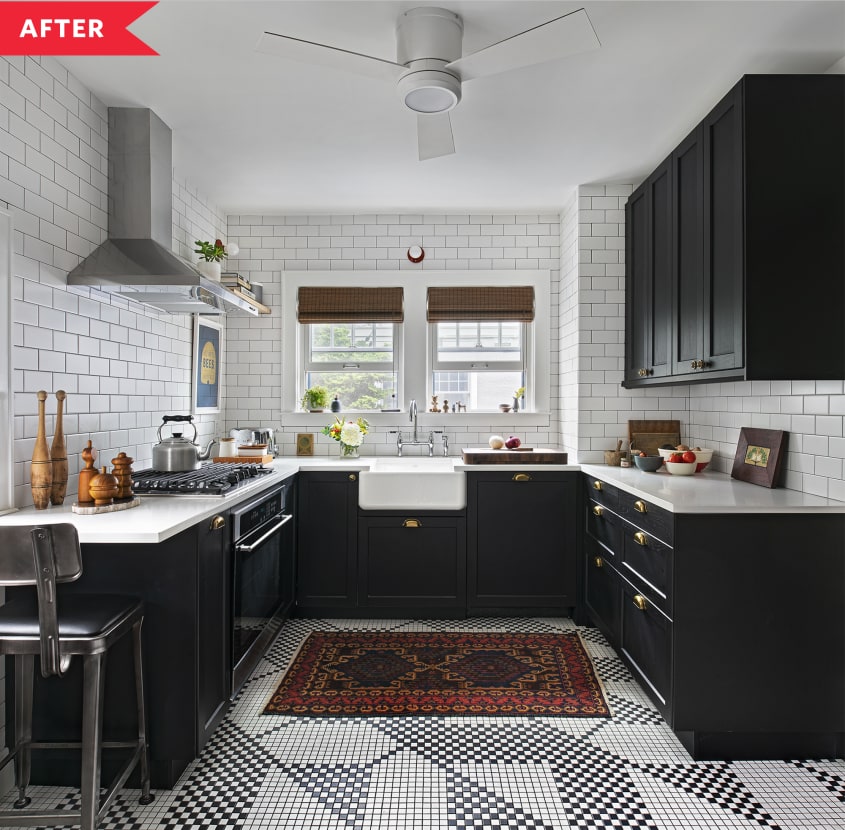
As the owner of his own design firm, Patrick Thompson knew his dark, dated kitchen looked a little “blah.” To add literal warmth and personality to the space, Thompson chose to use an electric-heated floor beneath the custom mosaic tile pattern created by Daltile.
The detailed, black-and-white flooring is totally gorgeous on its own, but paired with sleek black-painted cabinets and white subway tile, the space is now airy and bright. Pops of color, including a colorful kitchen rug, add just the right touch to make Thompson’s kitchen an Instagram-worthy masterpiece.
See the transformation: Before and After: This Dated Kitchen’s Whole Remodel Is Great, But the Floors Are to Die For
Opt for open shelving to make things light and bright.
Despite having two windows, this kitchen was pretty dark. The brick red walls and honey maple cabinets made it even more cave-like. That’s when Tim Ouyang of Bay On A Budget decided to remove the row of upper cabinetry to allow for open shelving. Natural light can now flow in and bounce off the newly painted white walls, transforming this kitchen into a bright and spacious cooking area. While losing cabinet space can be a tough choice to make, this kitchen had plenty of storage to spare.
The owners now use the open shelves to artfully display dinnerware and glassware along with stylish touches, such as a clock, a bit of greenery, and frequently used recipes in magazines.
See the transformation: Before and After: This Kitchen Redo Is a Breath of Fresh Air
Allow functionality to dictate your design.
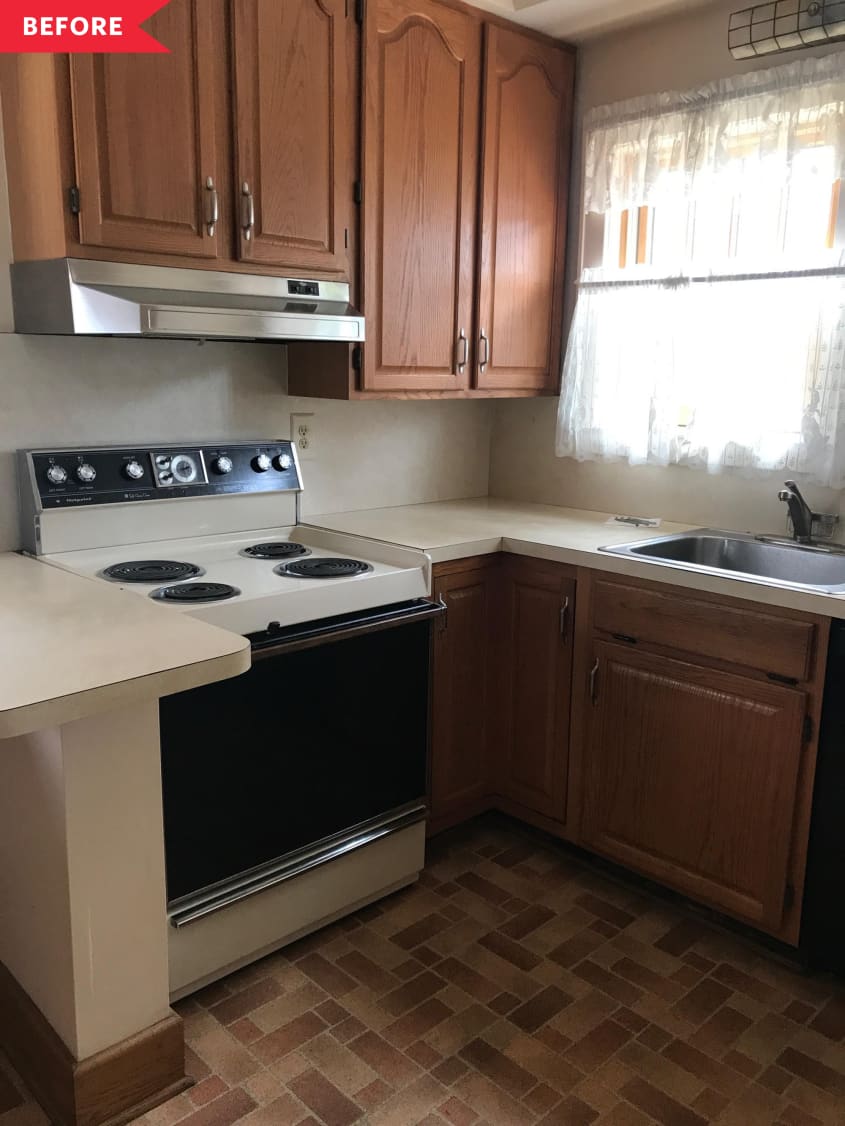
Suchada Eickemeyer bought her new home just as she was entering interior design school. She soon realized that the timing was perfect, and her newly learned skills would come in handy to re-do her very own kitchen. Of the old design, Eickemeyer explains, “We had to keep moving things around to avoid breaking shelves [to the point] that it was a nightmare to find any tools we needed to cook.”
Eickermeyer had two years to think about the functionality of the space and how her family used it. By taking the time to plan ahead, she customized her renovation just for her family. One key update? She changed out all of her outdated appliances and installed a new stainless steel fridge, stove and oven, and even added a nifty Rev-A-Shelf stand just for her large KitchenAid mixer. “It’s easy to find a photo of a beautiful kitchen and duplicate the look,” she says, “but the true value of a kitchen renovation is how well it functions for you.”
This post originally ran on Kitchn. See it there: The Best Builder-Grade Kitchen Makeovers We’ve Ever Seen — Plus, Smart Tricks to Steal from Each