
Before and After: A Bright, Cheery DIY Bathroom Overhaul for Just $1,500
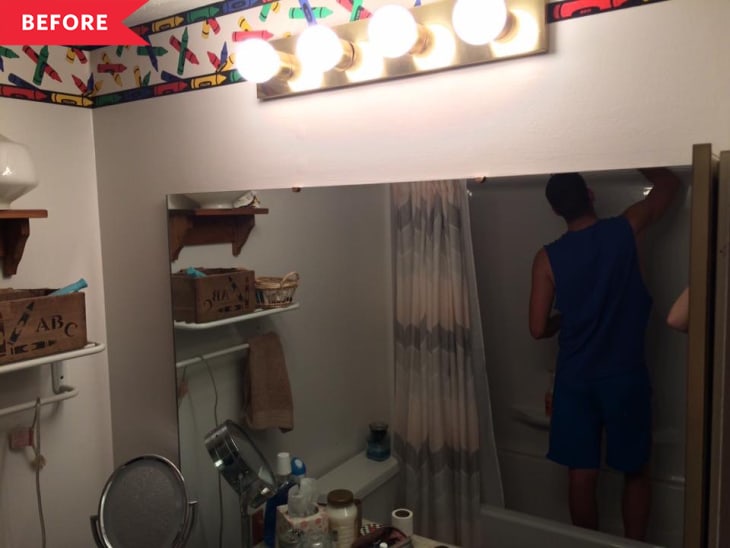
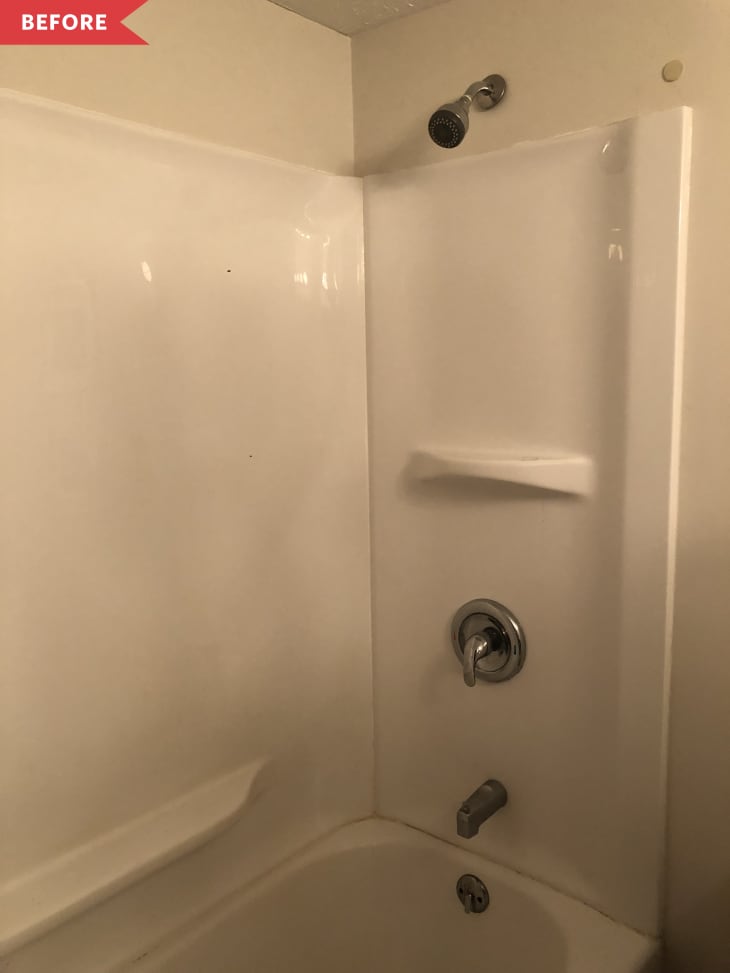
Kids’ decor can be extremely chic—and if you don’t believe us, take a look at these seriously stylish spaces. But Sara Snell’s bathroom wasn’t like that. When she and her husband moved in, the bathroom looked like it hadn’t been updated since the house was built in 1982. “The only addition the previous owners added was a lovely crayon border and a poorly installed fiberglass shower surround,” Sara says. Even worse? The original vanity and toilet were child-height—not great when it comes to serving adults!

“Our house is a split level with 1.5 baths, so this is our only full bath and obviously the one we use daily as it is right next to our master bedroom,” Sara says. They needed to update it stat to make it more functional and palatable for adults—particularly tall adults. “The very low vanity and toilet were a priority to change as we are both over six foot tall so they just weren’t comfortable or practical,” Sara says.
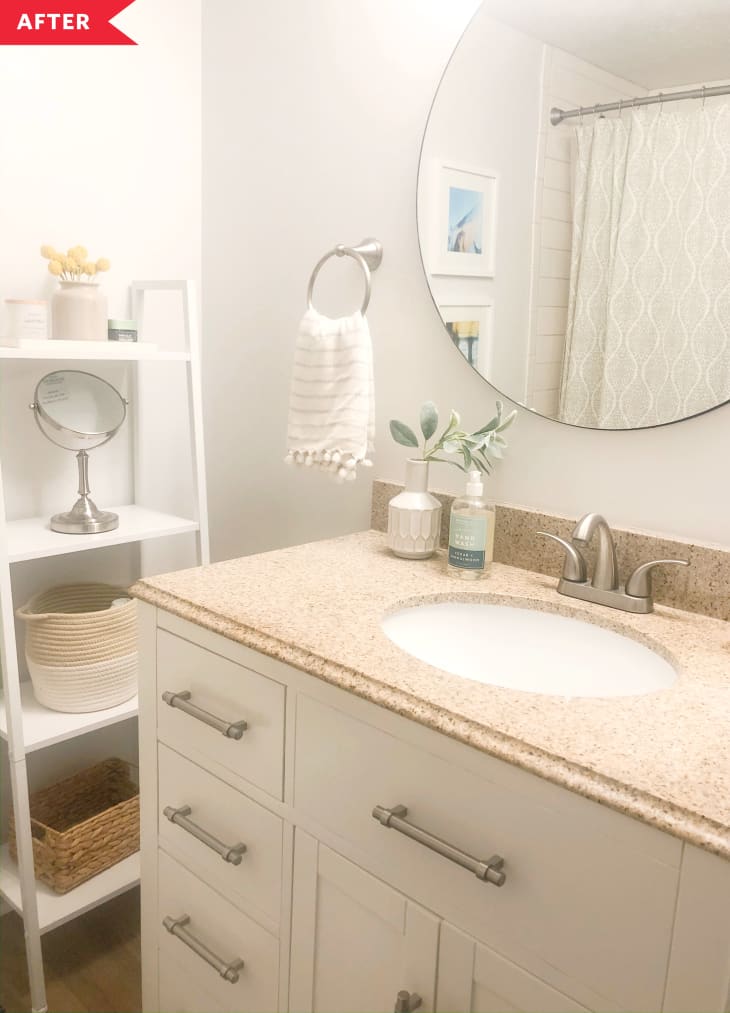
The whole project took about three years, but Sara and her husband took it on in phases. First, they painted (HGTV Home by Sherwin-Williams’s Glacial Stream) and installed a new (grown-up-sized) vanity, which they found on Craigslist. It was brand-new and just $400, including a granite countertop and sink. They added new hardware from Amazon.
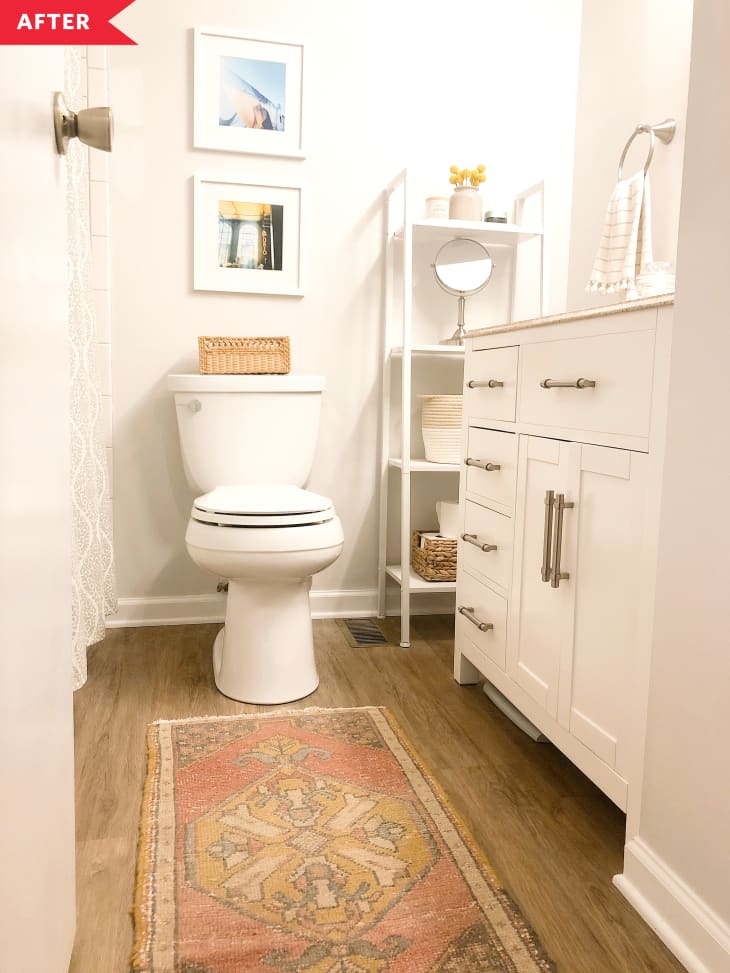
Next, about a year later, they installed a new (grown-up-sized) toilet and laid vinyl plank flooring. “The flooring can be tricky, but once we got a system down it went pretty smooth,” Sara says. Finally, they completed the final piece: a total shower reno. They kept the existing tub, but took everything else down to the studs.
“Tiling is definitely an art form, so it was tedious doing a whole shower and getting everything level and flush, but well worth it in the end!” Sara says. “Some surprises we encountered were some issues with the plumbing and changing the fixtures, but after calling in a handy family friend, it was actually a simple fix of changing the shower valve.” But, she notes, the project took much longer than expected—about two months—so for those looking to take on the same, she has some words of wisdom. “Make sure you have a plan for basic needs like showering!” Sara says. “This is our only shower in the house, so we were lucky that we have family right down the road and took advantage of our gym membership and often showered there.”
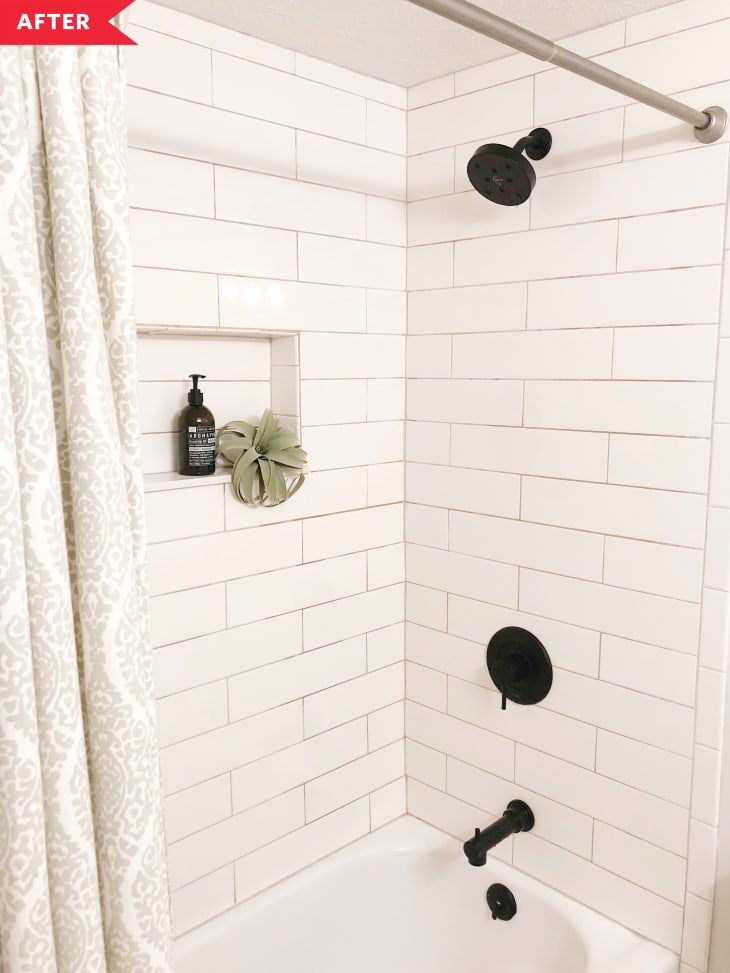
The elongated subway tile with dark grout, plus the new black shower fixtures, make the bathroom look way more sophisticated. “I love how bright it feels even with no natural light and being a small space,” Sara says. “The shower upgrade is probably my favorite part—it looks and feels amazing, and was the most challenging part of the DIY so we are really proud of it!”
Inspired? Submit your own project here.