
Before and After: 2 Orange-Toned Nightstands Rescued from the Curb Get a Boho-Modern Refresh
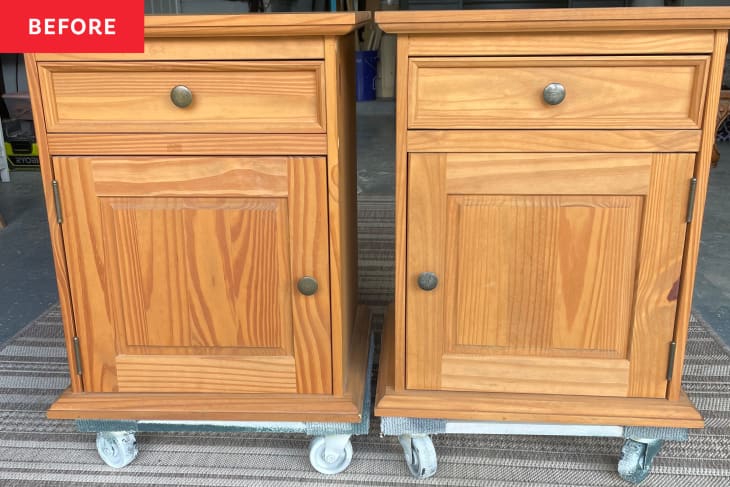
Free furniture is (often) the best kind of furniture, especially when you can spruce it up so it looks tailor-made for you. That’s why when furniture flipper Hannah Way (@hanmade.details) found these two nightstands on the side of the road, she couldn’t pass them up. “The people throwing them away were moving, and they just didn’t want to take the furniture with them,” Hannah explains. “I had a vision for what I wanted to do with these pieces and brought it to life.”
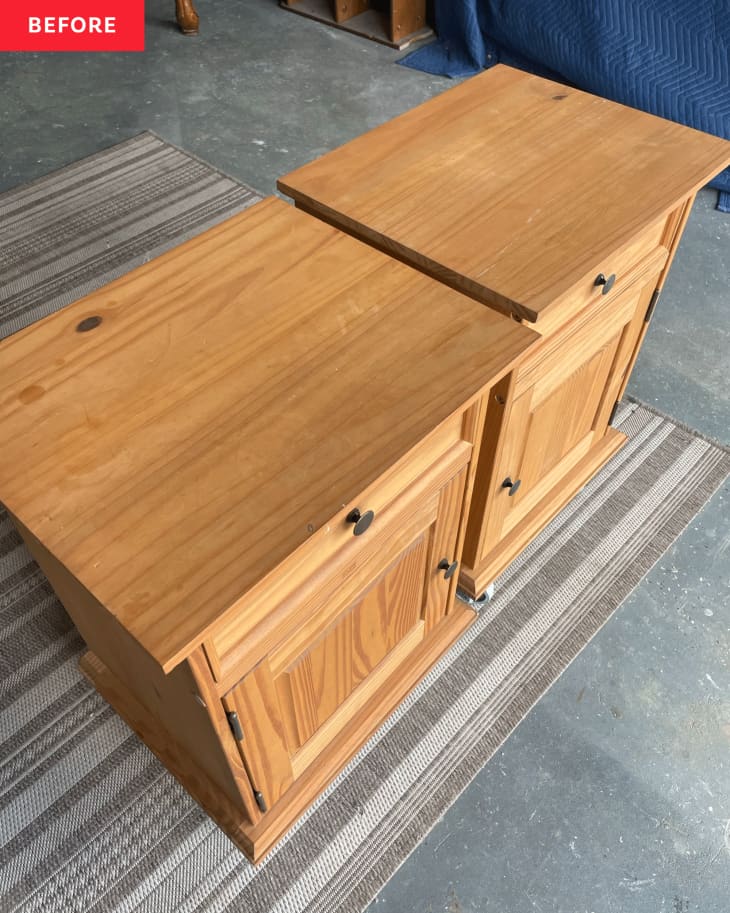
Before, Hannah says, the nightstands were lightweight (great for repurposing), but the orange-y tone was less than inspiring. She started her redo by removing the old hardware and filling in holes and cracks using an all-purpose putty. Hannah followed her putty repairs with an orbital sander to ensure a smooth finish, then scuff-sanded the rest of the nightstands to help paint adhere.
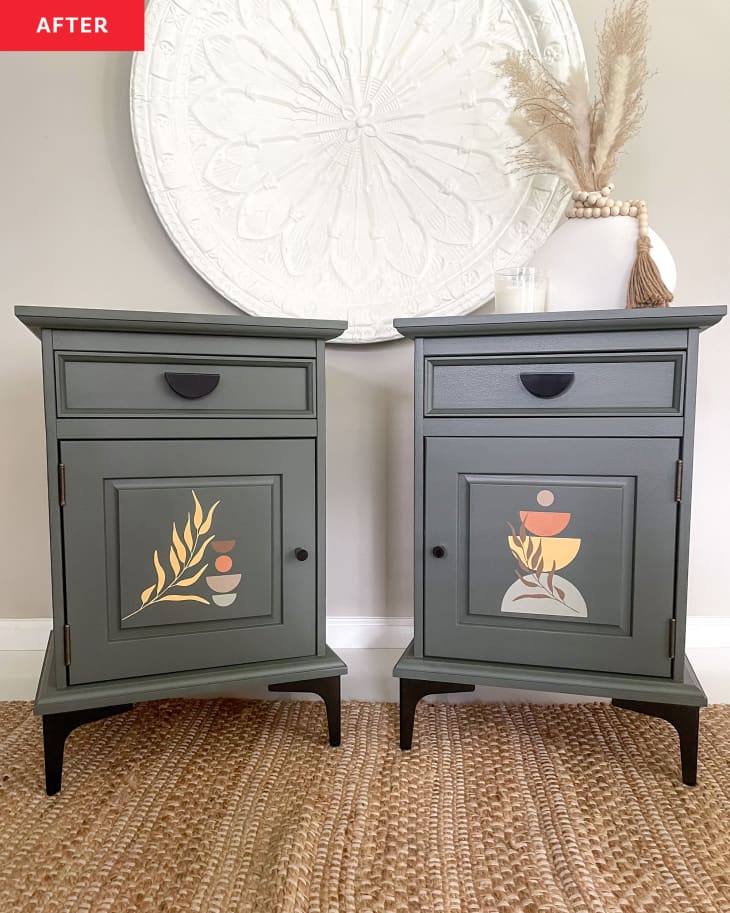
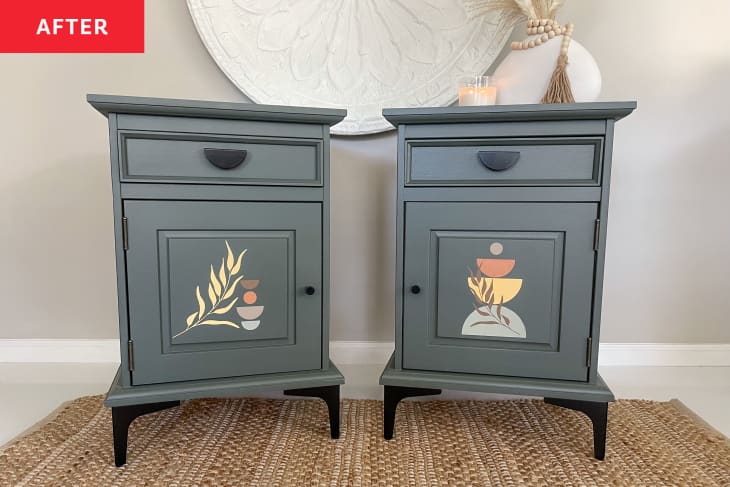
Next, Hannah primed the pieces and painted the bases a gray-green (Fusion Mineral Paint’s Everett). To add a special touch to each piece, Hannah used stencils to create a minimalist design overtop the gray. “The thing that took the longest was drying times in between each stencil I used because I had to let the paint completely dry before adding the next stencil on,” she explains.
For her design, Hannah used half-circle, full circle, and leaf-shapes she created with her Cricut. Five paint shades bring a little bit of color to the door fronts: a creamy tan (Fusion’s Algonquin), a muted yellow (Fusion’s Prairie Sunset), a sage green (Fusion’s Bellwood), a warm brown (Country Chic’s Leather Bound), and a terracotta (Valspar’s Terra Cotta Trail). The paint for the project was gifted to her.
“I love that the way the designs came out on theses nightstands,” Hannah says. “Usually when I do a set of nightstands, I make them match, so I decided to think outside the box for this project and create designs that coordinate in colors and sizes but that don’t just match each other in exact design.”
Hannah says her design would look good against a more neutral backdrop, too, and if she were to do the project again, she might go with something other than the gray-green. Still, she’s proud of the new look she created.
“Don’t be scared to try the new things you’ve been wanting to try,” she says. “Make your own stencil designs, add those trim pieces, and paint in those bold colors … Of course, you start out every project with an idea of how you want it to turn out, but as the project goes on, you are able to change and add to that creativity.”

Her last steps were adding black metal legs to raise the nightstands, replacing the old pulls with more modern picks, and spray painting the hinges and pulls black to match the legs. “I’m really happy with the final results on these nightstands,” she says.
The lessons learned here? New hardware can work wonders on old furniture, your nightstands don’t have to match exactly (or at all!), and creating a custom stencil can be a great way to create one-of-a-kind furniture — or floors, or walls, or backsplashes, or shower curtains… you name it!
Inspired? Submit your own project here.