Before and After: This Cozy $3,000 RV Redo Is Packed with Budget-Friendly Small Space Ideas

There are many situations where paint is a great solution. If you need to brighten up a dim living room, make a bedroom feel more personalized, breathe new life into your old fridge, transform dated kitchen cabinets, or add a pop of color on your floors, paint is the answer. And the owner of this 2015 RV, Elizabeth Switajewski (@switlife.mnc), used it on almost every surface to revamp its very dark interiors.
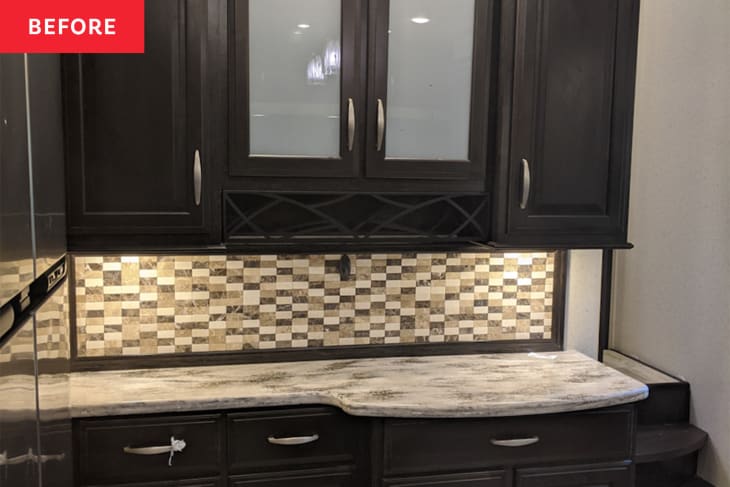
Her RV is a toyhauler, which means it has a garage in the back. There was a queen-sized bed in the back of the RV and a sliding door that spearated the garage from the main kitchen and living area. “Before, there were a lot of brown, gray, and black colors,” Elizabeth describes.
She and her husband, Troy, made several changes to the space to maximize it for their family of five and to make it “look and feel more like a tiny home versus an RV,” Elizabeth says. Their total transformation cost about $3,000.
One of the most impactful changes? Painting over the dated finishes. “We painted all of our countertops (except the island), fridge, bathroom counter, bathroom sink, all faucets, all cabinets — even the bathroom floor is painted,” Elizabeth says, adding that these were relatively low-stakes, low costs DIYs. “We always knew we could replace it later on if needed,” she says.
She and Troy used a mix of Sherwin-Williams’ Ripe Olive and Pewter Green for their earthy cabinets in the kitchen and bathroom, and the off-white paint is Alabaster. They used Rust-Oleum’s appliance epoxy to paint the dishwasher, stove, and perimeter and bathroom countertops, and their bathroom sink. (They bought a new, larger sink for the kitchen from Wayfair.)
In the gathering space, the couple added a new kitchen island countertop, hickory-esque vinyl flooring, and brass light fixtures. They also installed a square tile backsplash using a pre-mixed adhesive.
When it comes to creating a space you love, Elizabeth says, “use colors and decor ideas that you truly enjoy. Don’t just use something because you saw it somewhere else or because it’s in style at the moment.”
Where Elizabeth and Troy didn’t use paint to spruce up the RV, they added new hand-built wood features, like shiplap and other moulding to add texture to the walls, bunk beds for their kiddos in the RV’s main bedroom, and shelving throughout.
“Our RV was built really well, so we were able to reuse a lot of the wood and materials for our new projects,” Elizabeth says. “We had some help from family friends with the kitchen countertop and some of the woodwork.”
One of their smartest small-space-friendly wood projects was building a clever bed for Elizabeth and Troy that folds down from the ceiling; this allowed the family to maximize the living area. “I love how open our space is,” Elizabeth says.
The vintage rugs, lacy curtains, woven textures, and small-space friendly IKEA finds throughout complete her cozy, functional family home on wheels. To see all of the before and after photos from Elizabeth and Troy’s four-month project, check out Elizabeth’s Instagram highlights.
Inspired? Submit your own project here.
