
This IKEA Hack Turns a Modern HEMNES Dresser into a Vintage Heirloom
There are a lot of things to love about IKEA products. They’re well-priced, they’re easy to find, they’re easy to transport in their deconstructed, flat-pack state … the list goes on. But the retailer’s style skews more contemporary, with sleek modern silhouettes and crisp finishes, so it’s not necessarily an obvious choice if you’re looking for furniture with a more traditional, old-school look.
Of course, for intrepid DIYers, that’s hardly a roadblock. This IKEA HEMNES dresser redo from DIYer Jung Hi Han is proof.
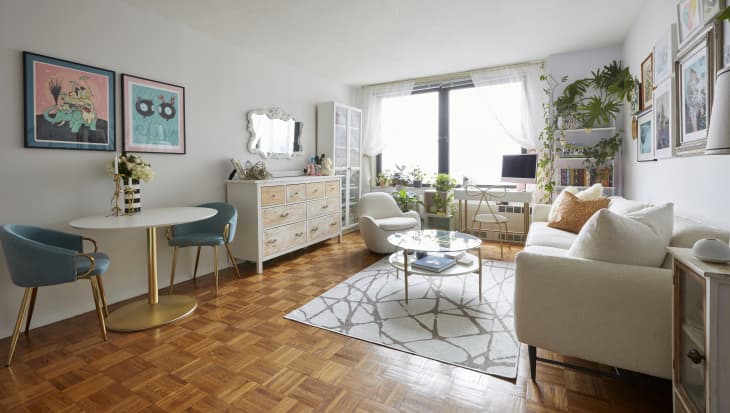
Jung Hi, a licensed real estate salesperson who recently shared a peek into her 528-square-foot Upper East Side studio apartment with Apartment Therapy, finds inspiration from beautiful homes all around the world. For this dresser, she had a lightbulb moment on a trip to Europe — after which she decided to give the simple solid wood dresser a French country look with a “vintage feel.”
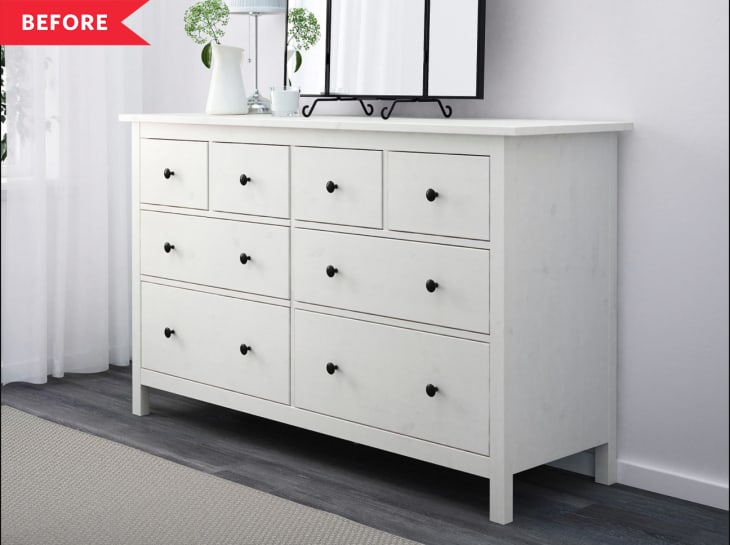
Jung Hi didn’t intend this HEMNES to be a forever piece for her, but almost a decade later she still has it. “I am not in a place where I can invest in very expensive pieces,” Jung Hi says, but with a little research and elbow grease she’s been able to make affordable furniture like this HEMNES (which is priced at $400) look way more luxurious.
Hacking the IKEA HEMNES dresser was a learning experience for Jung Hi, who had never sanded a piece of furniture before this. That didn’t deter the art school grad, though. Her mindset, she says, was simple: “I am going to look this up, and I am going to make it happen.”
How Jung Hi Gave a Vintage Look to Her HEMNES Dresser
1. Sand away the existing paint.
Jung Hi purchased a sanding block and 220-grit sandpaper at Home Depot. She acknowledges that using a sander would have been easier, but she opted to hand-sand. The initial investment is a lot lower, and it’s a lot quieter, too — making this doable in an apartment setting.
Before sanding, she took out the existing hardware and removed the drawers. Jung Hi didn’t want to get the dust all over her apartment, so she actually took the drawers out of her former apartment she shared with a roommate and sanded them in the park.
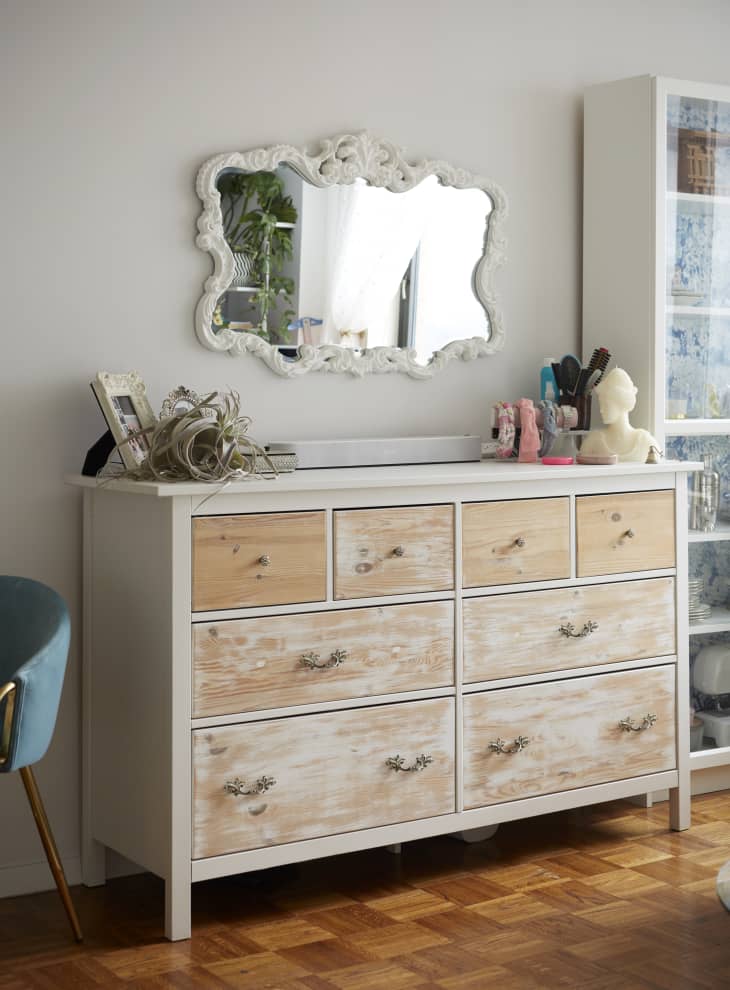
“Originally, I was going to sand all of the paint off to get to that raw wood,” she says. “Then, my hand got tired.” (Hand sanding is hard work!) Fortunately, the unexpected roadblock actually benefited Jung Hi. With some of the white paint still visible, the drawers have an almost lime washed look that’s a perfect fit for the French country look Jung Hi was after.
2. Fill in the old hardware holes.
Jung Hi purchased vintage pulls and knobs on Etsy (similar to these French Provincial furniture pulls). The pack came with six pulls (for the larger drawers on the bottom) and four knobs (for the smaller drawers on top). The HEMNES originally came with two knobs on each of the large bottom drawers, so that meant Jung Hi needed to fill those holes before adding in her new hardware.
3. Make new holes for the fresh hardware.
Jung Hi centered her new pulls on the drawers to figure out where the holes would need to be, then pre-drilled her holes. At the time, she didn’t own a drill so made these holes by hand using a screw and screwdriver — something she’d do differently today!
4. Install new hardware, then place the drawers back in the dresser.
The newly sanded fronts provide just the right amount of contrast against the still-white frame of the dresser. The two-tone look isn’t just stylish — it’s also a smart way to make a big impact with less work overall.
Lessons Jung Hi Learned from Her HEMNES Dresser Hack
Jung Hi completed the project when she was a DIY novice, so she learned a lot. Here are her major takeaways, and what she’d do differently the next time around.
- Lesson 1: While it made sense to sand the dresser in the park for the sake of cleanliness (there was a lot of dust!), Jung Hi did get a few looks. If she were to do the project again, she would stay put and create a workstation in her studio by putting down plastic sheeting and covering the surrounding furniture. She would also wear a protective dust mask.
- Lesson 2: The sanding block and sandpaper did the job, but Jung Hi’s arms were extremely tired. Investing in a sander would make the entire project go much faster. Instead of spending two days, sanding the drawer fronts would have taken around an hour.
- Lesson 3: Making a hole with a screw and a screwdriver is difficult! Jung Hi now has a drill from IKEA that would make quick work of any future drilling tasks.
Get all the IKEA UPDATES
Sign up for The IKEA Edit, our twice-weekly newsletter with the latest IKEA finds, deals, and hacks.