
I Tried 3 Tricks to Fix My Stretched-Out Collars, and the Winner Worked in Minutes
As much as I love the look of oversized crewneck sweatshirts, I don’t care much for the loose, stretched-out collars that inevitably come for most cotton shirts, hoodies, and sweaters (especially the “vintage” ones I steal from my parents or buy secondhand!). In an attempt to live more sustainably and take better care of the clothes I already own, I decided to experiment with the best methods to fix stretched-out collars.
I scoured the internet for three recommended tricks, including one I found on Apartment Therapy, for tightening stretched-out sweatshirt necklines, and put them to work to see which one prevailed. I couldn’t believe what made the biggest difference!
How I Tested the Methods to Fix Stretched-Out Collars
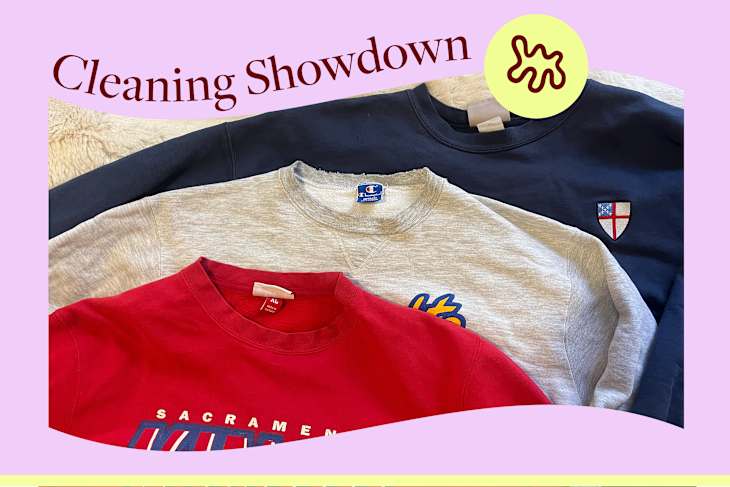
The three methods I chose involved using ice water, boiling water, and a steamer. To test the methods, I started with three XL mostly cotton hoodless crewneck sweatshirts, all with varying amounts of looseness in the collars, but none in great shape. All three of them are years old and have been washed dozens of times at least. I tried a different method on each of the sweatshirts, taking photos and notes of them before, during, and after each trick was tested. I had to consider that each sweatshirt was made of a slightly different cotton mix, was of a different age, and had been cared for differently. For example, my red Sacramento Kings sweater had the most stretched-out collar, while the heather gray David Letterman sweatshirt was more frayed than stretched.
The ratings: I rated each method from 1 to 5, with 5 being the highest score that made the biggest difference on the tightness of the collar. As opposed to comparing each collar to one another, I focused on how much each method had actually shrunk or changed from its original form. I also included a score out of 5 for how easy the method was to use.

Method 1: Boiling Water
Rating: 2.5/5
Ease of use: 3/5
Method: Boil a pot of water and dip just the collar in for one to two minutes. Then immediately place the sweatshirt in the dryer on high heat.
How it went: This method seemed to be all about heat, which is known to shrink fabric fibers, so I was excited to see how it worked. It was simple enough to boil the water and dip the collar in — which immediately turned the water bright red — although I had to stand there and carefully make sure the collar didn’t touch the bottom of the pot and that the flame didn’t get any of the rest of the sweatshirt. It was a mini arm workout, but after just one to two minutes, the legwork was done.
Ultimately, this technique was a bit of a letdown. To be fair, the red crewneck I tried this method on was by far the loosest collar to start with. It did make a subtle difference, but not the big change I was hoping for with such high heat. After its go in the dryer, it is a little more stiff, but I think laying it flat to air-dry in place might have helped mold its shape better.
Additionally, I was doing a big load of laundry at my local laundromat, so I had less control over the cycle than if it was at home, but I set it to high heat and it came out completely dry. A few creators also recommend wrapping the collar with a rubber band or folding it in the same accordion wave before dipping it in the boiling water, which could’ve made a difference, but still, the minimal changes in the tightness and texture of the collar left me unimpressed with this method.

Method 2: Ice Water
Rating: 4/5
Ease of use: 4/5
Method: Start by folding the collar of the sweatshirt in an accordion “wave” pattern and soak it in a bowl of ice water for a few minutes, or until completely saturated. Next, unfold the collar and wring out as much water as you can. Then, iron out the collar and allow it to dry flat naturally.
How it went: I liked this method because although it was two-ish steps, it took minimal effort and was pretty foolproof. I’m not sure I nailed the “wave” (and it was tricky to keep it intact while in the ice soak without a rubber band, which might’ve helped), but it didn’t seem super important to the result.
When another writer tested this method on a loose T-shirt collar, at first she didn’t notice a difference until she looked closely at the before and after photos, and the same thing happened to me. It’s hard to tell when you’re deep in the method, but waiting until the collar was completely dry to compare it to what it looked like before was eye-opening. It didn’t look like a new garment by any means, but it was tighter and stiffer to the touch.
I appreciated that I could just leave the sweatshirt on my countertop with the collar soaking for a few minutes, as opposed to the boiling method above, which required a much more watchful eye and resulted in tired arms. Also, I don’t have an iron so I steamed the collar instead of ironing it after the ice bath, which might have created a different result. This collar was in decent shape to begin with, but all in all, I’m quite pleased with how this method worked and would absolutely use it again.

Method 3: Steam
Rating: 4/5
Ease of use: 5/5
Method: Use a garment steamer (or the steam setting on an iron) to heat the collar, then use your hands to reshape it and let it air-dry flat.
How it went: This was by far the easiest and quickest of the three methods I tested. It only required a few minutes, and if you have a steamer or an iron, you’re good to go. I took my garment steamer and gave the collar 10 to 20 passes on the inside and outside to make sure the entire front and back were saturated with hot water. I took it off the hanger, molded the collar into a tighter, rounder shape, and laid it flat to dry.
This collar was more frayed than stretched, and I found the method to be successful enough to make it a little bit tighter and firmer. I realized that the real magic, just like with the ice bath method, came in the shaping of the collar before it air-dried flat. Unlike with the boiling-dryer method where the garment was left to roll around loosely in the heat of the dryer, by controlling how it dries and in what shape, it made all the difference. Air-drying clothes tends to make them stiffer because they dry in a more rigid position without the flexibility a dryer can add by moving the clothes while they dry.

Conclusion
Overall, none of these methods made the sweatshirt collars look fresh off the shelves, but they did all shrink the cotton to varying degrees. My first choice moving forward would be the steam method, mostly because it’s so quick and easy. Next, I would go with the ice bath, which was also simple but required the added step of filling a bowl with ice and water, which I ultimately just poured down the drain. If I were to try the boiling water method again, I would probably skip the dryer and, after waiting for it to cool, I’d hand-shape the collar to air-dry instead.
I think the steam setting on an iron could also be successful to fix loose collars, as it combines the most effective methods I tested: heat, water, and pressing the fibers into place. It’s also possible to do the same with a hair dryer on a dampened collar, and there are even products you can buy specifically to fix loose collars, like stiffening spray or fabric starch.
While I’m satisfied with my testing, it’s important to note that the methodology wasn’t exactly scientific. Though the three crewnecks were mostly cotton, some of them were polyester blends, so let it be known we’re not comparing apples to apples. The condition and quality of the sweatshirts was also important to the results. All of this is to say that different combinations of cooling, heat, and drying might affect different garments differently — let us know if you have a favorite trick for shrinking loose collars in the comments below!