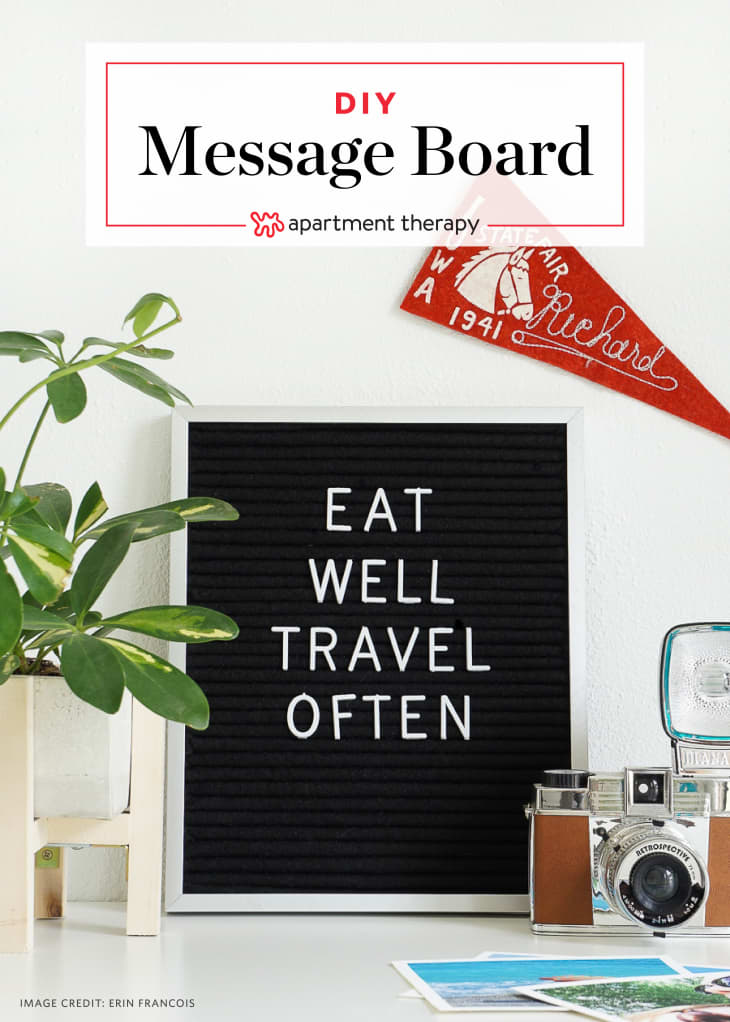
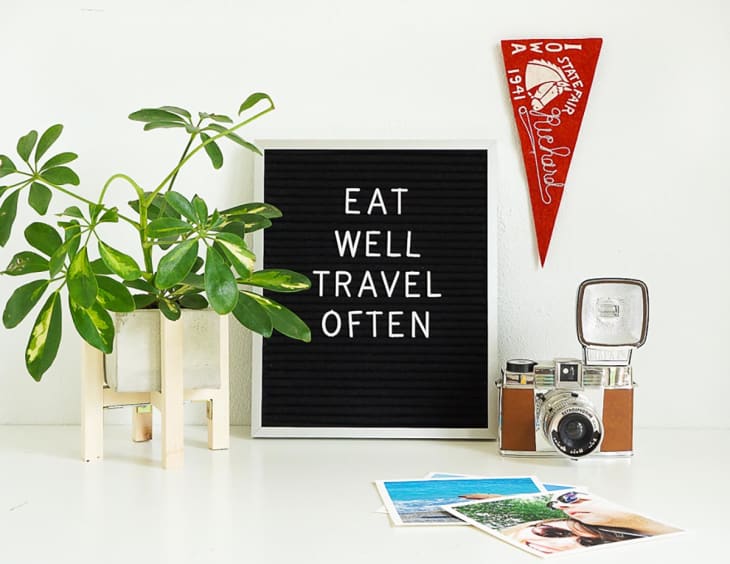
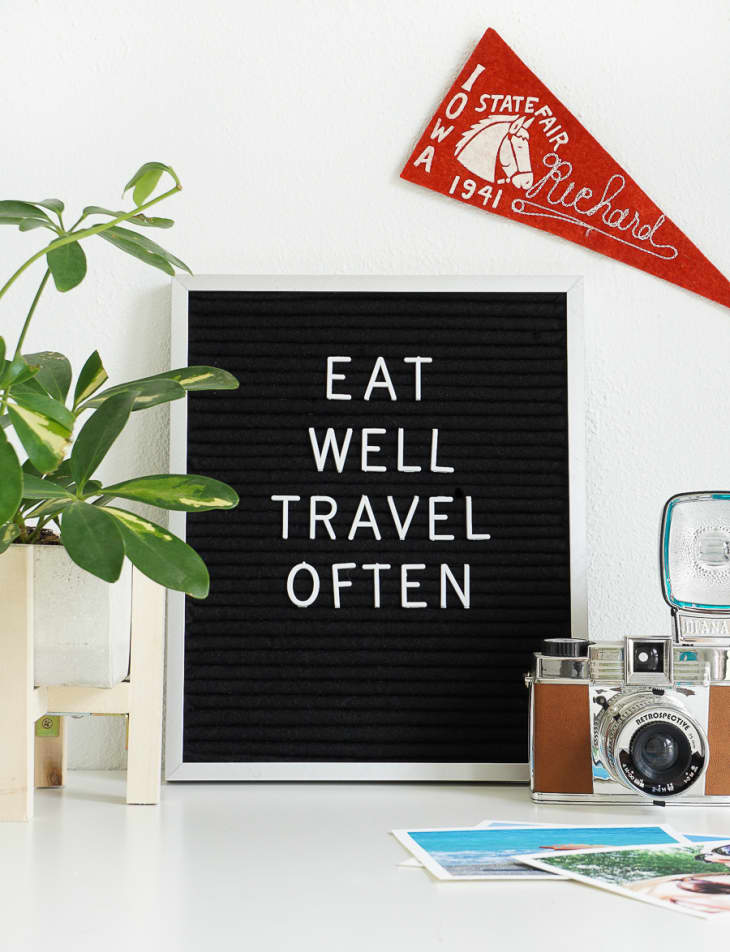
How to Make a Vintage-Style Felt Message Board For Under $25
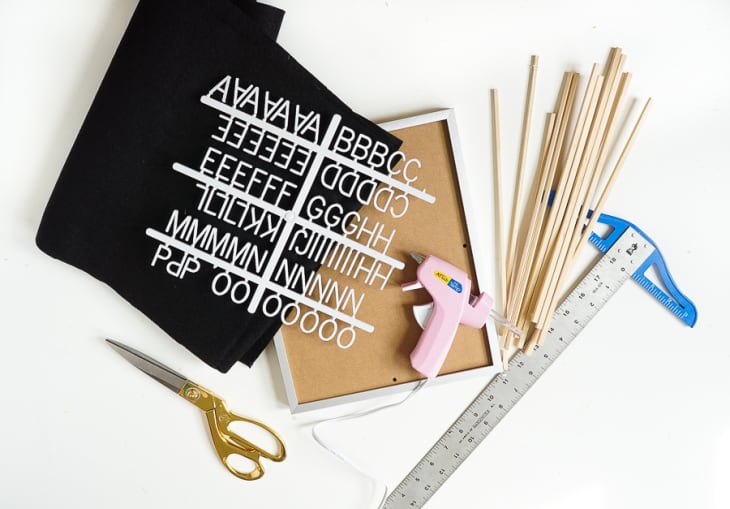
What You Need
- 9″ x 11″ frame that has an interior depth of at least ¾” and spring-loaded backing clips on the back of the frame. I used this picture frame.
- 36″ x 12″ piece of black felt
-
1″ White plastic letters
- Pencil
- Scissors
- Ruler or T-Square
- Hot glue gun
- Mitre or circular saw
- Qty 18 – 3/16″ thick square balsa wood dowels, 24″ long
Instructions
1. Cut the wood dowels into the following quantity and lengths:
- Qty 2: 10-15/16″
- Qty 34: 8-15/16″
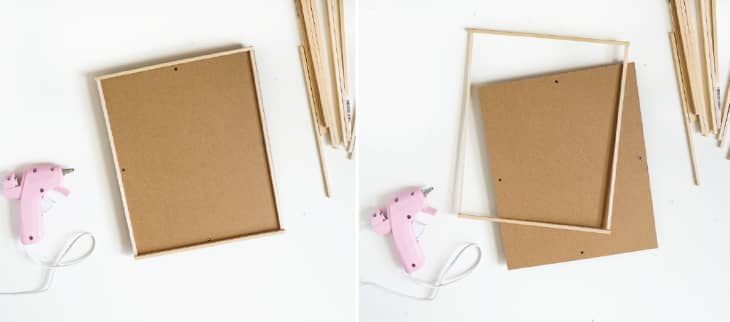
Using the picture frame backing as a size and shape guide, build a simple rectangle frame using the 2 longer dowels as the length and 2 shorter dowels as the width (top and bottom crossbars). Then, hot glue the shorter horizontal dowels onto the longer dowels. Do not glue the dowels to the picture frame backing.

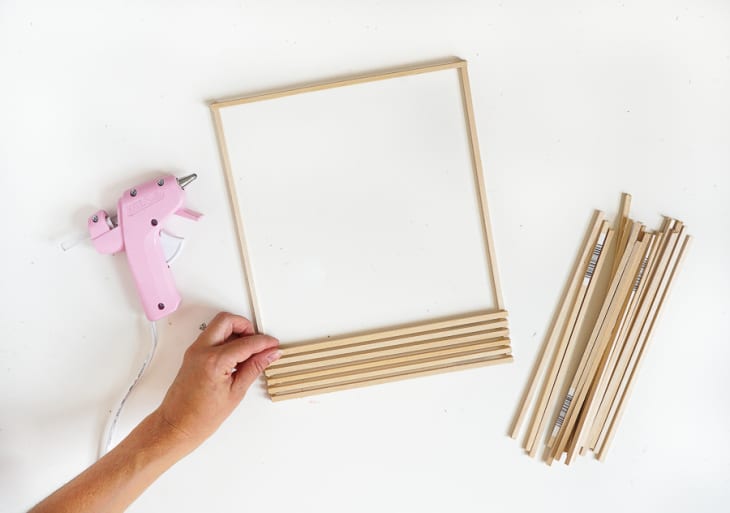
2. Once the frame is assembled, begin hot gluing the rest of the shorter dowels horizontally into place, spacing them 1/8″ apart, until you have a (roughly) 9″ x 11″ wood slat frame. Pay careful attention to the slat spacing because if the slats are too far apart, the letters won’t stay on the board, they’ll pop right off.
Tip: When you have 4-5 dowels in place, check to make sure the plastic letters fit, there should be some wiggle room to accommodate for the felt fabric coming next.
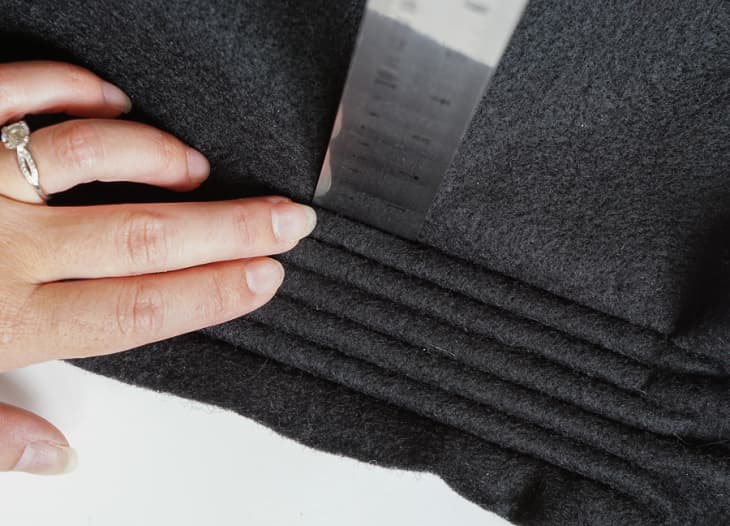
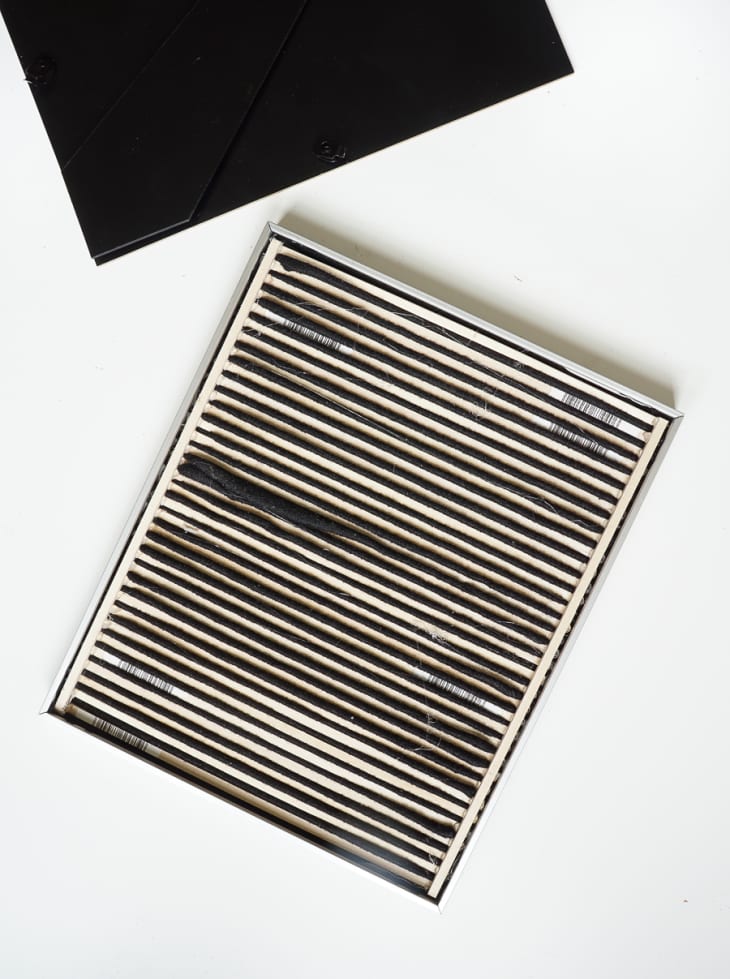
3. Now it’s time to tuck the felt in between the wood slats. Begin at the bottom of the frame and use a metal ruler to guide the loose fabric down into the slats. Then move on to the slat above it. Hold down the fabric tucked in the previous slat, so it doesn’t pull out when tucking felt into the next slat. This is probably the trickiest part of the project, but once you get the technique down you’ll breeze through it.
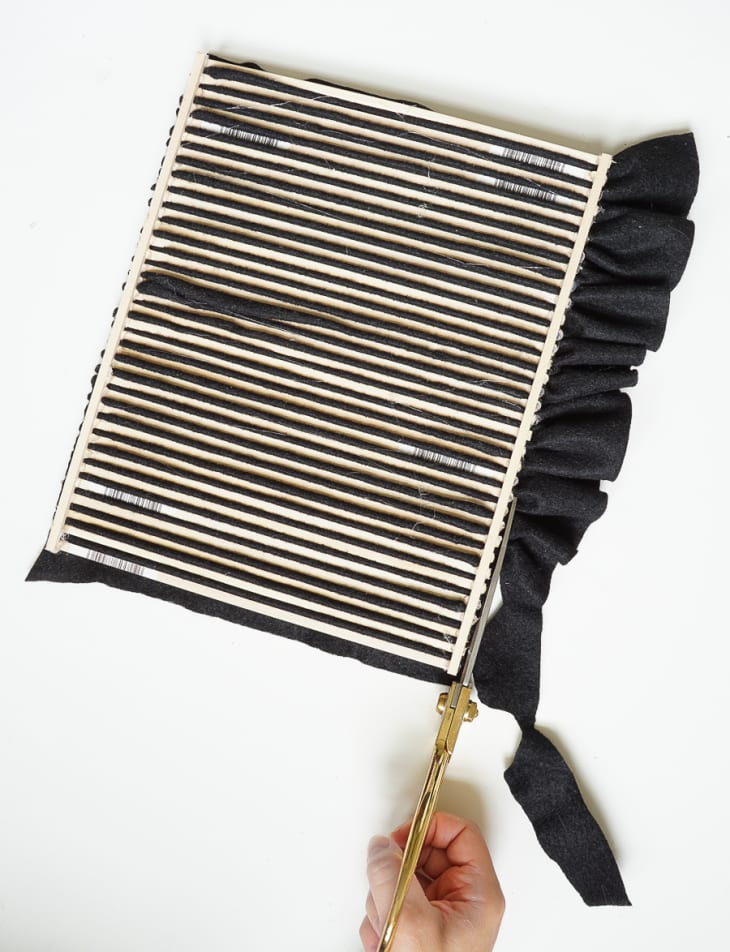
4. Once the entire frame is covered in fabric, trim the top and bottom edges to about 1″ in length. Then flip the fabric frame over and trim the excess fabric on the sides as close to the wood frame as possible.
5. Pop the fabric frame into the picture frame and adjust fabric folds on the front to make sure everything is laying flat.
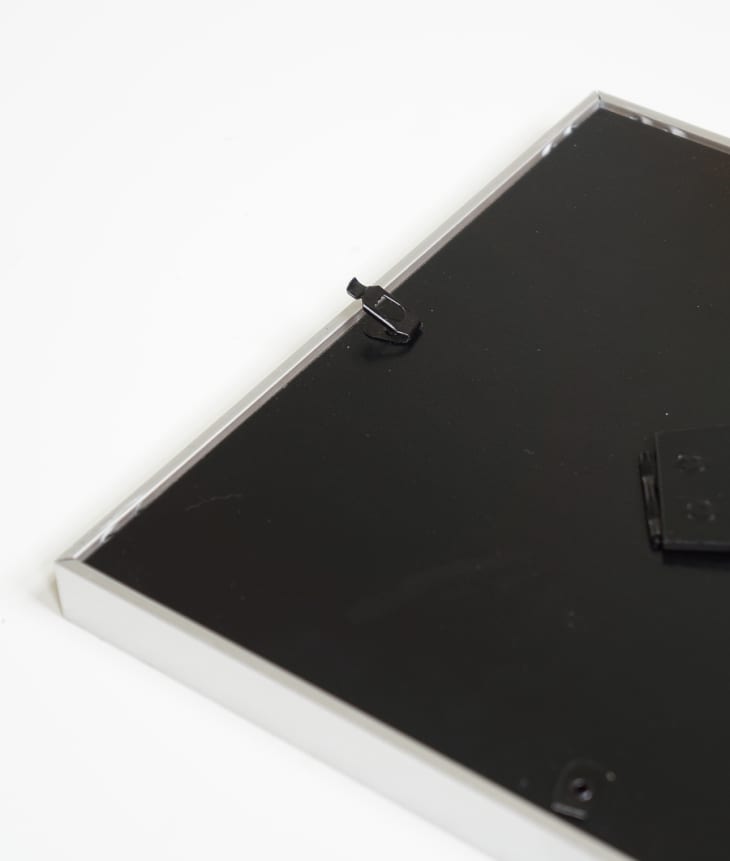
6. Place the frame backing on the picture frame and swivel the top and bottom spring-loaded clips into the frame. The side clips will not fit into the frame, so remove them by bending them back and forth until they snap off.

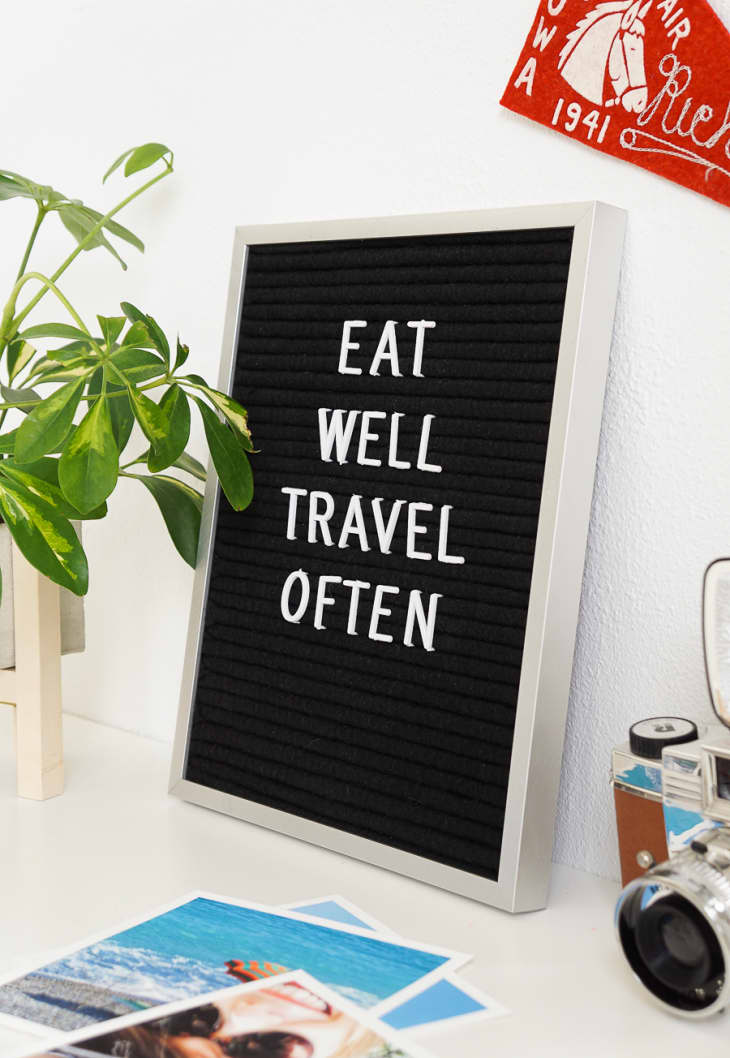
7. Add a clever message using the plastic letters and enjoy!
Have a really great DIY project or tutorial that you want to share with others? Let us know! We love checking out what you’re making these days, and learning from our readers. When you’re ready, click here to submit your project and photos.