See How This DIYer Made Her Dream Coffee Table Using a $25 IKEA Find

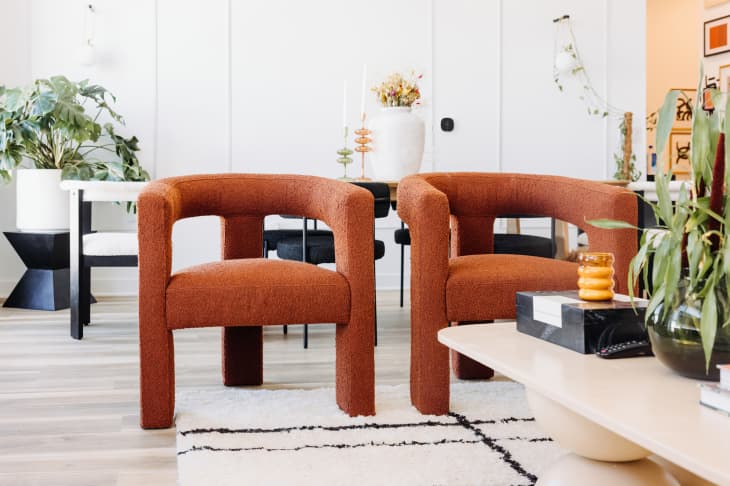
Ball-shaped feet for furniture are back in style. Case in point? When Philly-based renter Chloe Griffin (@chloejjari) was shopping for her living room coffee table, she knew she wanted something with a spherical flair. “It was important to me that we had shapes in the home, and not a bunch of perfect lines and 90-degree angles,” Chloe says.
The only problem? The options out there for furniture with funky round feet “are super expensive,” Chloe says. The price tags she saw online were about $1,000, which was far beyond what she hoped to pay. But Chloe was able to DIY a $300 version of her dream coffee table, and she saved big using bamboo 11-inch BLANDA bowls.
“I also looked up various sphere options for the base,” Chloe says. “Ultimately because I was pretty impatient, I went with the most accessible option: The wooden bamboo bowls from IKEA that Lone Fox and many other DIYers use. There are options of wooden spheres already colored and finished on Etsy, but the price is high and the shipping time is even higher.”
Here’s how the IKEA hack coffee table came together.
1. First, Chloe glued six bowls together to create three balls for her table’s base. She used construction-strength glue for durability and a caulk gun for precision.
2. Each sphere also got one bowl (a half sphere) glued on top for the tabletop to sit on. “I wanted to take the design a step further than what I’ve seen and add an additional top layer,” Chloe says on Instagram, adding that she wanted to add a bit of height to her coffee table creation.
3. To make the spheres look seamless, Chloe used wood filler around the seams where the bowls meet. Once dry, she sanded the filler to create a smooth, seamless look.
4. The tabletop was cut from pine wood board. “I researched videos on the best jigsaws for cutting wood, the best wood to use for something like a coffee table, how to treat wood, sand it, stain it, paint it, how to use a jigsaw, the best sanders and how to use them,” she says.
5. Then, she sanded, primed, and painted the legs and the tabletop. Originally, Chloe wanted a natural light oak stain — “nothing too far off from the natural color of the wood before it was treated,” she says. But the stain turned out more orange than she thought — and it was two different shades because the wood types on the bowls and the tabletop were slightly different.
The takeaway? Paint might be the best option for this DIY, as it cobbles together a few different wood types. Chloe’s paint selection is a light tan that she had custom-mixed at Lowe’s.
6. Chloe connected the top and legs with more glue, then used wood filler to address any gaps. The finished piece “is completely unique and one-of-a-kind,” she says. “I also love the fact that with this piece at any point I could change the color if I wanted or make another one if I felt frisky.”
Remember that this project requires safe DIY practices (and some prep).
If you want to follow Chloe’s lead, make sure to follow DIY safety guidelines including wearing safety glasses when sanding and painting in a well-ventilated area.
Chloe’s best DIY advice is to do your research before you even begin. “You cannot do this without first educating yourself on the necessary steps from start to finish, including understanding the materials you are going to be working with,” she says. “If you want to make a quality piece, you’ve got to be a student first.”