
Before and After: A 1967 Ranch’s Kitchen and Dining Room Get a Loving Mid-Century-Style Makeover
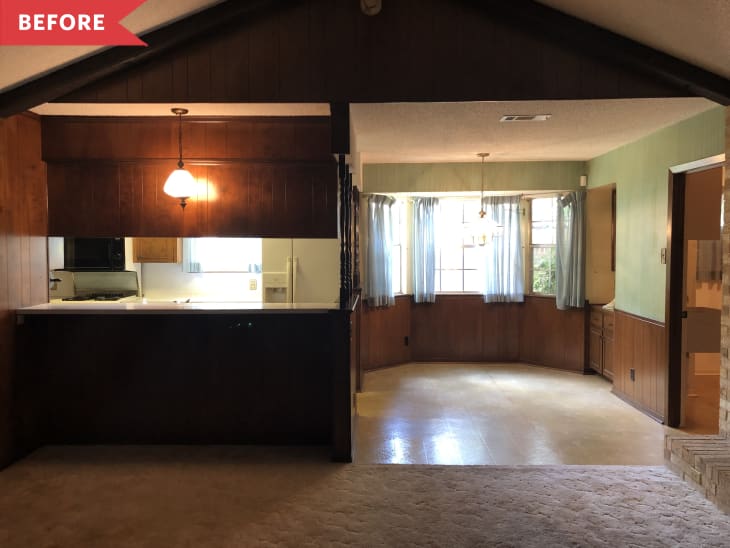
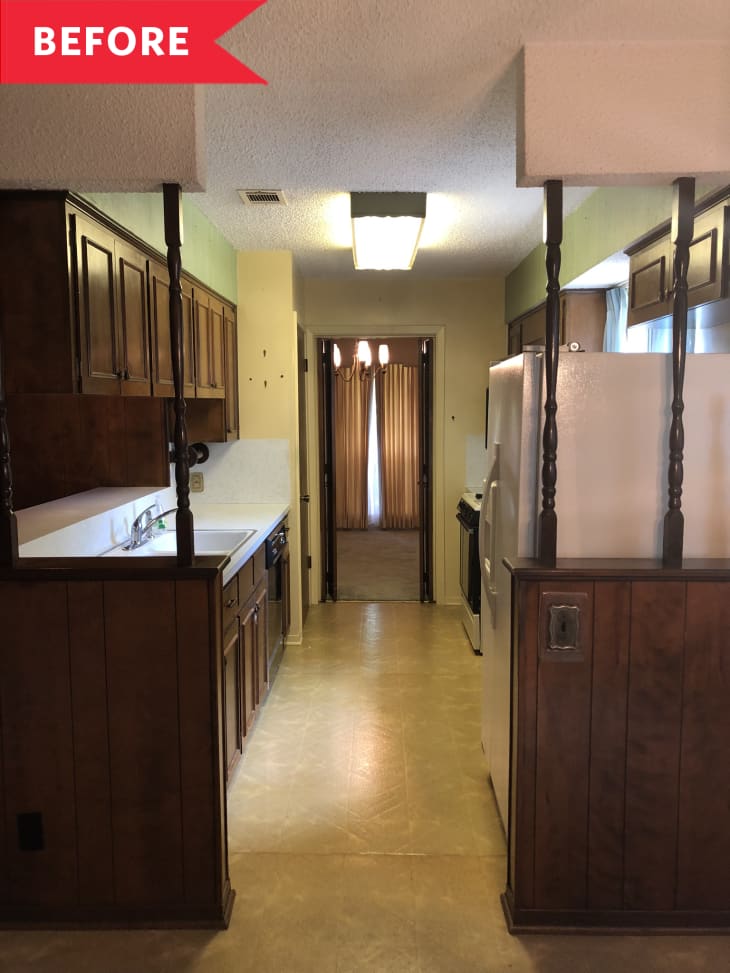
Decades-old houses where essentially nothing has changed from a bygone design era can be treasures filled with cool design details you won’t find in houses anymore. Time capsule houses, anyone?
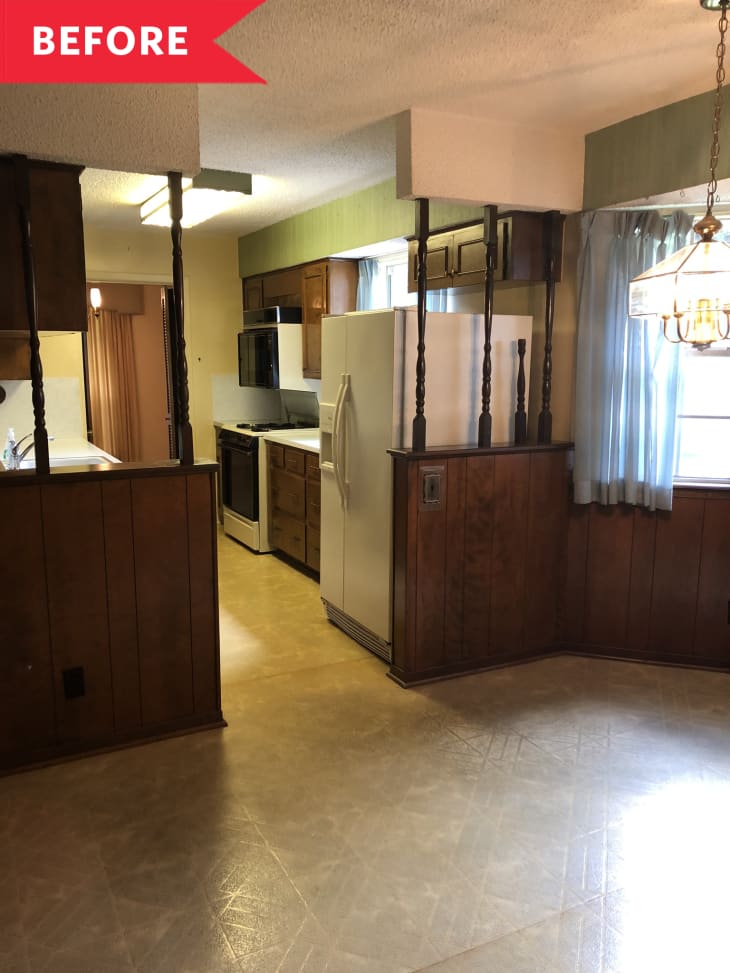
But even if it’s not feasible to preserve every detail in an older home, it is possible to maintain some retro feelings and features in a renovation that makes an older home more functional in 2021. Doing decor research on the home’s original era, staying true to that era’s wood stains and finishes, preserving one-of-a-kind details, embracing vintage hardware, and maintaining much of the home’s original footprint are surefire ways to preserve a home’s historic feel even after a renovation, like Brooke Roeder (@b3ecreative) did in her mid-century ranch.
She and her partner, Adam, bought the house after blending their families. “We needed to find something with lots of bedrooms and big potential with the smallest possible price tag for the area,” Brooke says of their Austin, Texas, house hunt. The retro ranch caught her eye. “I kept circling it, looking at the pictures over and over again, making the case for what a cool house it could be,” she explains.
Brooke says everyone she showed pictures to cringed at the dark wood paneling and popcorn ceilings, but she had a vision. “After Adam and I went by and peeked through the windows, it was a done deal,” she says. “We bought the house and I immediately started planning a mid-century makeover.”
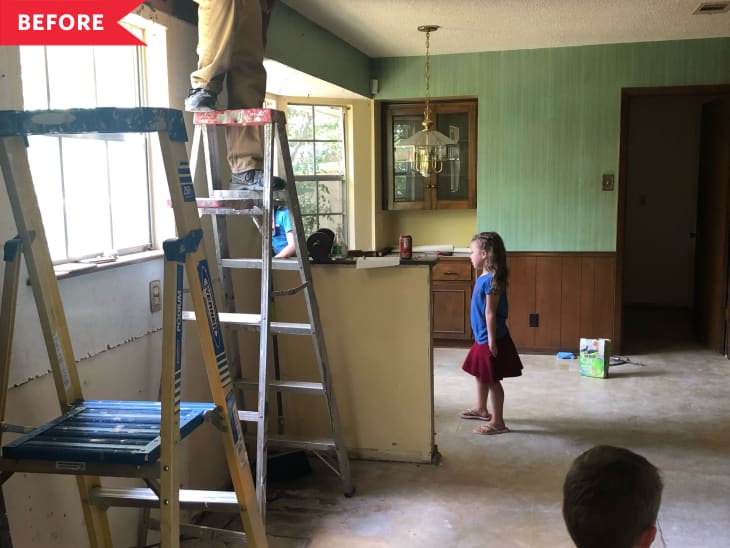
Brooke served as her own general contractor for the whole house renovation to save money, and split the project into two phases. The main living, kitchen, and dining areas were part of the first phase.
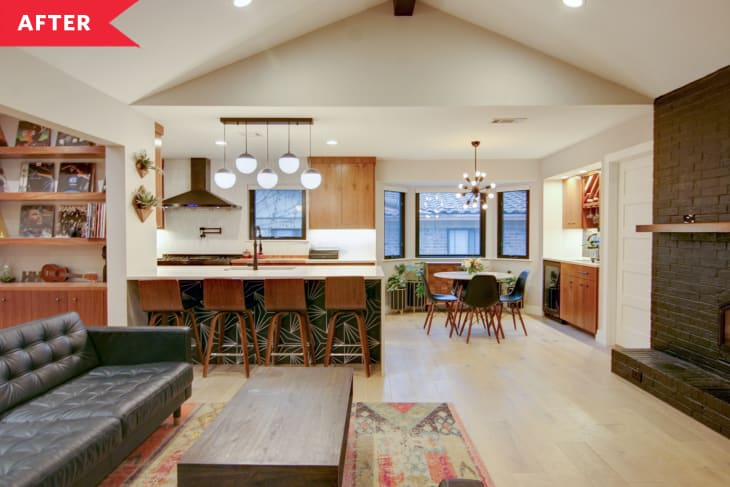
In the dining room, Brooke swapped the green wallpaper from before for a coat of white paint. She also removed the barriers separating the kitchen and dining rooms to make the space feel brighter and more open, but she maintained wood paneling throughout and kept the bay window (swapping out actual windows and painting the frames for a bolder look).
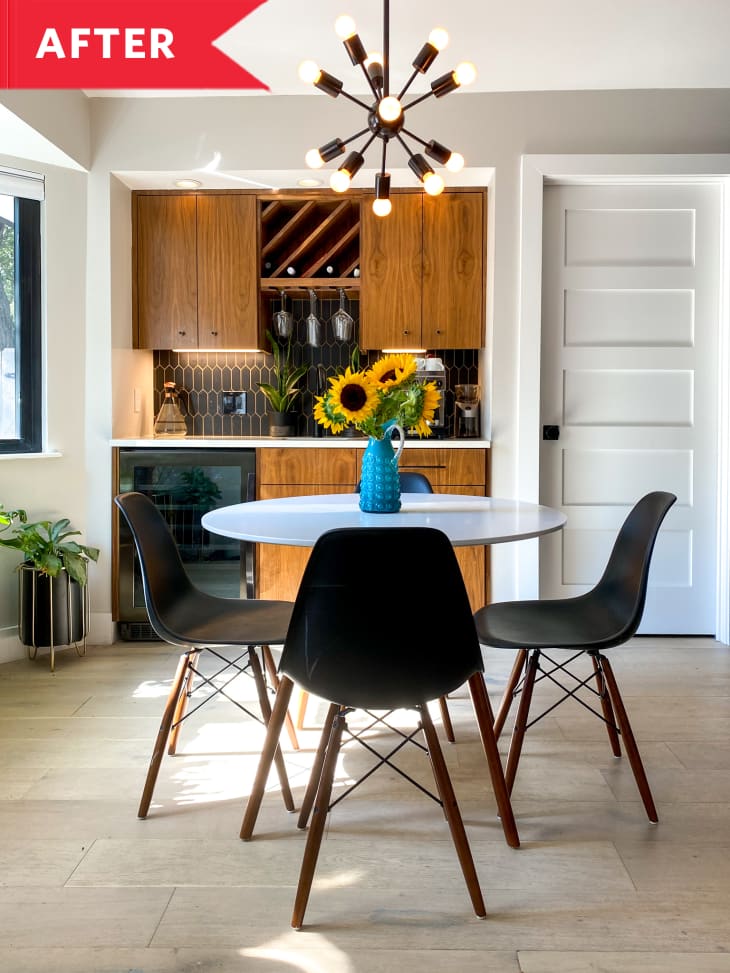
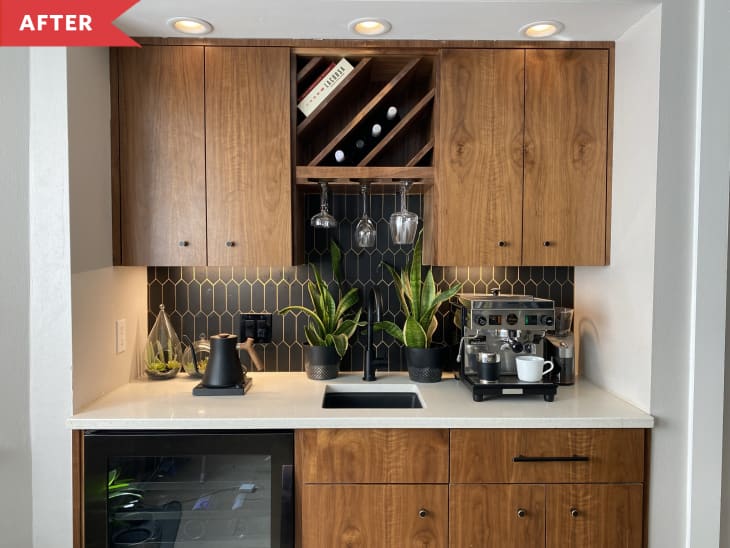
Brooke used space from an existing laundry room on the other side of the wall to widen the buffet in the dining room and add a sink and wine fridge.
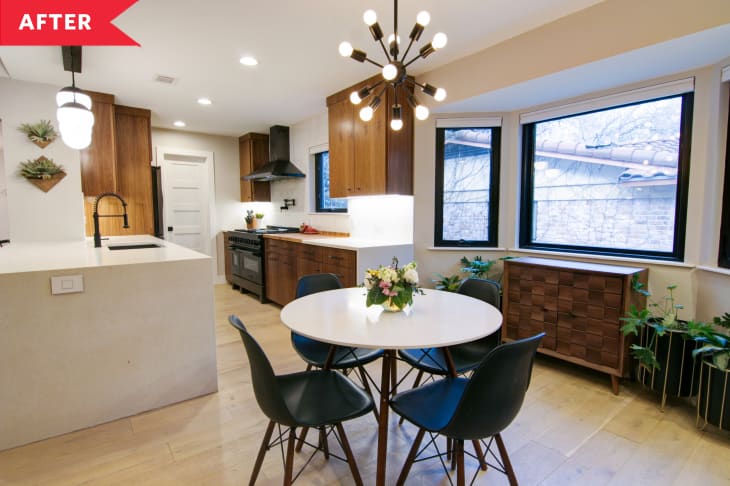
In the kitchen, removing the partition between the cooking and living space, moving the fridge, and eliminating some of the upper cabinets all make the whole space feel more open. The tweaked layout also allows more room for food prep.
Brooke says she and her family “absolutely love” the after, and one of their favorite parts of the day is making an espresso at the new coffee/wine bar, chatting “as the kids trickle in and find their place at the kitchen counter for breakfast.”
“We spend all day living and working in the space, and it’s wonderful,” Brooke says. “I love everything about the after. It’s my dream home.”
Her advice is to not be afraid of a fixer upper home, even when it looks (and is) daunting. “I knew exactly what I wanted to do, had the experience to execute it quickly, and had the budget to do it from selling another home, so I did this project in two big phases, but we easily could have moved in to the house as-is and tackled each task as a DIY project, one step at a time,” Brooke says. “If you can imagine what you want, or even imagine separate pieces and details, you can get to where you want to be without having to plunk down a big chunk of change all at once. Renovating is a journey.”
Inspired? Submit your own project here.