
You’d Never Expect to See Ombré Walls in a Laundry Room — But They Totally Work
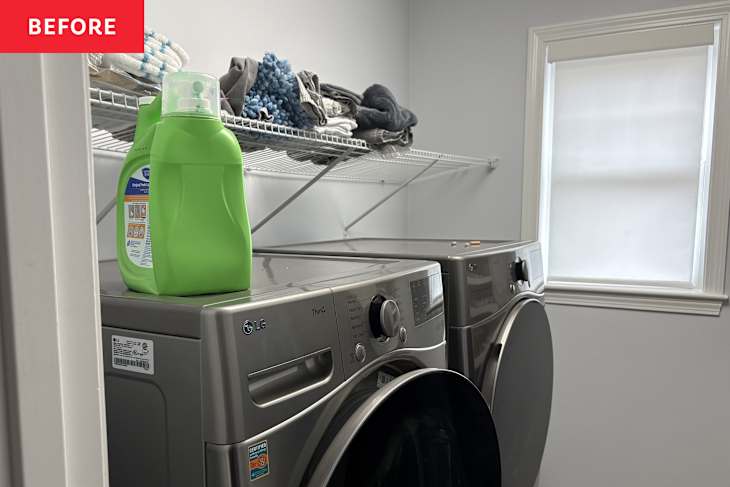
Multipurpose rooms, because of the nature of what they are (essentially combining two separate spaces, with their own goals and needs, into one), can easily become overwhelming and a headache. For June Cruz, that room was her dual laundry room and mudroom. It had no storage or organization, which made it a dysfunctional area.
“It was essentially a drop zone for our coats, shoes, and bags, as well as our weekly laundry,” June describes.
Their Laundry Room Was Also the Mudroom, but It Wasn’t Functional
June joined the One Room Challenge to make the space functional for her family every day. She focused on creating a better organizational system and adding personality so that she and her family would enjoy being in the laundry room regularly.


The Hardest Part of the Makeover Was the Ombré Wall Treatment She Painted
Each week of the 2-month project, June tackled a different task in the room, which helped her feel less overwhelmed by the entire transformation and allowed her to take her time with each step.
In week one, June focused on decluttering the space, removing the racks, and patching any holes in the walls so that she would have a fresh canvas for paint. Then she tackled the ceiling light and existing door by swapping in a drum light and a faux French door.
But in weeks three and four, June started the hardest part of the transformation: painting the walls in a blue ombré. She was inspired by the artist Mark Rothko’s blue color field studies and “how encompassing they feel,” June notes.
Channeling those colors and the feeling, June used Sherwin-Williams’ “Icicle” and “Naval” to create the ombré walls, but it was a difficult process because it required June to paint uninterrupted for long stretches of time.
“For the paints to blend, they couldn’t get tacky or dry, so the paint process had to be planned, continuous, and quick,” June explains.
But afterwards, June didn’t regret a thing and would do it all over again in a heartbeat.


She Added Peel-and-Stick Floor Tiles as a Budget-Friendly DIY
Once June completed the hardest part of the transformation, she moved on to the easiest part of the process: During week five, she installed peel-and-stick floor tiles over the room’s original flooring.
June recommends peel-and-stick flooring to anyone looking for a temporary solution because she was able to use paper as a template to create the design she wanted. Then, she simply cut the tiles with a paper cutter and installed them in sections.
The following week, June added shoe storage and installed hooks for bags and coats. “Now the space is so easy for my family to use, with everyone having their own hooks and shelves for their coats, bags, and shoes,” June shares.


One Last DIY Helped Complete the Inviting Space
Before the final touches were added in week eight, June had one last DIY she wanted to add.
“I originally bought a bench with a white bouclé cushion, which would get dirty fast,” June explains. She covered the cushion with extra fabric she had, and after taping a striped pattern, she mixed the leftover wall paint from the ombré treatment with fabric paint to effectively cover the textile.
“I love how it turned out, and plan to try the technique on a few more items,” June comments.
In the final week, June added artwork, wall sconces, and decor to the room, creating the inviting space she had always wanted.
“The bench makes it easy to put shoes on, and the sconce lighting is great when I don’t need the big light,” June says. “Overall, it works perfectly for our family, and I’m so happy with how it turned out.”
Inspired? Submit your own project here.
Shop This Before & After

- Paints
- Products
- Set of 2 Rechargeable Wall Sconces in “Matte Black and Gold” from Wayfair
- Grey and White Marble Peel-and-Stick Floor Tiles from Amazon
- Set of 2 Wall Mounted Brushed Gold Hooks from Wayfair
- 10-Tier White Farmhouse Storage Cabinet from Wayfair
- Solid Wood 2-Tier Shoe Bench from Wayfair
- Speakman Neo Robe Hook from Amazon
- Brushed Gold Coat Hooks from Amazon