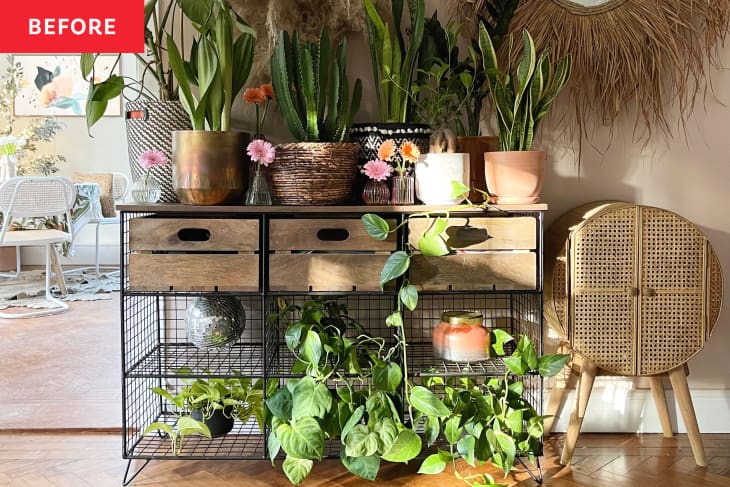
Before and After: This Checkered Console Makeover Proves the Power of Small DIYs

Looking to make a small change to rejuvenate your space? Consider giving a piece of furniture that you walk by every day a revamp. Even a small upgrade can change the look for the better, and breathe new life into an area of your home you see all the time. For inspiration, here are nine dresser flips you can do in less than a day, 20 painted furniture ideas, and 19 fun hardware options.
Another project to add to the list is this console table revamp from Dani Sandels (@danisdomain). This small-but-mighty project cost Dani the price of two canisters of chalky finish paint ($90), and the “after” is extremely on-trend.
“I loved this unit before — we’ve had it for years and it’s so handy for storage,” Dani says. “It lives in our hallway, and I wanted to give it a bit of an update, as it can get quite dark in the room.”
Dani says she wanted to “make the piece a bit more standout” and “make the piece unique to [her] and make it feel a bit more fun.” It was the perfect opportunity to test out a checkerboard paint treatment she’d been wanting to try.
“I found the two colors I liked and then just started painting small squares, one color first and then the next color,” Dani explains. (She used Annie Sloan Chalk Paint in Scandinavian Pink and Antoinette, and has plenty left over for future projects.)
Dani chose to freehand the pattern using a 3-centimeter flat paintbrush for a more rough-hewn look — plus she knew that would be easier than taping or marking the squares out (although she says that’s a safe option, too, especially for first-time DIYers).
“It all went to plan,” she says. “I kept looking back and referring to the first squares I painted to make sure they were roughly the same shape and in line. I found using chalk paint to have a nice matte finish, and it was quite thick paint to correct any mistakes.” Plus, it was easy to wipe away the paint while it was wet if she had any errant drips, Dani recalls.
The biggest setback was the amount of time it took to create all the small squares because she wanted the scale to be on the smaller side. That said, Dani notes that the repetitive hand-brushing was worth it in the end to get the casual look she was going for. Once she was done, she used a round brush to buff on a protective wax finish over top.
“The new piece makes me so happy to look at!” she says. “It’s the fun-looking piece I wanted to create and looks much brighter in the room. It also suits my plants so well, too.” (Her vintage cloud mushroom lamp from IKEA, HAY crates, twisty taper candle, and disco ball look pretty fabulous with it, too!)
“It’s a pretty and practical upcycle!” Dani says. And what more could you ask for? To see the rest of Dani’s home, check out her house tour.
Inspired? Submit your own project here.
